Today I will continue to share with you a trick to help you quickly write text on a picture in word 2016,2013,2010,2007, 2019. You can use this way to create text on book covers, textbooks, lesson plans or any kind of images easily. It also makes your writing to look more beautiful and more diversity too.
With this method you don’t have to install any other applications, all operations are done in Word only. Just follow these steps for MS Word version 2016, for other versions 2007,2010,2013,2019, do as the same.
How to write text on a picture in word 2016?
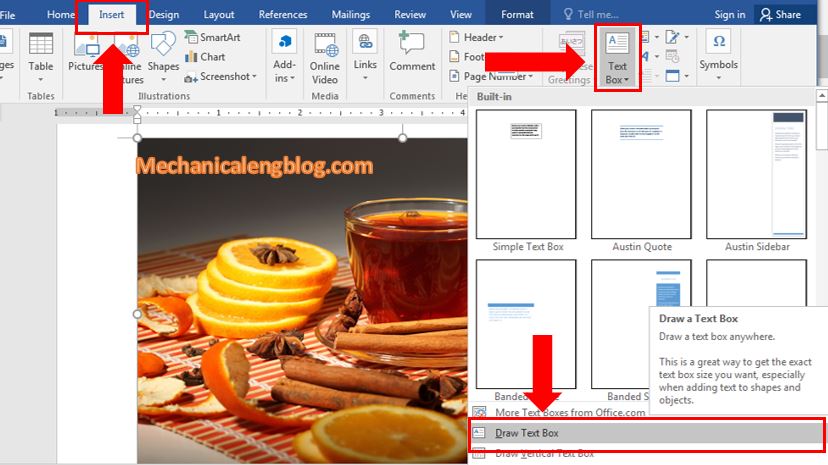
Step 1: Open the Word file that contains the image. Go to Insert, then Text Box. Look down and choose Draw Text box.
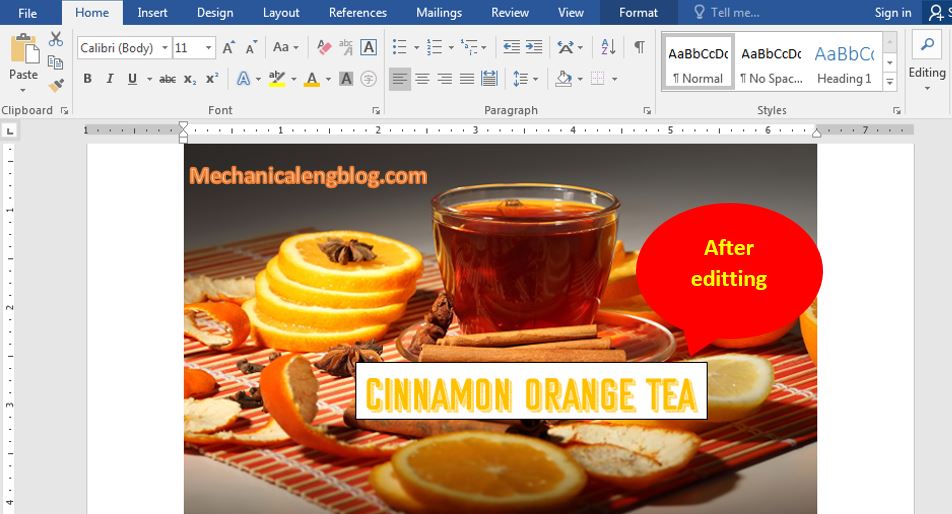
Step 2: Next, select the position to insert text, create a blank cell to write text by dragging and dropping the mouse pointer, then enter the text to insert into the newly created blank cell.

Step 3: Now your job is to change the font size, font style, font color … the way you want. You can find all the editing tool in tab Home or just simply right-click at the text. Remember to scan/select the text first.
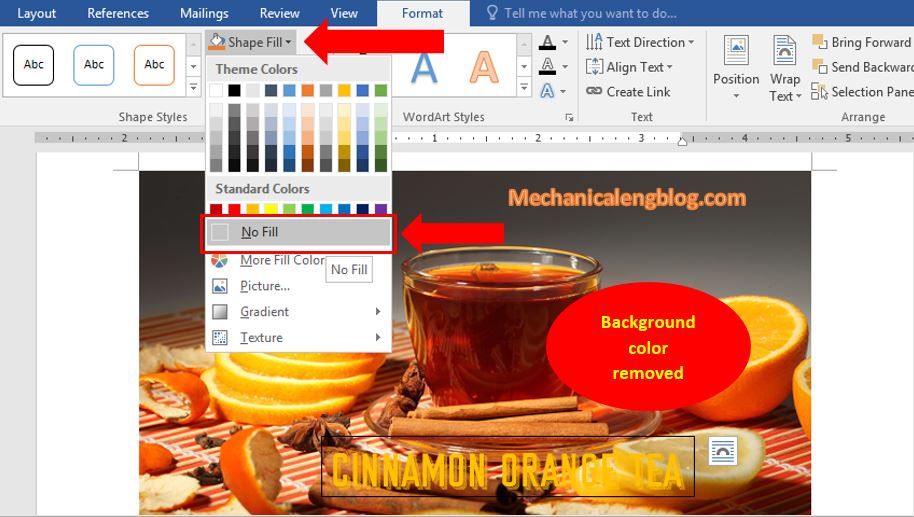
Step 4: Now the picture looks great except for the annoying background. Go to Format, then Shape Fill, select No Fill to clear the fill color of the text.
Step 5: What about the border line? No worry. Go to Shape Outline and choose No Outline. The outline will be remove and you have completed the process of inserting text on images.
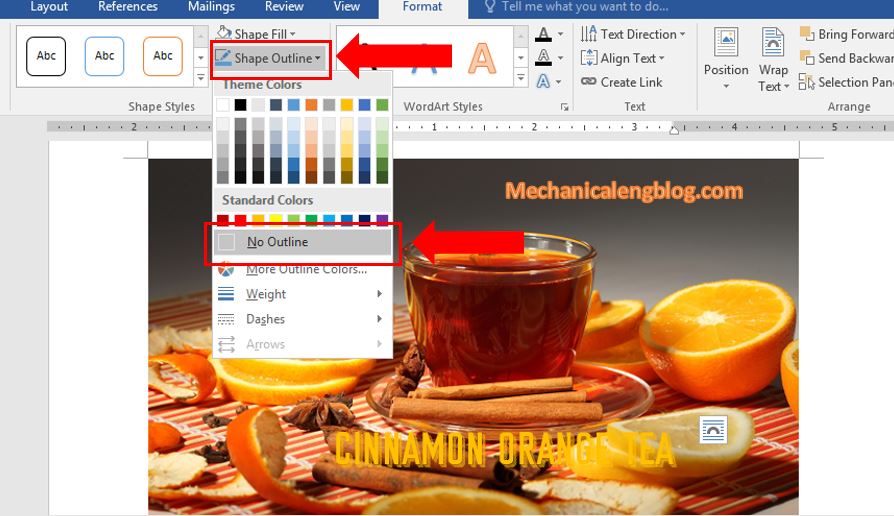
Change the position for a little bit, and here is the result of the process I just worked on.

To remove the text, just click at the Text box that covers the text, then press Delete, or simple backspace all the text.
CONCLUSION
Okay, so I just showed you a little tip in stamping, writing text on images in a Word document. This trick is very useful and necessary in many cases and now, you have known how to quickly apply it to your work.
Hopefully this tip will always be helpful for you. Good luck!
———————–
Author – hhchi


Leave a Reply