A self-running PowerPoint presentation means you won’t have to click when you want to move to the next slide. It works like a kind of timer for each slide. It is also extremely useful for you to manage the presentation duration of each slide. And if you are curious how to do this, let’s dive into this article with us right now.
How to create a self-running PowerPoint presentation ?
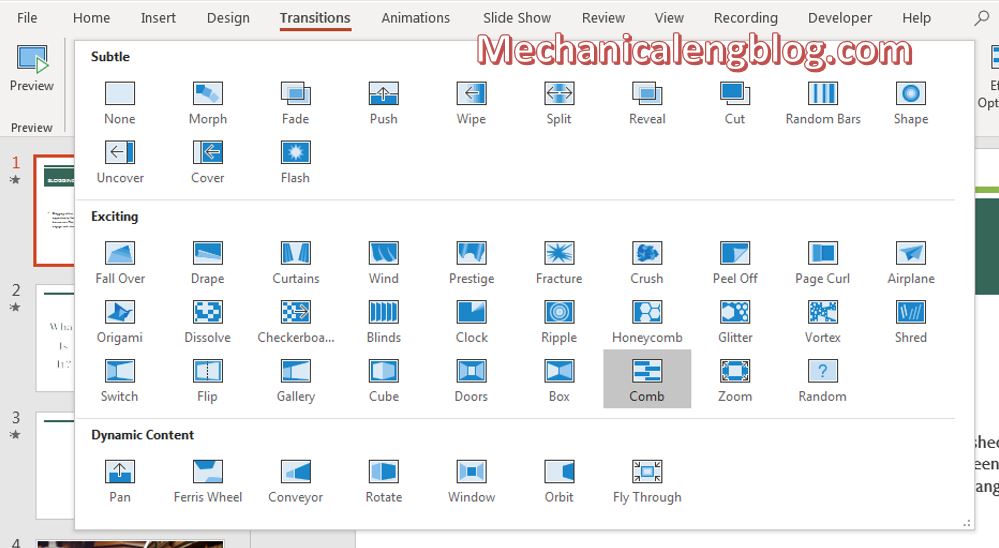
Step 1: To do this, first open your PowerPoint file and select Transitions.

In Transitions, choose one transition effect. This is the type of motion that will be applied when automatically switching from one slide to another.

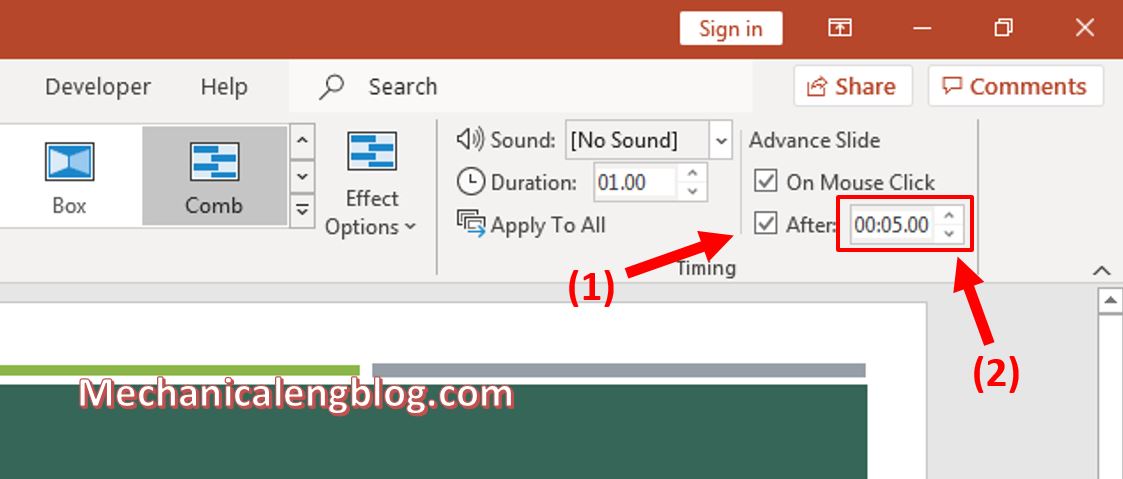
Step 2: The next step you will set a timer for each slide, after that time the slide will automatically switch to another. You can schedule each slide separately.
To do it, select the slide then look at the Timing section on the ribbon. Check the box After and enter the time you want to stop on this slide, or click on the 2 arrows to adjust.

Then you also select the remaining slides and do the same at Timing.
If you want to apply the settings for all slides, in the Timing section, click Apply to All. Then the transition between the slides and the stopping time on each slide will be the same.
Step 3: Once you’re done editing, you should always review your presentation. Go to the Slideshow tab and click From the Beginning to see if the movements you have set from the beginning are satisfactory or not.

CONCLUSION
And the article has ended here. Thank you for reading this tutorial on how to create a self-running presentation that slides run automatically in PowerPoint. Just imagine, you don’t have to run up and down every time you want to switch slides, just do the presenting and the slide will automatically run for you.
Hope you will find this information useful. See you in other posts.
-hhchi


Leave a Reply