Have you ever read a magazine or newspaper? If yes, I bet you have seen this, the first letter of a word is magnified, to make it stands out. How to add a drop cap in word document?

Drop Cap is one of MS Word’s feature to show you how to do it, very simple and easy, and here we come with the guide.
I. Add a drop cap in word document.
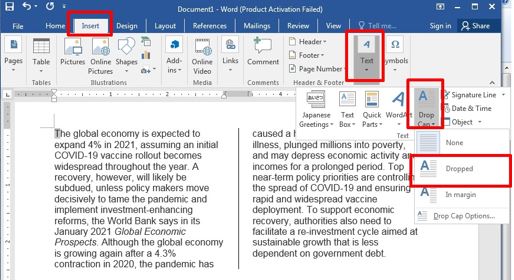
Step 1: Open the document and select the first letter of the paragraph to make it large.
Go to “Insert”, find “Text” and choose “Drop Cap”, then we will “Dropped”.
![]()
Step 2: After that the first letter will look like this. It is called a “Drop Cap”.

Note: There should be no space before the Drop Cap letter, otherwise, the Drop Cap feature will not be available.
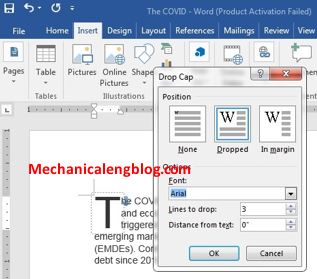
Step 3: To customize your Drop Cap, go to “Drop Cap” again, select “Drop Cap Options”.

Step 4: The Drop Cap box appears, these are some options:
– Position: Where the Drop Cap will lay.
– Font: Choose the font of Drop Cap.
– Lines to drop: How many lines the Drop Cap will lay.
– Distance from text: The space of Drop Cap with characters after it.
Here we gonna make it In Margin and Lines to drop is 4 lines.

Step 5: See the result.

II. Create a drop cap for split column format.
If you want to add a Drop Cap but your text is in a split column format, it won’t be available at this stage, you have to split the column first before adding Drop cap.
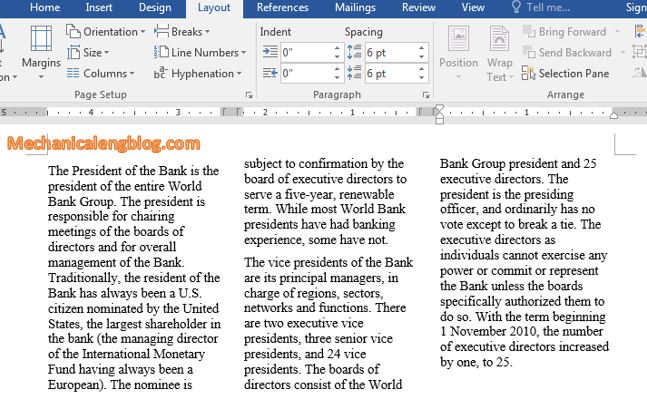
Step 1: Select the paragraph, go to tab “Layout” => go to “Columns” => select “More Columns”.
Step 2: Choose “Two” columns and tick on the box “Line between”. Press OK.

The paragraph has been separated into 2 columns.

Step 3: To add Drop Cap, select the first capital letter, go to “Insert” => “Text” => “Drop Cap” then click “Dropped”. The first letter has been magnified.

III. Remove a drop cap.
In case you want to remove Drop Cap, go to “Insert” again, in “Text”, choose “Drop Cap” then select “None”.

Drop Cap will be removed.
That’s all for the guide, hope it is helpful for you.


Leave a Reply