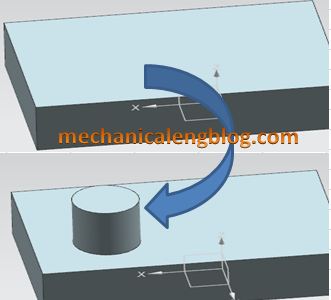
In the siemens nx modeling, emboss command use to create an embossing by modify a body with faces made by projecting a section along a vector, with options for end cap location and shape.
Where do you find it?
From the menu (Top border bar): insert -> design feature -> emboss.
From the home tab: feature group -> design feature drop-down -> emboss.
You are reading a guide how to use Emboss command in Siemens NX. Click here to read all design feature in Simens NX.
How to create an embossing?
1. From the menu: insert -> design feature -> emboss.
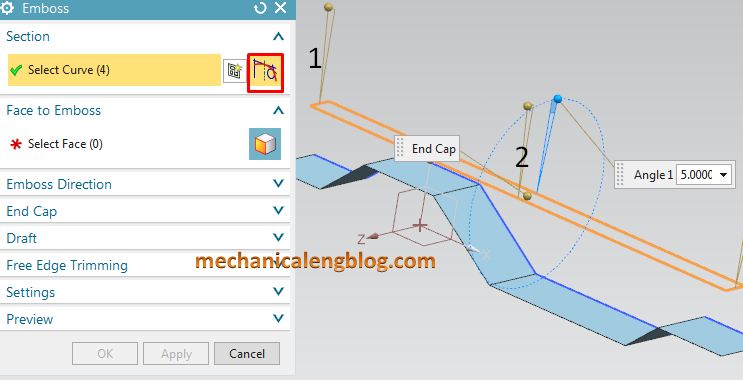
2. In the emboss dialog, section group, click on curve icon then choose curves in the graphics window.
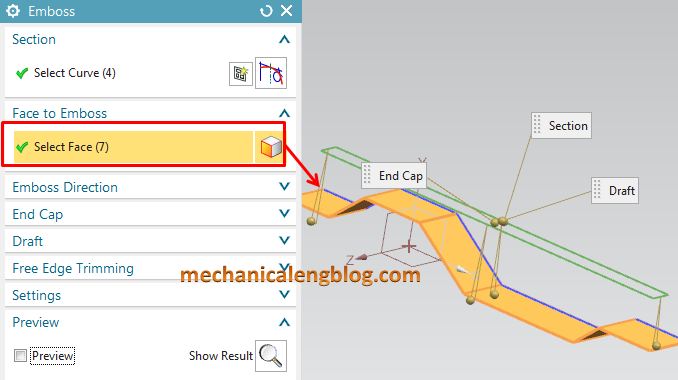
3. Click select face icon in the face to emboss group, then select faces in the graphics window.
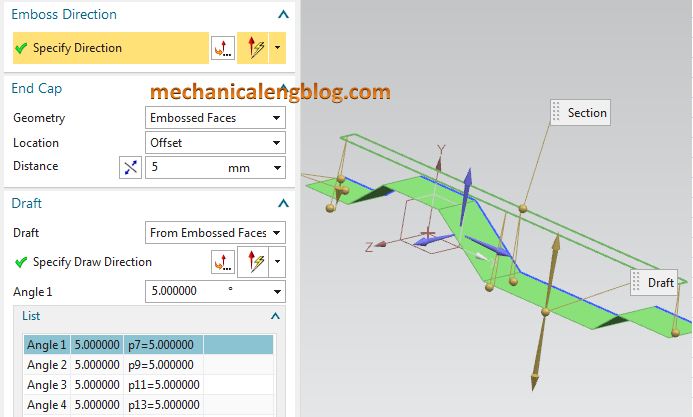
4. In the emboss direction group, specify a new emboss draw direction.
4. In the end cap group, use one or more following options: plane of section, emboss face, datum plane, or selected faces. For this tutorial, I selected embossed faces option, in the location list, select offset then type 5 mm in the distance box.
5. In the draft group, set draft angle you want. For this example, I will select draft from embossed faces then type 5 deg in the angle box.
6. Click OK to complete.
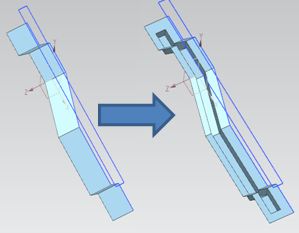
CONCLUSION
We already finished this article. I hope you can know how to use emboss command in Siemens NX. To create an emboss you must:
+ A closed section.
+ The faces to emboss.
+ An emboss direction (or accept the default, normal to section).
Thank for your reading?

Leave a Reply