In the siemens nx modeling, extrude command use to create a feature by extruding a section along a vector. This tutorial I will guide how to create 3D cad model by extrude command.
Where do I find it?
From the menu(Top border bar): insert -> design feature -> extrude.
From the home tab: Feature group -> design feature drop-down -> extrude.
How to create 3D cad model by extrude command?
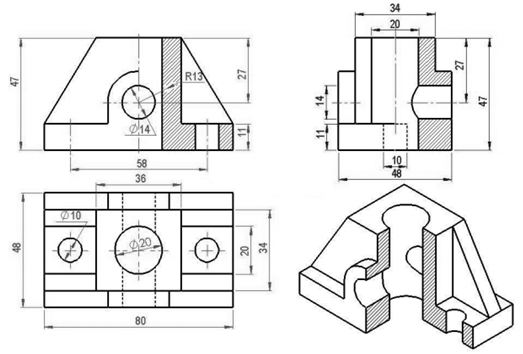
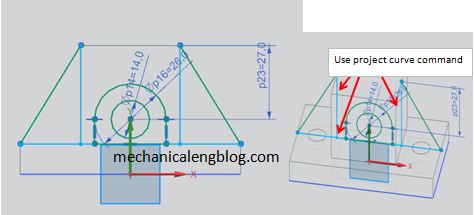
This tutorial we are going to create 3D model following drawing below.
1. We will draw a sketch on xOy plane.
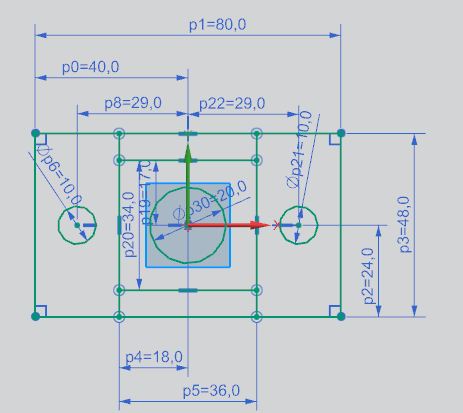
Click finish sketching to complete sketch 1.
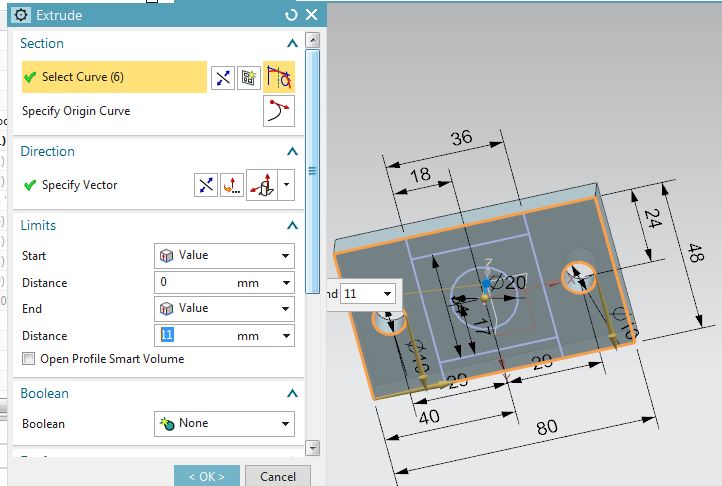
2. Press X from the keyboard, the extrude dialog will appear. In the graphics window, we will select curves to extrude. Extrude with distance is 11.
Click OK to complete extrude 1.
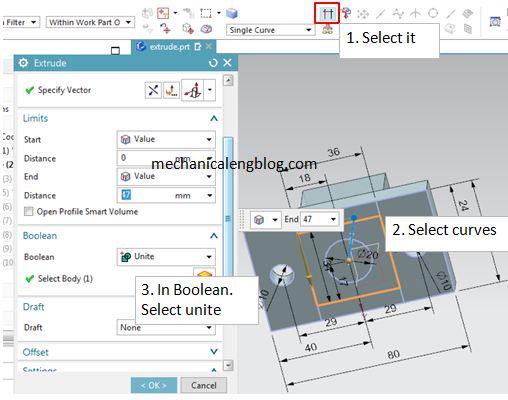
3. From the keyboard, press X button.
+ In the top border bar, curve rule list, select single curve and stop at intersection option.
+ In the graphics window, select curves as picture below.
+ Select extrude distance is 47 (mm) in the limits group.
4. Draw new sketch with dimension below.
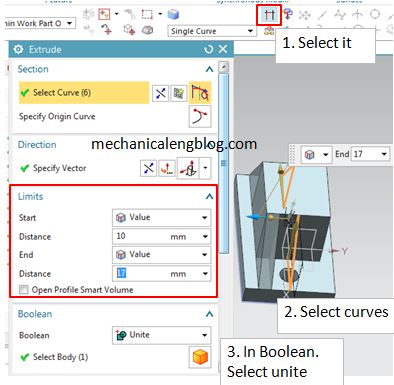
5. Use extrude command to create new shape as picture below. In the limits group, we will setup start distance is 10 (mm), end distance is 17 (mm).
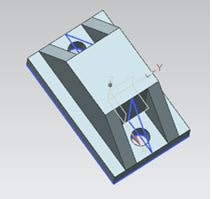
6. Use mirror feature command to create new shape.
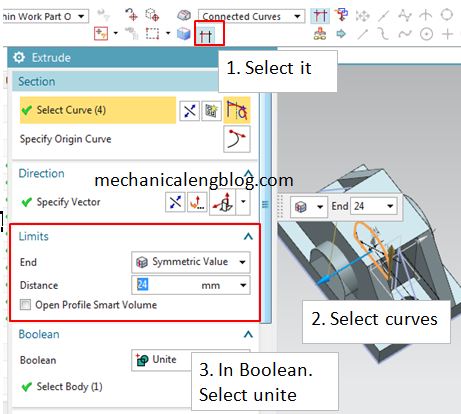
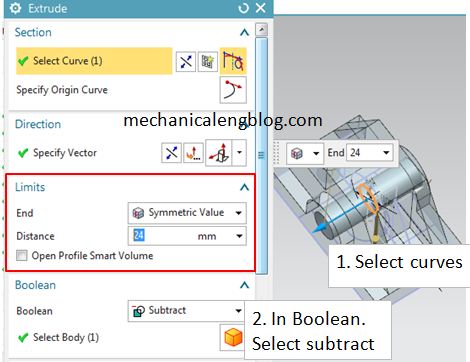
7. Use extrude command to add new shape on modeling. In the limits group, we will select symmetric value, type 24 (mm) in the distance box.
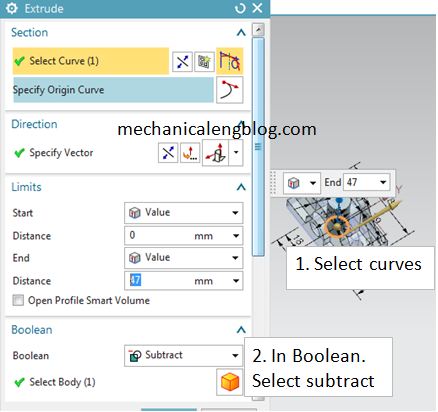
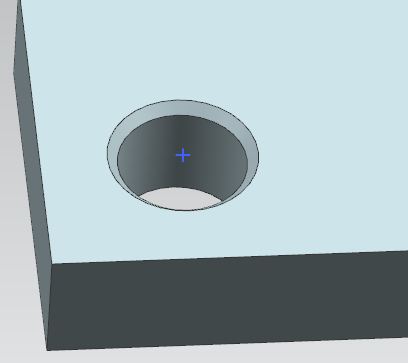
8. Cut a hole on modeling by extrude command.
9. Cut a hole on the modeling by extrude subtract option.
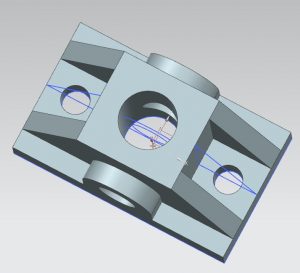
10. Click OK to complete.


Leave a Reply