It is easy to send word document to email. The easiest way is save your word document and attach it to email. Today, I will guide to you send email right on Word by Outlook email.
To flexibly apply between Outlook and Word applications to send attachments more quickly, in this article I will continue to share with you a tip in creating Email buttons right on Word files, to help you to customize the content, and send Email quickly to multiple objects on the same Word file. Sounds very interesting, doesn’t it?
How to send word document to email
For the Email sending operation can be smooth, make sure your Outlook email has been configured. There are many ways to do it that you can find on the internet, just search “Gmail Configuration Manager on Microsoft Outlook” and follow the tutorial.
Now let’s start.
1: Open Word file.
2: Go to File and choose Options.
(Since these steps are easy so I will skip the illustration.)
3: The Word Options box appears, here click the Customize Ribbon tab, then select Developer. Next click OK to add a tab for developers on the Word interface.

4: Go to tab Developer and select Legacy Tools. Keep selecting Command Button (ActiveX Control) to create a Button on the Word file.
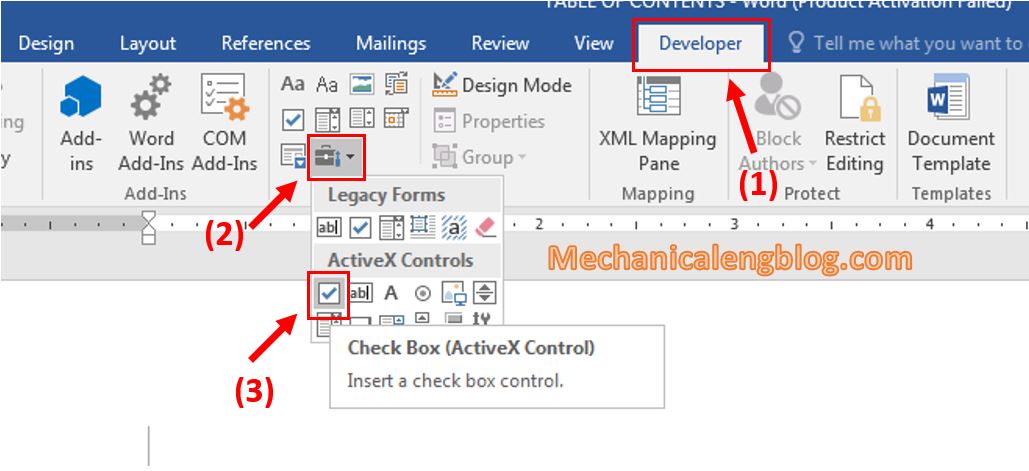
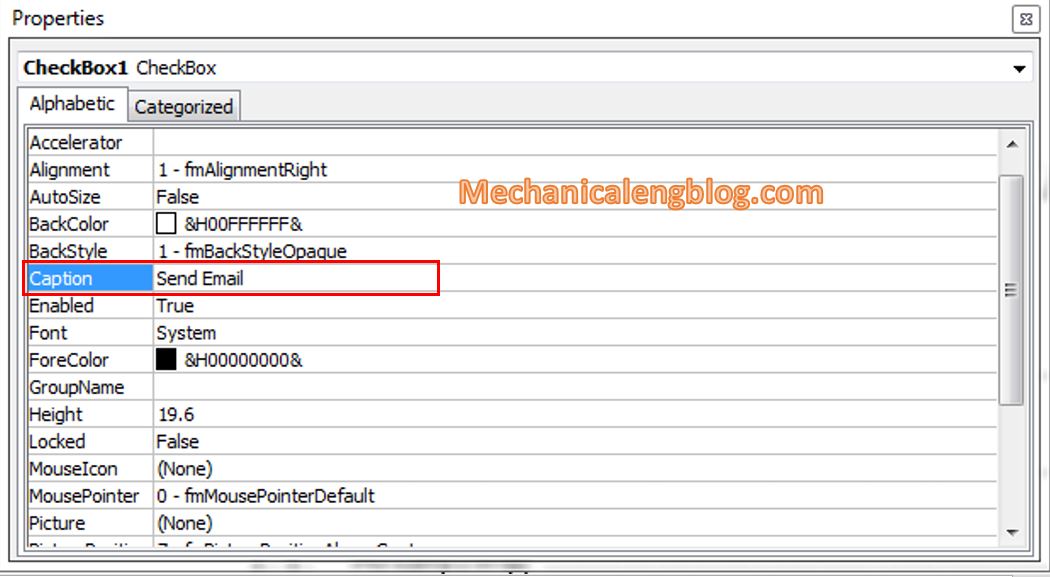
Then choose Properties to do some settings.

In the Properties box, look to the Caption and change the name in the box to Send Email.
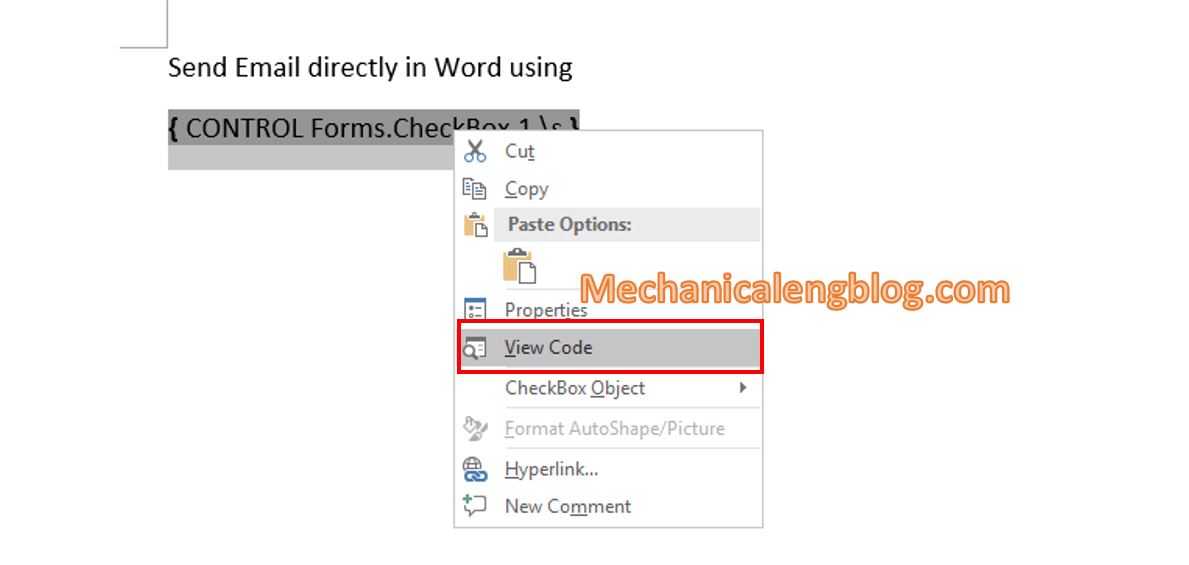
5: Right-click at the Button and choose View Code.
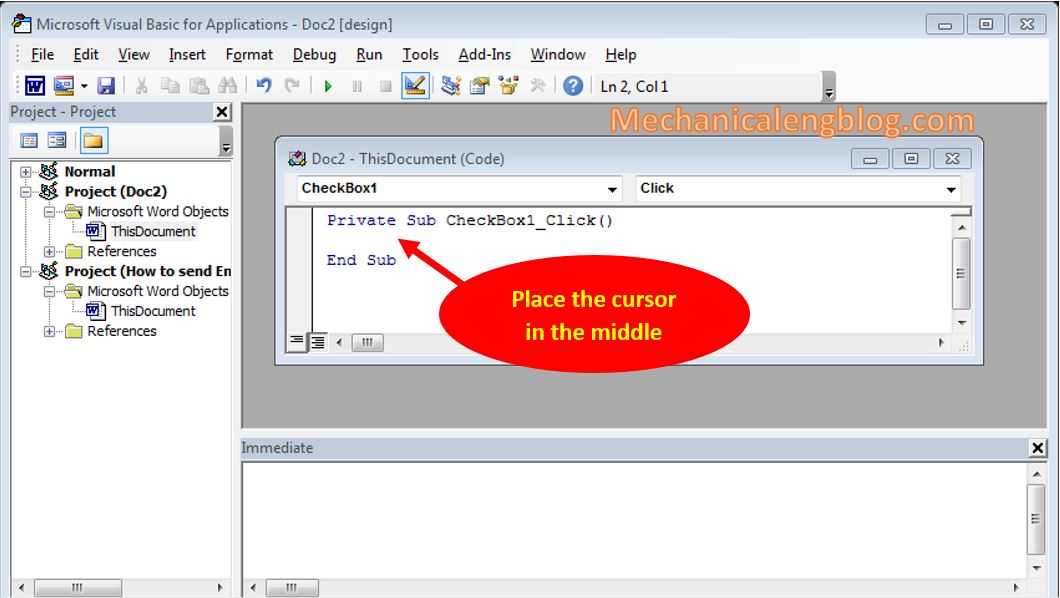
6: The Microsoft Visual Basic for Applications box opens. At this step put the cursor in the middle of the two code segments. Then copy the following code:
Dim xOutlookObj As Object
Dim xEmile As Object
Dim xDoc As Document
Application.ScreenUpdating = False
Set xOutlookObj = CreateObject(“Outlook.Application”)
Set xEmile = xOutlookObj.CreateItem(olMailItem)
Set xDoc = ActiveDocument
xDoc.Save
With xEmile
.Subject = “Fax-data”
.Body = “TEST MAIL.”
.To = “luongtrungxxx@gmail.com”
.Importance = olImportanceNormal
.Attachments.Add xDoc.FullName
.Display
End With
Set xDoc = Nothing
Set xEmail = Nothing
Set xOutlookObj = Nothing
Application.ScreenUpdating = True
7: Paste into the ThisDocument (Code) dialog box. Then correct information such as:
Subject: Email subject.
Body: Email content.
To: Recipient.
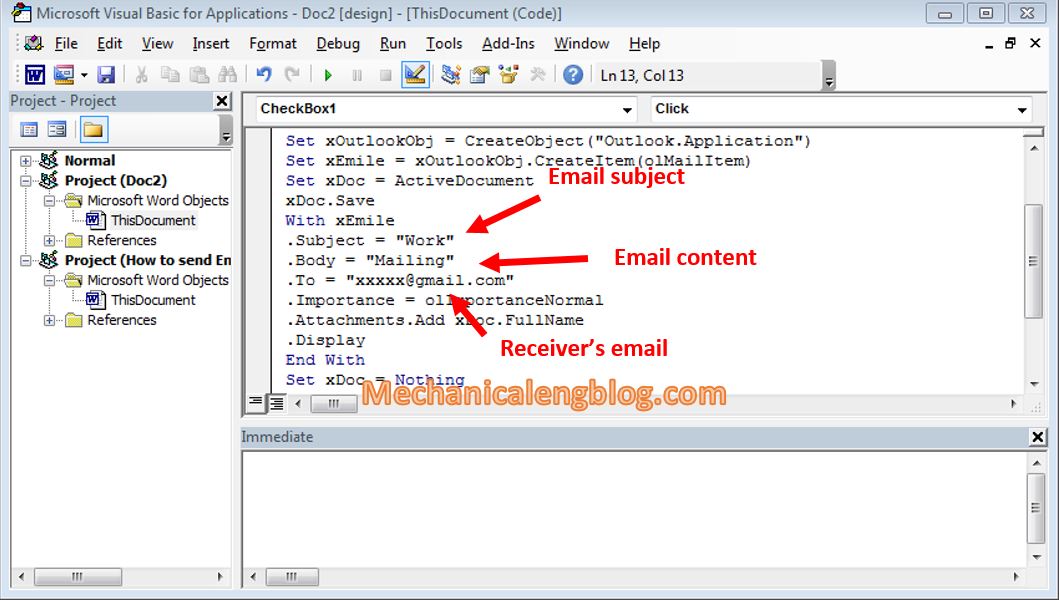
8: Finally, click Run.
Click the Send button in the Outlook dialog box to send the email. And that’s it.
CONCLUSION
And the tutorial ends here. Above is how you can send email right on Word, sounds pretty new and interesting, right? To be more proficient, you can apply this approach to daily work. I hope you will find it useful to you.
Thank you and good luck.
-hhchi


This works well but sets the normal to low priority and also does not get received. Would there be some sort of block in permission settings?