In this tutorial, I will guide to you how to insert page borders in ms word? Also, you can edit and remove borders in word, too. Follow these steps below to do it.
In dissertations, essays, projects … people often create borders around the text or around the outer cover to make writing more beautiful and scientific, making a good impression on the viewers.
Creating a border in Word is actually quite simple. Users can choose from different types of text frames, from solid lines, dashed lines or even add some textures that you like to the document frame. So if you insist, or you are new to Word and haven’t known how to create borders yet, here I will instruct you in details, to insert, edit and remove borders in Word.
I use MS Word version 2016.
If you want to create a border frame for a standard report, the first thing you need to do is set up the correct print page alignment format according to the report’s alignment guidelines.
Below is my suggestion for the alignment:
Top margin: 2 cm, Bottom margin: 2 cm, Left margin: 3 cm, Right margin: 2 cm.
I. Insert page borders in ms word 2016 according to the available templates.
From Word version 2007 and above, Microft Office has provided nice and standard border templates, supporting users to create borders quickly without having to spend much time adjusting size and color. These templates are simple ones and usually follow a certain theme.
1: Place the cursor on the page you want to create a border.
2: At Insert, go to Cover Page, then select the suitable border to you.
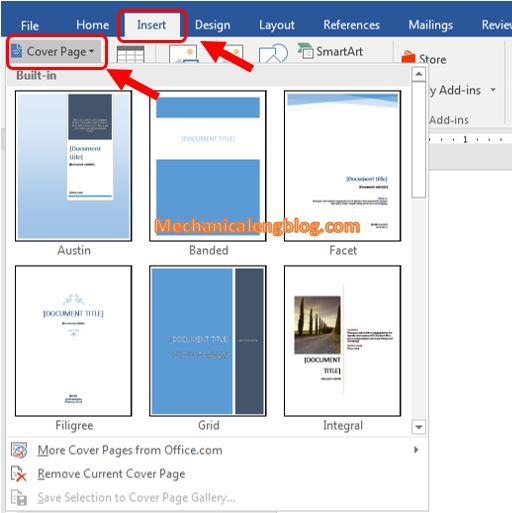
3: Edit the information from the given form to match your report.

II. Customize a border in Word
1: Place the cursor on the page where you want to create a border.
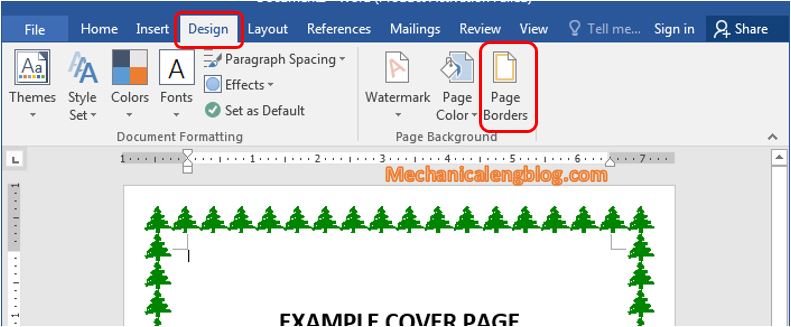
2: Open Page Borders in tab Design (or Page Layout for lower versions of Microsoft Word).

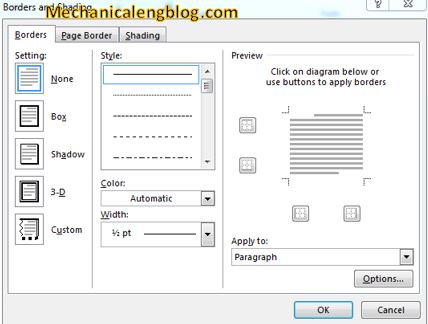
3: The Borders and Shading dialog box appears.
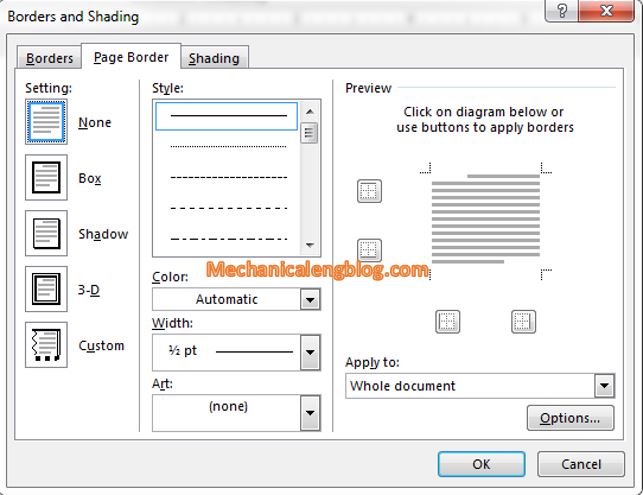
The options includes:
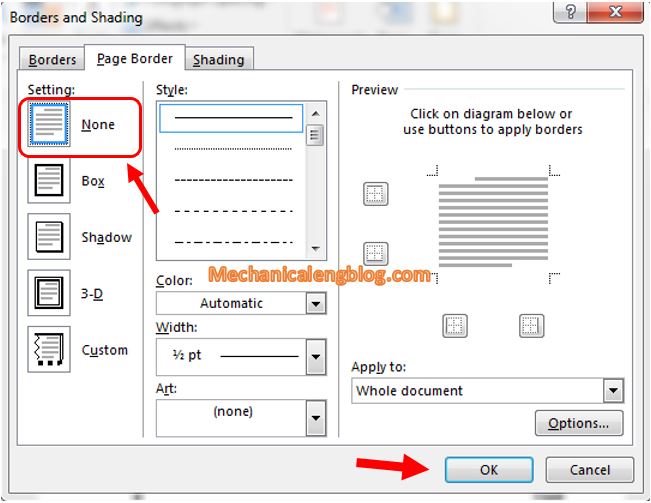
Setting: Choose frame. Such as None is no frame, Box is draw a frame around like a box,…or custom your own borders.
Style: Line shapes used to draw frames.
Color: The color of the line.
Width: The thickness of the line.
Art: Allows users to create borders around text with available shapes.
Preview: Here you can preview the result borders created.
The Art section allows you to create a border with the images available in the Word library. If you choose the Art section, then Style, Color, Width sections will be hidden.

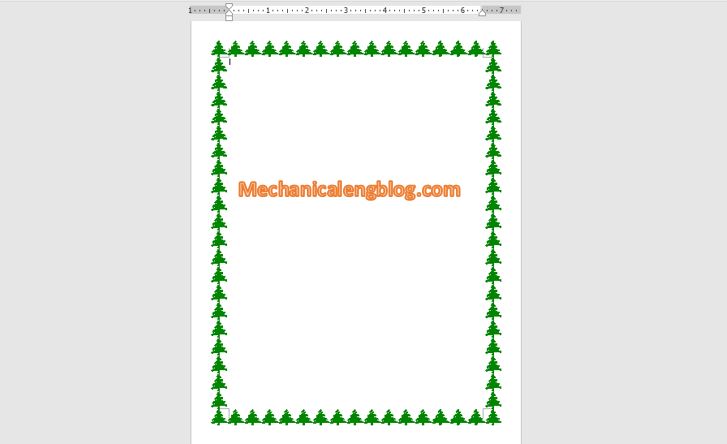
4: Click Options…, at Mesure from, select Text. Unchecked all the options below so that the cover page is aligned to the page margins.

And this is the result.
III.Insert page borders in ms word using online images.
In case you do not want to use the two methods above, you can also use the cover downloaded from the internet.
1: Download the frame you want on the Internet. I will use this frame as an example.
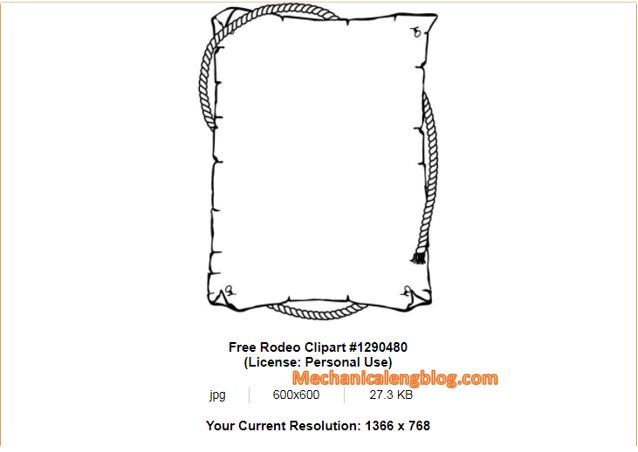
2: Open Word, type in the content of your cover or the content inside borders.
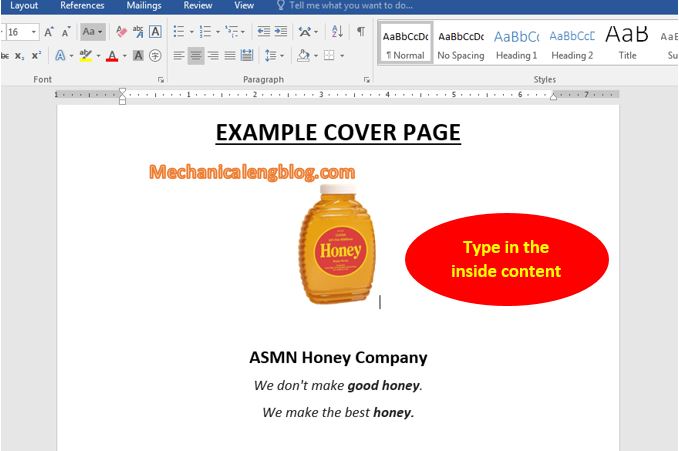
3: Insert image into word, select the newly downloaded image. I guess this step is already too easy for you guys.

4: Double-click on the inserted border image to automatically move to tab Format. In the Wrap Text group, select the Behind Text item.
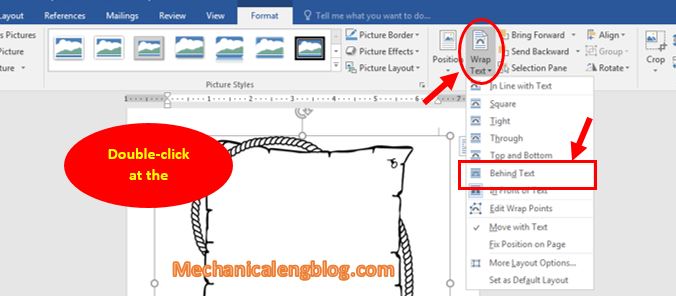
Note that the border image downloaded online must have the background removed.
5: Select the image, drag the circle dot on the border of the image in and out to align the size, cover all the content and leave the margin.

Note: Do not pull close to the edge of the paper
6: Go to the Print section to see if the frame is okay, if you lose the frame, pull it back to fit.

And that’s all.
IV. Remove borders in Word.
1: Go to tab Design (or Page Layout with lower versions of Microsoft Word), select Page Borders.
2: In Setting select None. The frame will be removed.
CONCLUSION
So in this article I have detailed instructions with you ways to create borders also insert borders online and remove border in Word very quickly and effectively. Try practicing it at home or in your work to keep it in mind.
Depending on the purpose of the job, choose which way suit you best. Hope this article will be useful to you. Good luck!
-hhchi



Leave a Reply