Today is part 2 of the introduction to create table in ms word the day before. In the previous section, I had showed you how to create tables, move tables, add rows / columns, delete rows / columns. Also in this part 2, I will guide you on some more important contents related to tables such as cell merging, splitting cells, or changing the width of rows and columns … please follow along the details tutorial below and you can easily manage it yourself.
The version I use in this post is Microsoft Word version 2016.
How to create table in ms word part 2?
See the part 1 at: how to create table in ms word
I. Create table in ms word _ How to merge cells in word.
Select the cells to be merged with. Then right-click and choose Merge Cell.
Or you can select the cells then in Layout choose Merge Cell in the Merge section.
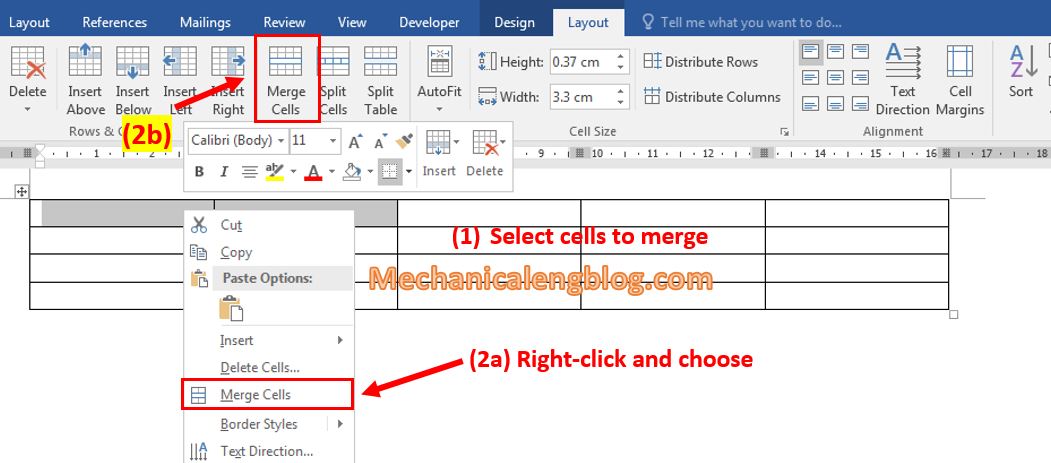
The result is 2 cells have been merged into 1.

II. How to split cell in word.
I will give a detail example of how to split cell to rows and column.
First select the cell in right-click to choose Split Cell. A box will pop up, choose the number of rows and columns you want to split then click OK.

As you can see, I choose to split the cell into 3 columns and 1 row. And here is the result.

You can continue to split from the splited cell, by selecting it, right-click and choose Split Cell again.
III. Create table in ms word _ change the width for row and column.
1. Change width for row.
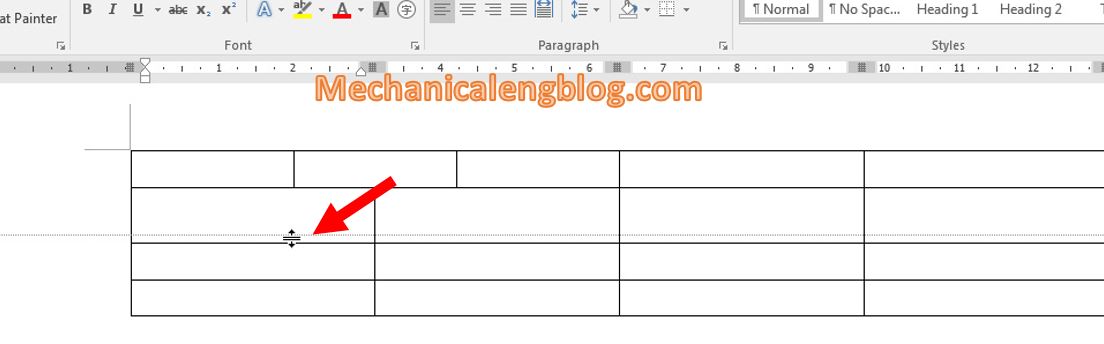
Drag the cursor to the edge of a row, you can see the cursor turns into another symbol. Hold and drag up and down to change the width of the row.
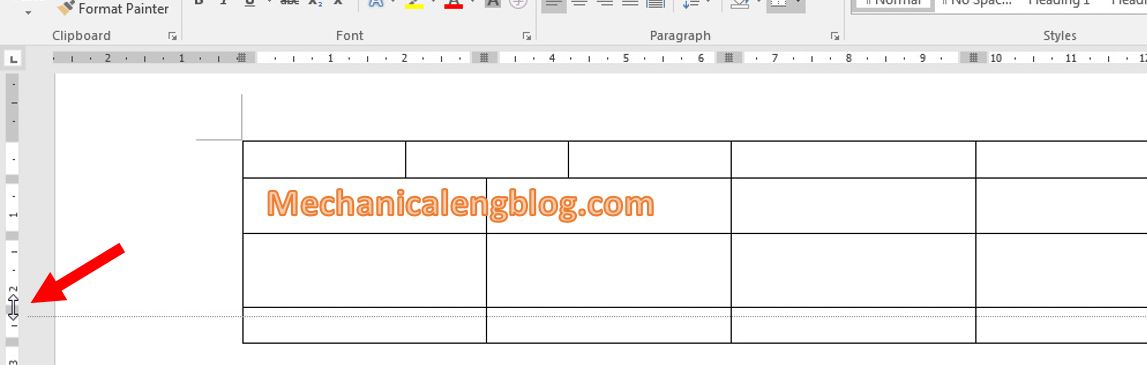
Or you can select the row then drag the cursor along the ruler bar in the left corner to adjust the width.
2. Change width for column.
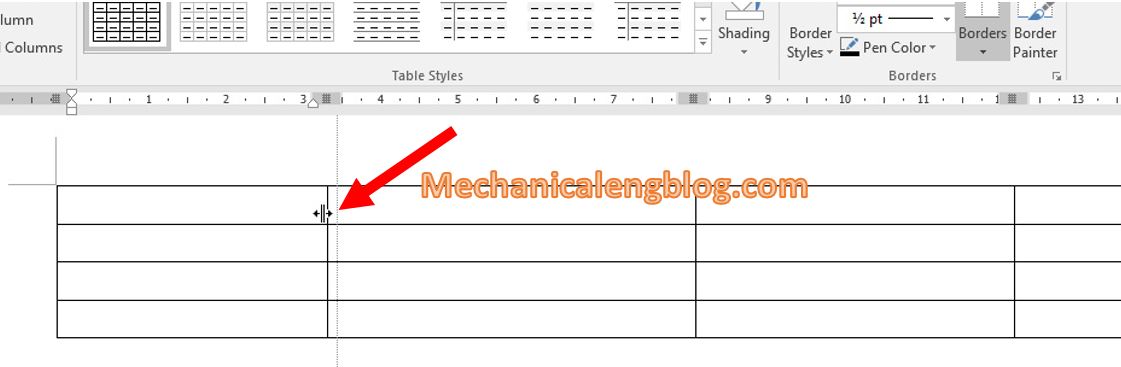
You also drag the cursor to the edge of the column, then hold and drag left or right to resize.
Or you can choose the column then use the ruler bar the same way as adjusting the row above.

3. Make rows and columns of equal size
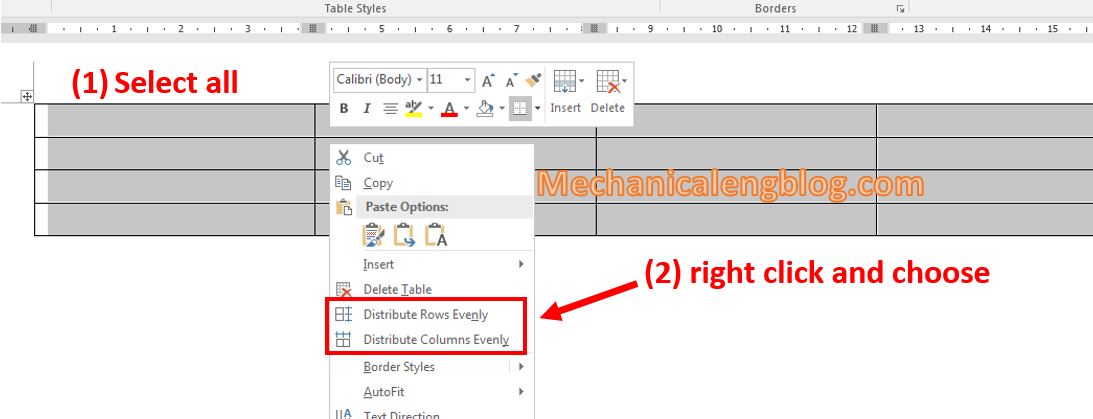
Select all of the table, right-click and choose Distribute Rows Evenly, this will align all the rows equal. Next, right-click to continue to choose Distribute Columns Evenly to adjust to the columns. After that all the rows and columns will be equal.
4. Resize for rows and columns.
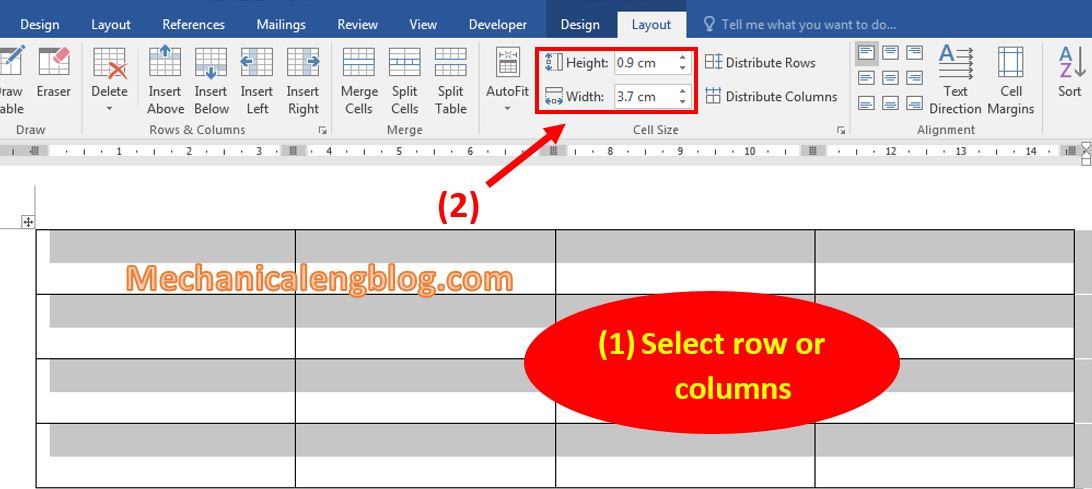
Select the row or the column according to your need, then in tab Layout, look to the Cell Size. The 2 sections Height and Width are where you can freely enter the size for your table.
5. Format borderlines.
In the Design tab, Table Styles section, you can see a lot of Borderline styles. To apply these styles, select the table then choose from the list the style you like.

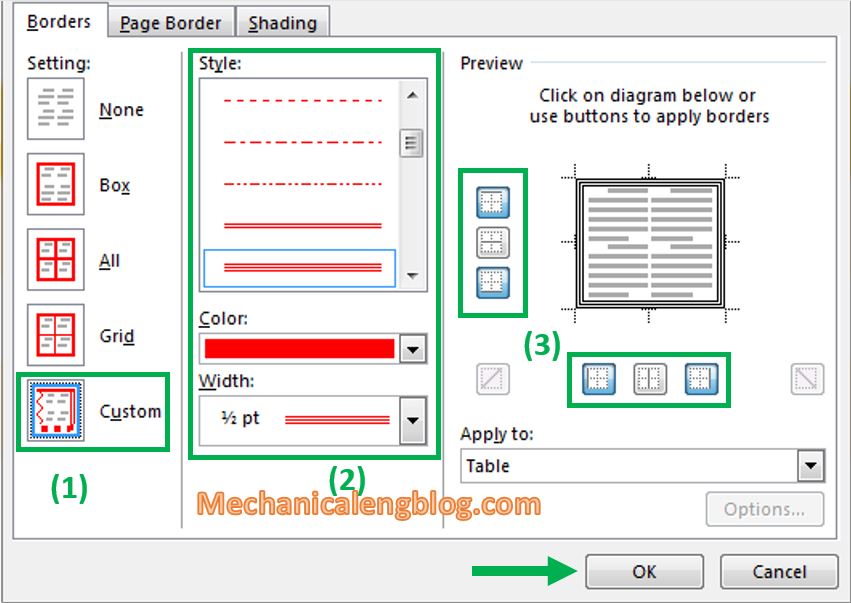
To customize the borderline yourself, in Design click on the small arrow. The Border and Shading box will appear.
Select Customize and you can choose the Border Styles, Color of the border and the width of the borderline. When done choosing click on the 6 small windows in the right to check the preview. Finally OK to save.
CONCLUSION
So we’ve gone a little further about tables in Word. Summing up today’s knowledge are: Merge cells, split cell, change the size of columns / rows and format borders in table. These are the operations that you will often use in the process of working with Word.
And today post will just end here. Hope you will find it useful and will be willing to apply it into your work. Thank you and see you in other posts.
-hhchi

Leave a Reply