In the siemens nx modeling, hole command use to create a hole on one or more solid bodies in a part or assembly with option for counterbored, countersunk, and threaded.
With hole command, you can make:General holes, Drill holes, Screw holes, Threaded holes, Holes on non-planar faces,…
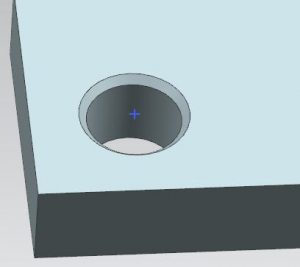
ou are reading a guide how to create a hole in Siemens NX. Click here to read all design feature in Simens NX.
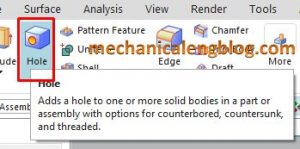
Where do I find hole command?
From the menu (Top border bar): Insert -> design feature -> hole.
From the home tab: Feature group -> hole.
How to create a hole in the Siemens nx?
I. Create a general hole.
1. Click hole icon in the feature group.
2. Select general hole from the type list.
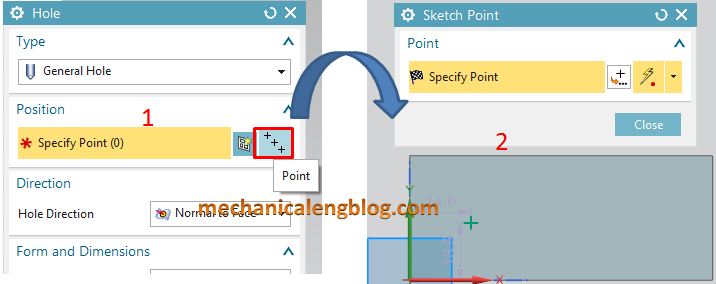
3. There are 2 ways to create to specify point.
+ Click the point icon in the position group then click the points in the graphics window.
+ Click on the sketch section in the position group then create the sketch point.
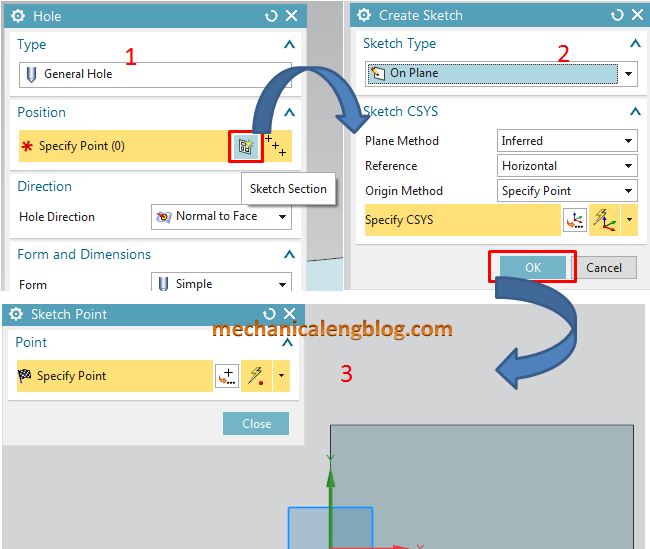
After you create the position of the points, Click Finish the sketch.
4. In the direction group, hole direction list, you can select normal to face or along vector. For this example, I will select normal to face option.
5. There are 4 shapes of general hole: simple, counterbored, countersunk, tapered. In the form and dimensions group, select simple from the form list.
6. Type value in the diameter box, depth limit box, depth box, top angle box.
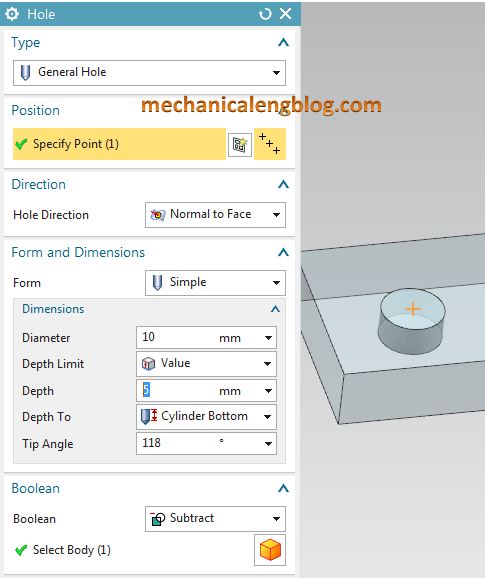
7. In the boolean group, select subtract option.
8. In the settings group, check on extend start box.
9. Click OK or apply to complete.
II. Create a drill size hole.
1. Select the hole icon.
2. Select drill size hole from type list.
3. Select position of hole by specify point.
4. In the direction group, select normal to face.
5. Select diameter of drill hole from the size list of form and direction group.
6. Select value in the depth limit and type depth value and tip angle.
7. Check enable in the start chamfer group.
8. In the boolean group, select subtract option.
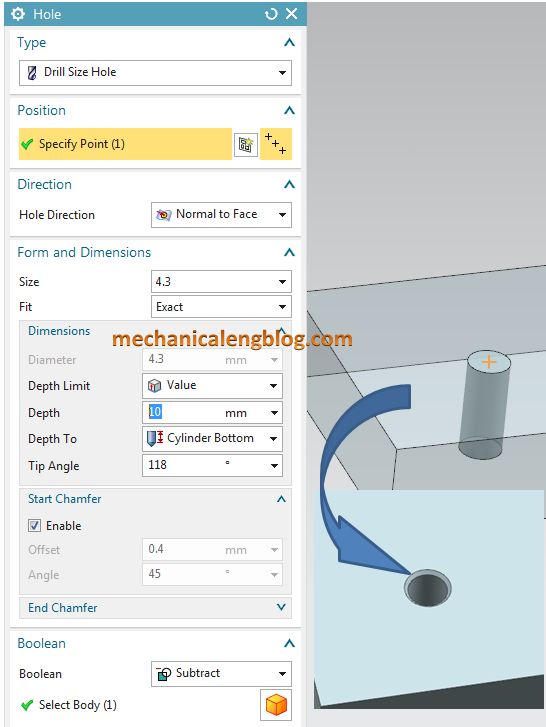
9. Click OK or apply to complete.
III. Create a screw clearance hole.
1. Click the hole icon.
2. Select screw clearance hole from the type list.
3. Select position of hole by specify point.
4. In the direction group, select normal to face.
5. There are 3 forms of screw learance hole: simple, counterbored, and countersunk. Select counterbored from the form list.
6. Select screw type, screw size,
7. Type value in the dimension box.
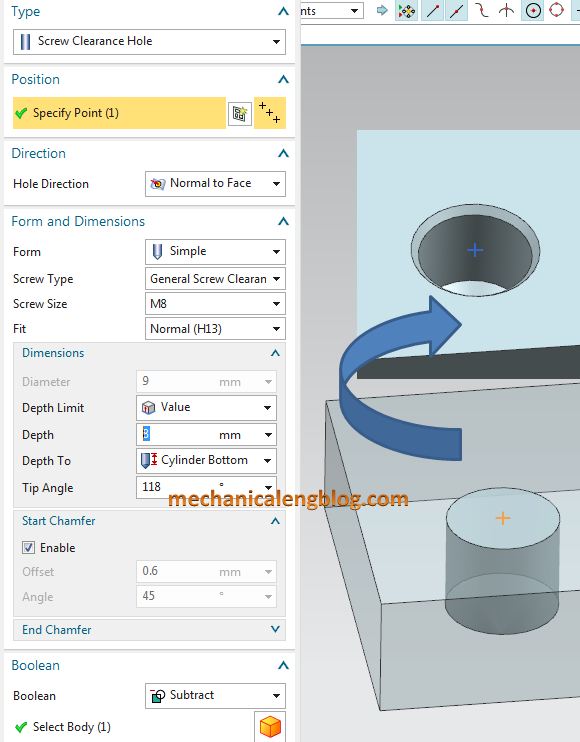
8. In the boolean group select subtract option.
9. In the settings group, from standard list, select iso option.
10. Click OK to complete.
IV. Create a threaded hole.
1. Click the hole icon.
2. Select threaded hole from the type list.
3. Select position of the hole by specify point.
4. In the direction group, select normal to face.
5. Select size, radial engage, depth type in the thread dimensions box.
6. Check the right handed box in the handedness group.
7. Select value option in the depth limits ans type value in the depth box and tip angle box.
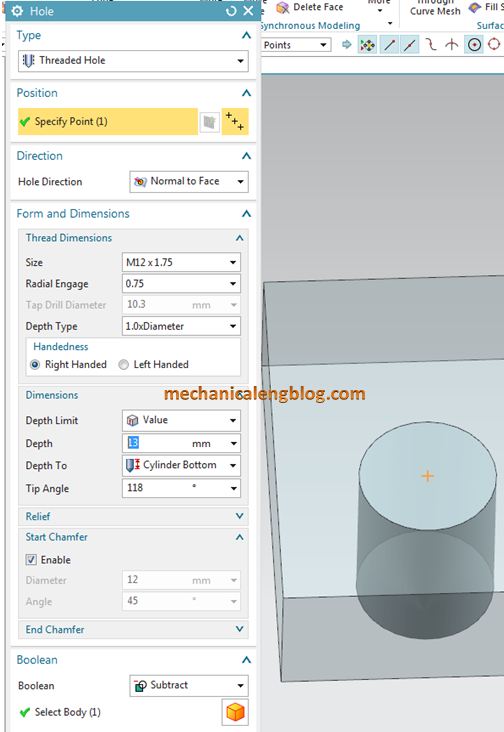
8. In the boolean group, select subtract option.
9. Click OK or apply to complete.
CONCLUSION
We already finished this article. With this tutorial, mechanicalengblog.com already introduced to you create 4 type of hole in Simens NX. With this base, I think you can test more options in hole function.
Thank for your reading?
Leave a Reply