For some reasons, you have to convert your pdf file into pictures. Well, of course you can take screenshots, but I will tell you that there are somes ways for you to convert them to images in a much more convenient way. Today I made this article for those of you who don’t know, to show you how to convert PDF to image in the fastest, easiest way that I often apply to my work too.
The first method let’s open your browser to access to those online websites that will convert PDF files to images for you, then we will go back to PowerPoint and talk about taking some screenshots, it still works after all. So let’s get started.
I. Convert PDF to picture by taking screenshots.
Simple as you think, open the file and start using keyboard or window’s tool to help with screen capture. There are many ways to capture the computer screen such as using the PrtScr key, the Snipping Tool or using a third-party application. You can refer to this article below about taking screenshot, the method is similar.
https://mechanicalengblog.com/how-to-take-screenshot-in-word-document/
II. Convert PDF to image with online tool
1. Online change PDF to pictures by website PDFtoimage.
Actually you can find quite a lot of different online website that helps with converting files on the Internet. But today I present you this PDFtoimage website that I often use.
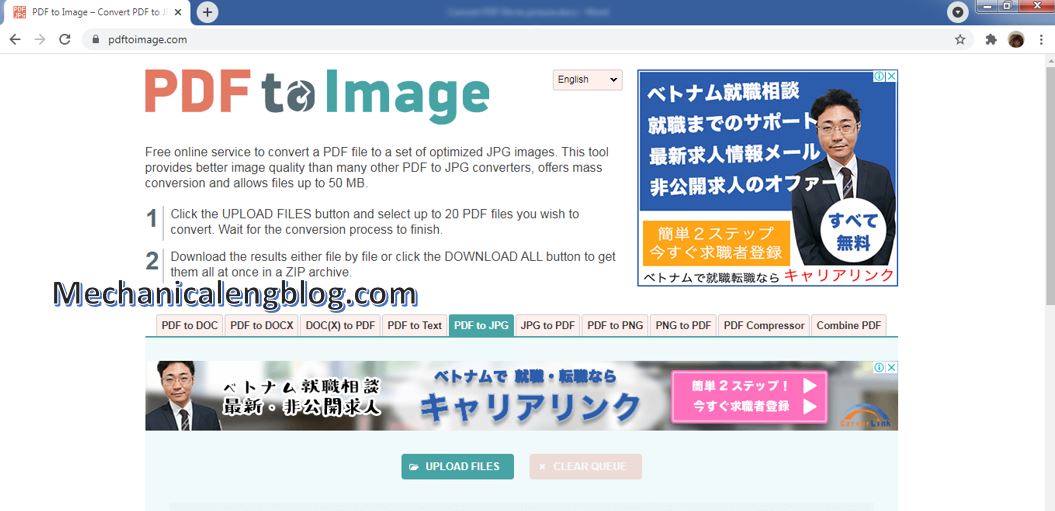
Step 1: Visit the address: https://pdftoimage.com/en/. Usually when converting to image, the format selected is .JPG.
The interface will be as shown below.
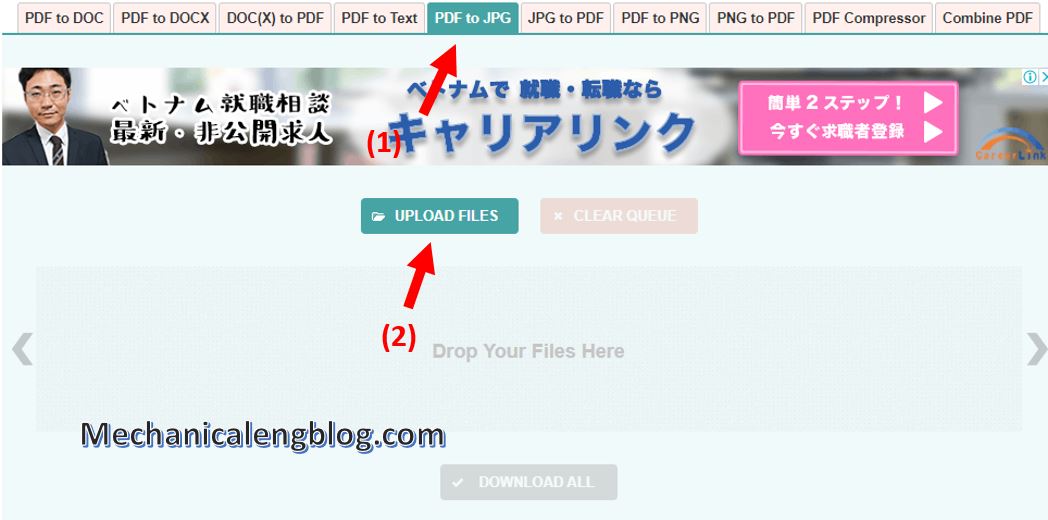
Step 2: There are many converting tools to choose. But for the purpose of this post, you will find the PDF to JPG tool (or PDF to PNG), then click on UPLOAD FILES. This website allows you to upload up to 20 PDF files for conversion at once.
Step 3: Wait for a little moment, the website will return the result that the file has been converted. Now your job is to download it. The downloaded file will be compressed as a ZIP.
You can click DOWNLOAD ALL button to download all the converted files, or download each one by clicking Download below each file.
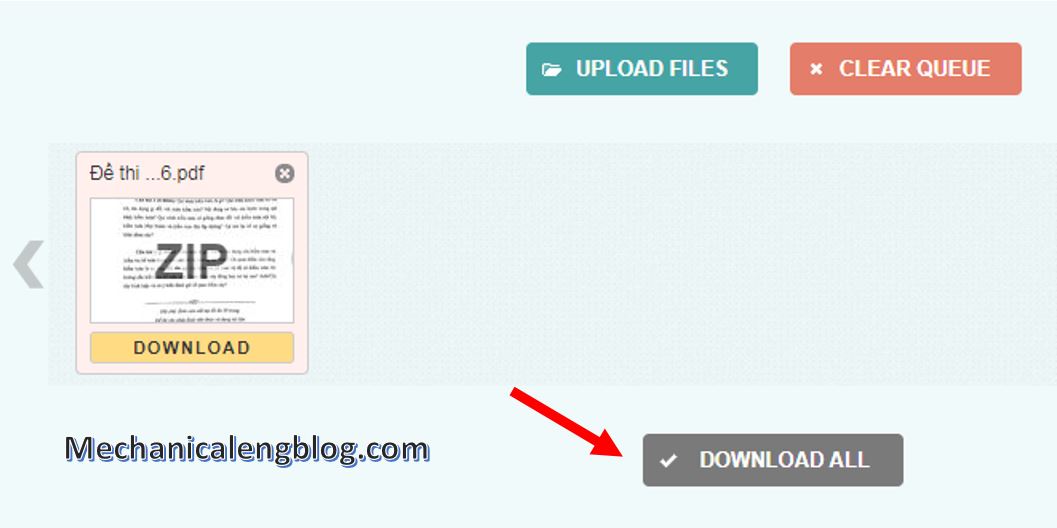
Step 4: After downloading the converted file, you can extract the file as usual, the file extracted has already contains images converted from the PDF file.
2. Convert PDF to images by Smallpdf
Another website – this website works better for me and which I use the most, is Smallpdf.
Step 1: Get access to the website https://smallpdf.com/vi. The interface is shown as below.

Step 2: You can change the language by going to the language section in the bottom right corner and select the appropriate language.
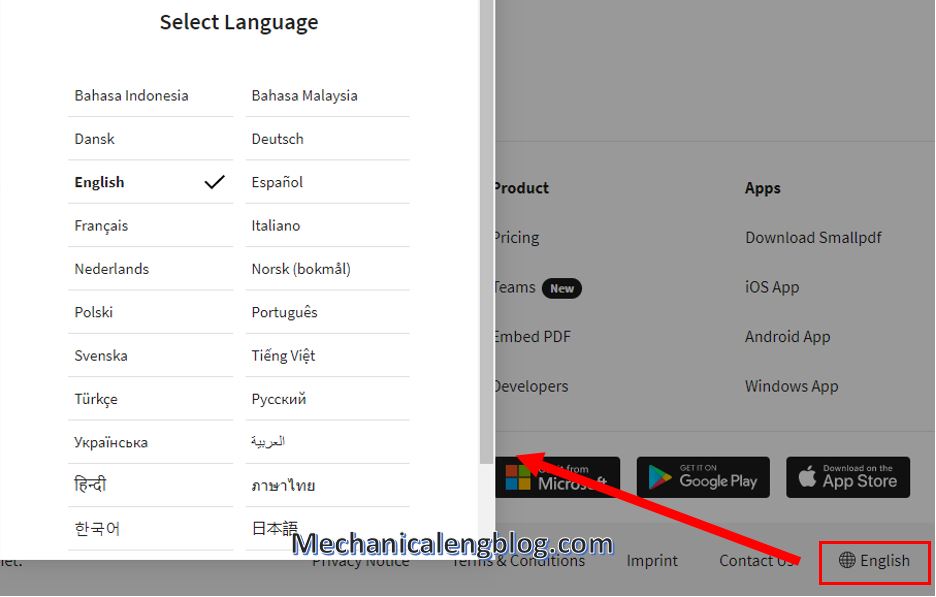
Step 3: To upload the PDF file, click All Tools then select PDF to JPG.
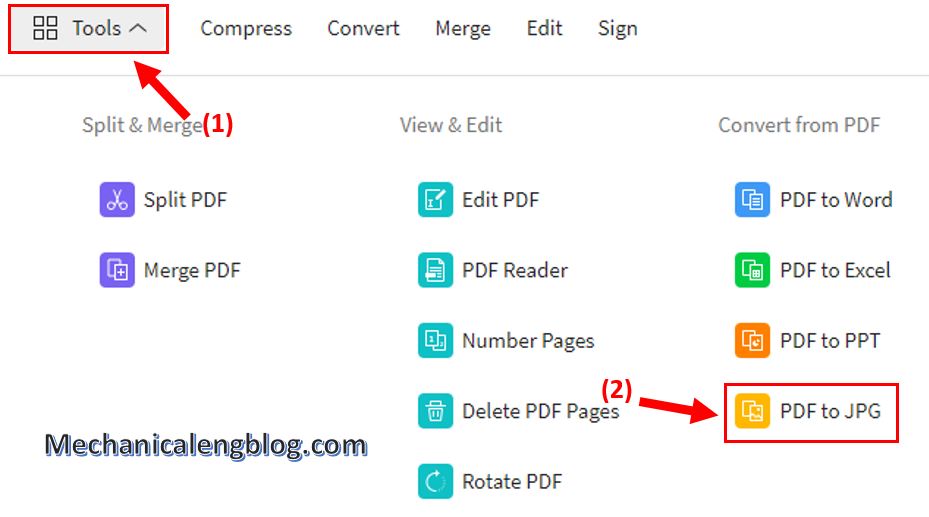
Next, choose or drop the file to convert. In addition to uploading files from your computer, you can also upload files from google drive or dropbox links.

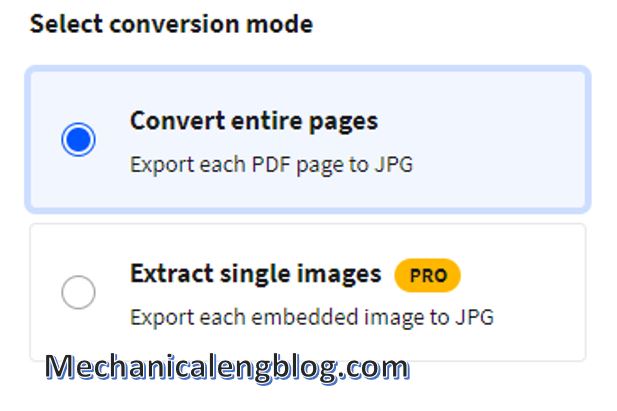
Step 4: Wait for the uploading to complete, after that choose the conversion method for the file. There is an option which you must pay to use. I guess the free option above is enough if you just want to make normal conversion.
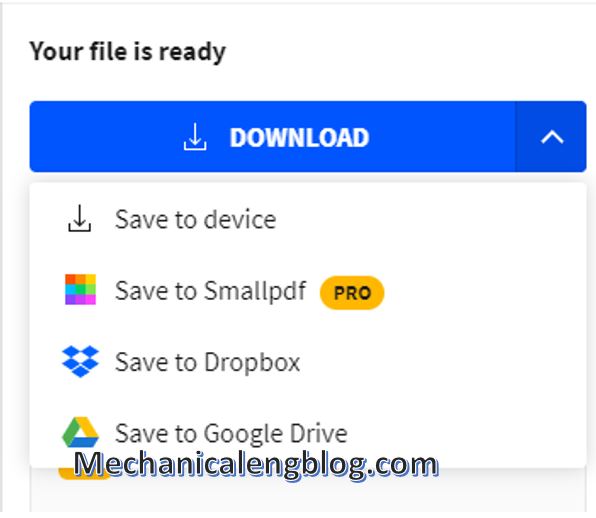
After the conversion is complete, you can download the file as a ZIP file via 4 ways.
Step 5: Extract the downloaded file as usual, by right-click and choose the type of extraction and you will have the images converted from the PDF file File.
CONCLUSION
That’s it and your PowerPoint file will be converted to pictures in a second. If you personally prefer to take screenshots, that’s okay, but the picture quality won’t be as good as using conversion tools. Please consider choosing the method that suits you best. Wish you have interesting PowerPoint experiences.
Thank you for reading my post. If you find it useful, please keep on following. Thank you and good luck!
-hhchi


Leave a Reply