Insert smartart in Word that help present your information quickly and easily. You can choose between different layouts to effectively convey your message or ideas. Smartart graphics can be created in Excel, Outlook, PowerPoint, and Word, and they can be used in Office.
For an overview of Smartart graphics, including choosing the best graphic type and layout to display your data or communicate a concept, here’s how to create and edit Smartart with Word 2016.
I. How to insert smartart in Word.
To insert Smartart, you follow these steps below:
Step 1: Go to Insert, in Illustrations, choose Smartart.

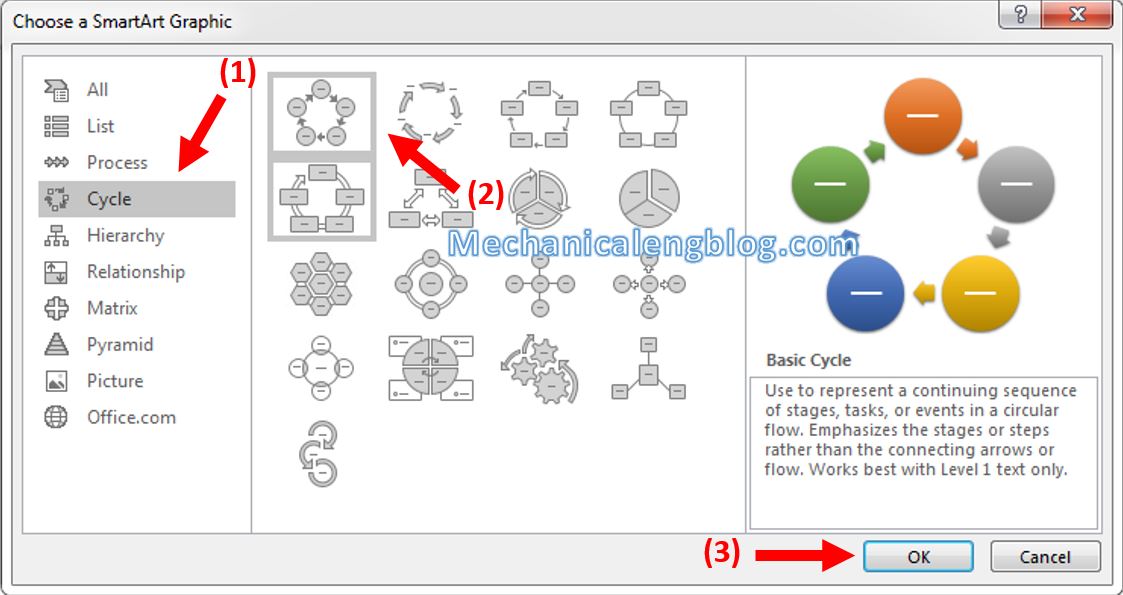
Step 2: The Smartart dialog box appears. Choose the type and the layout you want, then click OK to insert.
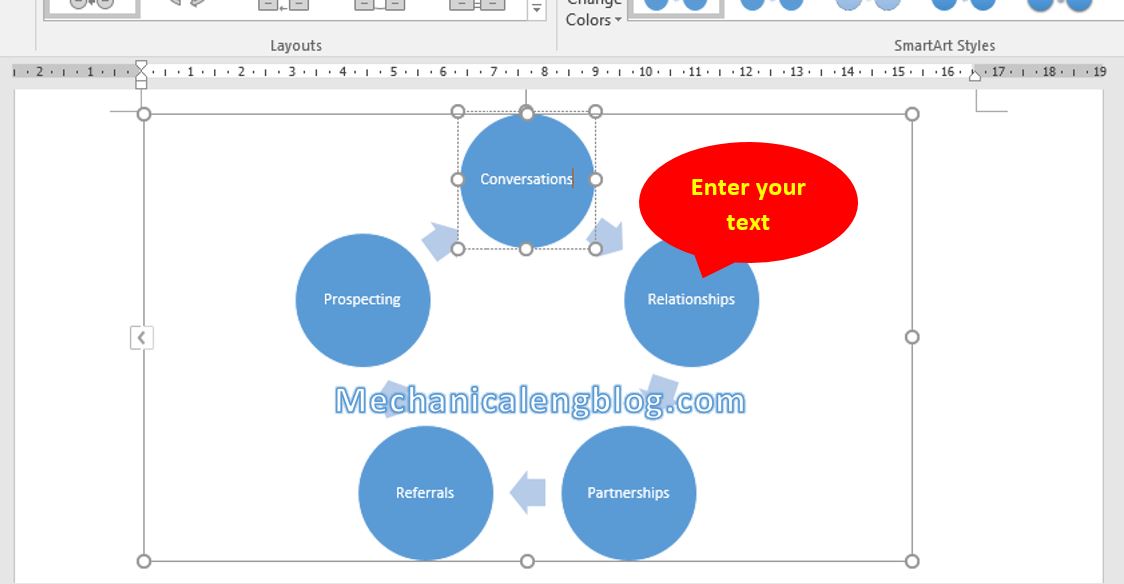
Step 3: After inserting, enter the content for each part of the graphic.
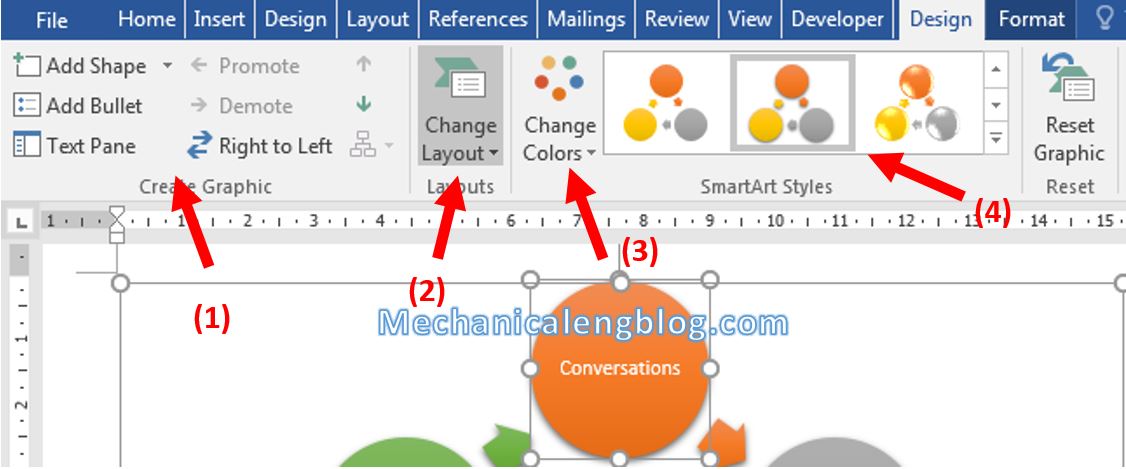
In the Design tab you can move, add in or delete shapes and bullets, freely customize the Layout, change Color or graphic Styles…
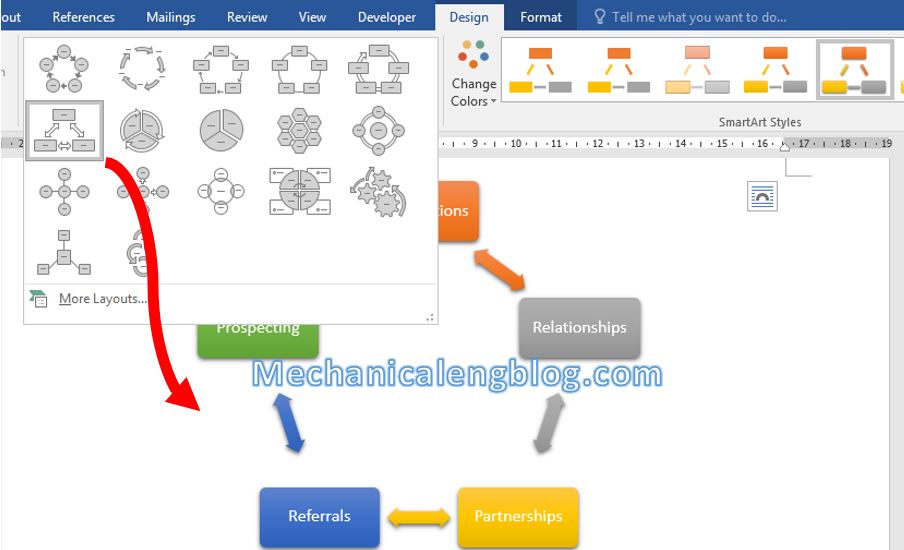
For example if you want to change the layout of the recent model to another model, click on that SmartArt model and select Design, then select Change Layout, choose the type of SmartArt you want to replace.
To resize the entire Smartart graphic, select it and drag the 4 corners in and out to increase or reduce the size of the graphic.
And above is how to insert and all options for modifying Smartart graphic, with Word 2016. This tutorial can be apply with Word 2010 and upper versions.
CONCLUSION
So I have finished showing you how to insert a Smartart into Word. Personally, I find this very similar to inserting a chart, they are equally convenient and have options for users to adjust themselves. So choose the features that are right for you, because they will all help a lot in your work.
Hope you will continue to support the blog so that we can create more useful articles. Thank you and good luck.
-hhchi


Leave a Reply