In inventor rib command used to create rib (thin – walled support shapes) using an open or closed profile.The profile can be projected to the next face or an explicit thickness can be specified.
Where do I find it?
3D modeling -> create -> Rib.
![]()
How to use inventor rib command?
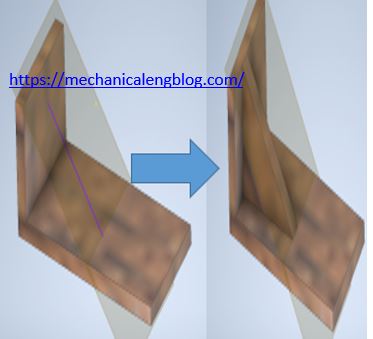
1. Create a wall and profile.
2. Click the rib icon in the ribbon tab. The rib dialog will appear. Select the profile you want to create the rib.
3. Set the direction of extrusion. There are two types of extrusion.
+ Normal to sketch plane. Extrudes geometry normal to the sketch plane. The Thickness is parallel to the sketch plane.
+ Parallel to sketch plane. Extrudes geometry parallel to the sketch plane. The Thickness is normal to the sketch plane.
I. Create a rib by parallel to sketch plane method.
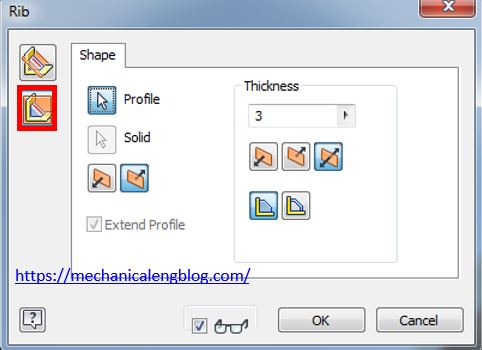
4. In the shape group, you can change the direction of extrusion.
5. Type the thickness value in the thickness box. Click a flip icon to apply the thickness to one side of the profile or extend it equally on both sides of the profile
6. Setup the depth of rib. There are two options you can select: to next and finite.
7. Click OK to finish this command.
II. Create a rib by normal to sketch plane method.
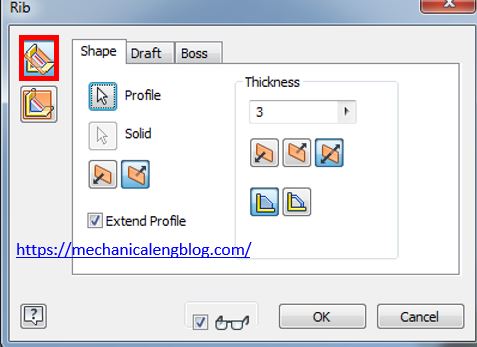
You can do as step 4,5,6. But with normal to sketch plane method you can select draft and boss options.
+ In the draft group, there are two hold thickness option: At top or at root.
Type the draft angle value in the draft angle box.

+ In the boss group, you can select centers, diameter, offset, draft angle.
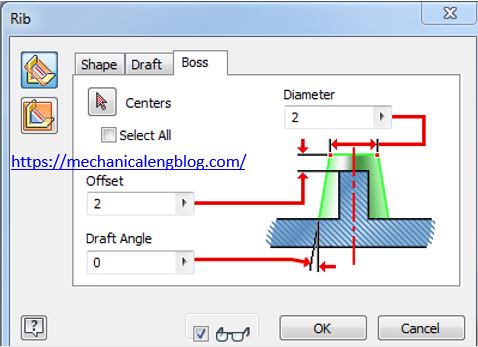
Click OK after you set your condition.

Leave a Reply