This tutorial I will guide about siemens nx synchronous modeling reuse command group as copy face, cut face, paste fae, mirror face, and pattern face.
1. Nx synchronous modeling reuse copy face.
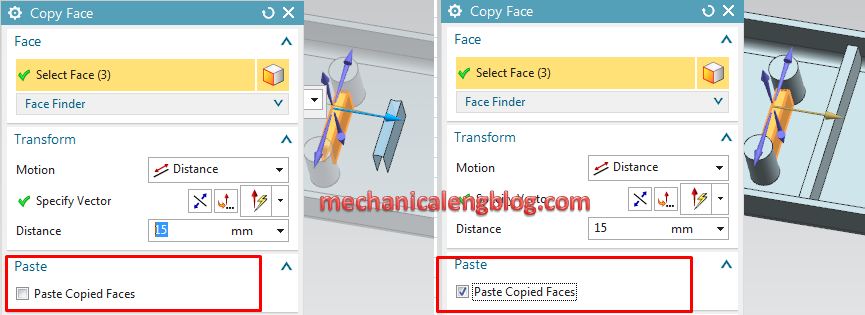
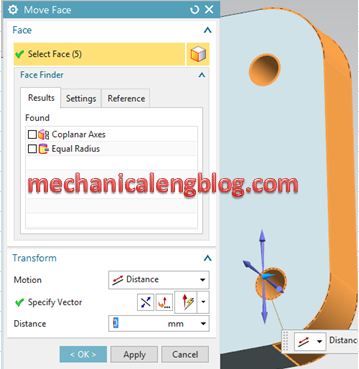
Copy Face command used to copy a set of faces from a body.
Where do I find it?
| From the menu: Insert-> Synchronous Modeling -> Reuse -> Copy face . | |
| From the home tab: Synchronous Modeling group -> More gallery -> recently used gallery -> Copy face. |
How to copy and paste faces?
1. From the menu: Insert-> Synchronous Modeling -> Reuse -> Copy face.
2. In the copy face dialog box, in the face group, select face is active. In the graphics window, select the faces for coping.
3. In the transform group, from the motion list, select distance option. In the graphics window, select transform vector direction and type value in the distance box.
4. In the paste group, select the paste copied faces check box.
5. Clicks OK to complete this function.
2. Nx synchronous modeling reuse cut face.
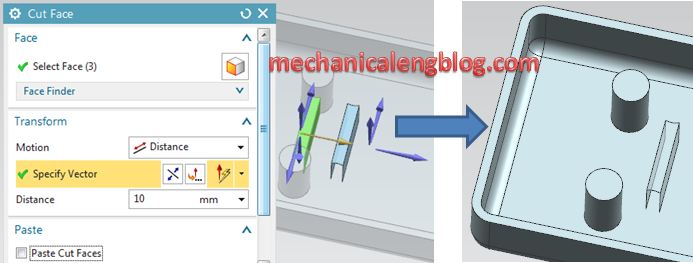
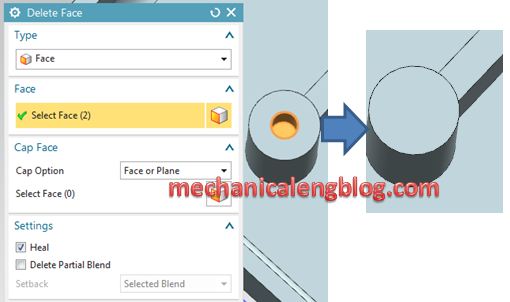
Cut face command used to copy a set of faces from a body and then delete those faces from the body.
Where do I find it?
| From the menu: Insert-> Synchronous Modeling -> Reuse -> Cut face. | |
| From the home tab: Synchronous Modeling group -> More gallery -> Reuse gallery -> Cut face |
How to cut and paste faces?
1. From the menu: Insert-> Synchronous Modeling + Reuse -> Cut Face.
2. In the Cut Face dialog box, in the Face group. Select Face is active.In the graphics window, select the faces for cutting.
3. In the Transform group, from the Motion list, select Distance option. In the graphics window, s transform vector direction and type value in the distance box.
4. In the Paste group, select the Paste Copied Faces check box.
5. Clicks OK to complete this function.
3. Nx synchronous modeling reuse paste face.
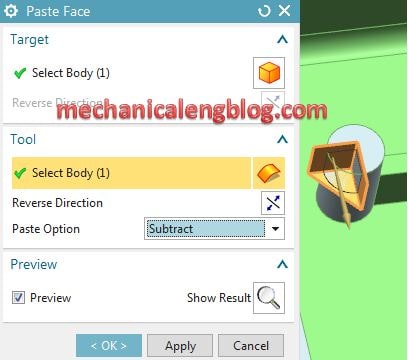
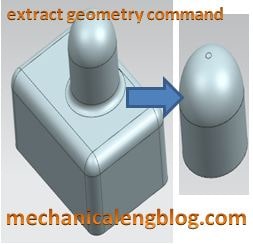
Paste face command used to modify a body by adding or subtracting faces of a sheet body.
Where do I find it?
| From the menu: Insert-> Synchronous Modeling -> Reuse -> Paste face. | |
| From the home tab: Synchronous Modeling group More gallery -> Reuse gallery -> Paste face. |
How to paste faces into a solid body?
1. From the menu: Insert-> Synchronous Modeling -> Reuse -> Paste face.
2. In the target body group, select body is active. In the graphics window, select the target body.
3. Left-click select body in the tool group, and select tool body in the graphics window.
4. In the tool group, select subtract from paste option list.
5. Clicks OK to complete.
4. Nx synchronous modeling reuse mirror face.
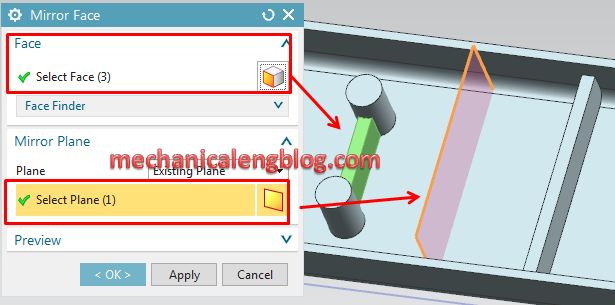
Mirror face command used to copy a set of faces and mirrors them cross a plane
Where do I find it?
| From the menu: Insert -> Synchronous Modeling -> Reuse mirror face. | |
| From the home tab: Synchronous Modeling group -> More gallery -> Reuse gallery -> Mirror face. |
How to create a mirrored set of faces?
1. From the menu: Insert+Synchronous Modeling Reuse-Mirror Face
2. In the face group, select face is active. In the graphics window, select the face to mirror.
3. in the mirror plane group, select existing plane option from plane and click select plane option. In the graphics window, select the mirror plane.
4. Clicks OK or apply to complete.
5. Nx synchronous modeling reuse pattern face.
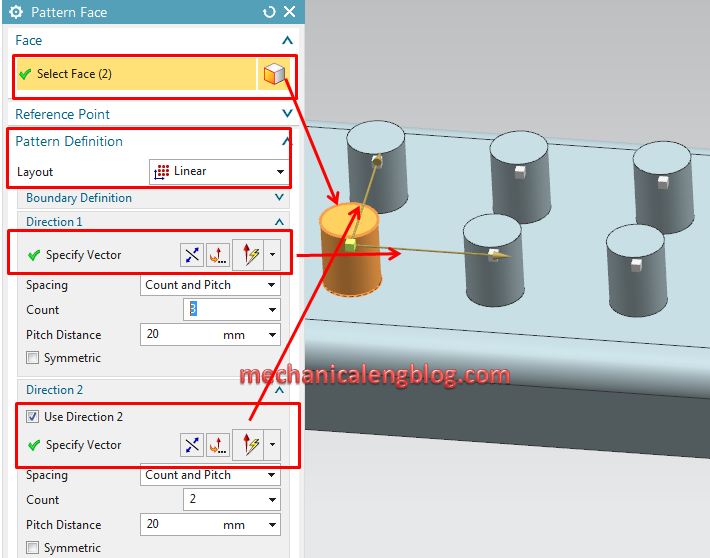
Pattern face command used to set of faves into many patterns or layouts (Linear, circular, polygon, etc.) with various options for pattern boundary, instance orientation, clocking, and delete, and then add them to a boy.
Where do I find it?
| From the menu: Insert -> Synchronous Modeling -> Reuse -> Pattern Face. | |
| From the home tab: Synchronous Modeling group -> More gallery -> Reuse gallery -> pattern face. |
How to create patterns of faces in nynchronous modeling?
For this tutorial, I will create a pattern by linear option. You can read this post to understand about pattern command.
1. From the home tab: Synchronous Modeling group -> More gallery -> Reuse gallery -> pattern face.
2. In the face group, select face is active. In the graphics window, select face to pattern.
3. In the pattern definition group, select linear option from layout list.
4. Click specify vector in direction 1 then select vector direction in the graphics window.Select count and pitch option from spacing list and type value in the count and pitch distance boxes.
5. Check the use direction 2 box and do same step 4.
6. Clicks OK to create the rectangular pattern feature.

hi, thanks for the steps explanation, however, may i check with you what is the differences between faces/feature and geometry? it seems like there are mirror feature as well which works the same way as mirror faces. thanks alot for the help in advance as i am a newbie in using this software. thanks!
Hi. this time i am busy so i could not answer early.
i think it spare by nevel.
ex with mirror command.
mirror face. you can select faces. and faces and mirror plane need to complete intersection. if it is not complete intersecrion. you can not do this command.
mirror feature. you can select faces, surface, body… feature to mirror and mirror plane don not need to complete intersection..
mirror geometry is the best. you can mirror faces that tool and target dont need to complete intersection. And all function of mirror feature.
hope it can help you.