This tutorial I will guide siemens nx synchronous modeling modify face as move faces, pull faces, resize faces, replace faces, offset faces.
I. Nx tutorial synchronous modeling modify face: move faces.
Move face command used to move a set of faces and adjusts adjacent faces to accommodate.
Where do I find it?
From the menu (top border bar): insert -> synchronous modeling -> move face.
From the home tab: Synchronous modeling group -> move face.

How to move selected faces?
1. On the synchronous modeling toolbar, click move face.
2. In the graphics window, we will select faces to move.
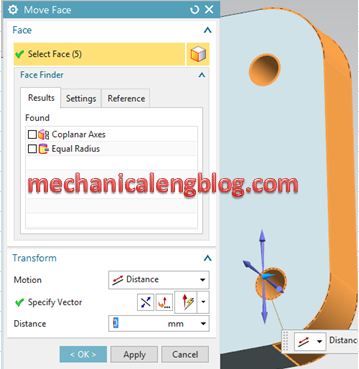
3. In the transform group, we will select distance option. You can move the faces by type distance value in the distance box or drag the cone head of the distance axis to the point where you want to move the faces. For this tutorial, I will type 20 mm.
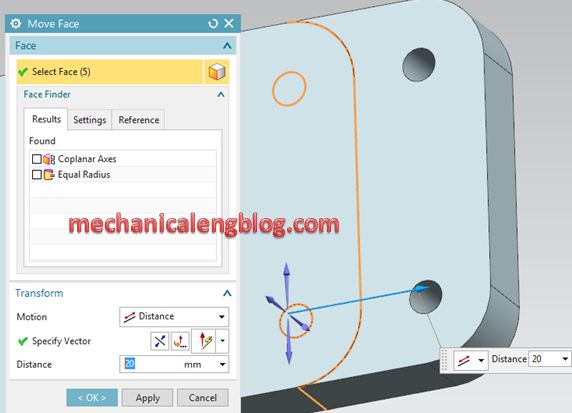
4. Click OK or apply to finish.
II. Nx tutorial synchronous modeling modify face: pull faces.
Pull face command used to pull a face out of the model to add material or into the model to subtract material.
Where do I find it?
From the menu (Top border bar): Insert -> synchronous modeling -> pull face.
From the home tab: synchronous modeling group -> More gallery -> move gallery -> pull face.
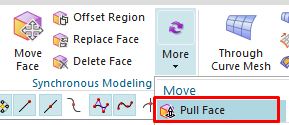
How to pull a face to modify a model?
1. On the synchronous modeling toolbar, click pull face icon.
2. In the pull face dialog, select face is active. Select one or more faces in a solid body.
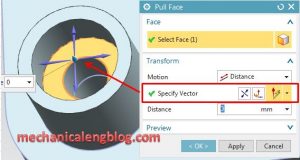
3. In the transform group, we will select distance option.
4. Select specify vector.
5. Pull the selected faces by dragging the distance handle or by typing a value in the distance box.
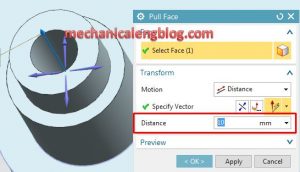
6. Click OK to complete.
III. Nx tutorial synchronous modeling modify face: resize faces.
Resize face command used to change the diameter of a cylinder or spherical face and adjusts adjacent blend faces to accommodate.
Where do I find it?
From the menu (Top border bar): insert -> synchronous modeling -> resize face.
From the home tab: synchronous modeling group -> more gallery -> move gallery -> resize face.
How to resize a face.
1. On the synchronous modeling toolbar, select resize face.
2. In the resize face dialog, select face is active. Select the face of a cylinder, sphere, or conic to resize.
3. Type new diameter value in the diameter box.
4. Click OK or apply to complete.
IV. Nx tutorial synchronous modeling modify face: replace faces.
Replace face command used to replace a set of faces with another set of faces.
Where do I find it?
From the menu (top border bar): insert -> synchronous modeling -> replace face.
From the home tab: synchronous modeling group -> replace face.

How to replace a face with another face?
1. On the synchronous modeling toolbar, click replace face.
2. Click select face in the original face group, then select the face to replace.
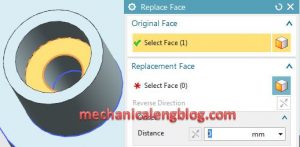
3. Click select face in the replacement face group and select replacement face in the graphics window.
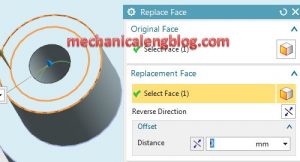
4. Click OK or apply to complete.
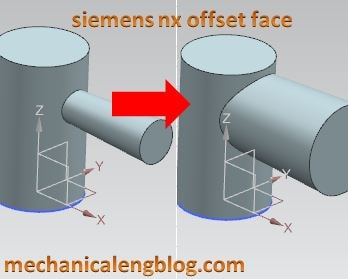
V. Nx tutorial synchronous modeling modify face: offset region.
Offset region used to offset a set of faces from their current location and adjusts adjacent bled faces to accommodate.
Where do I find it?
From the menu (Top border bar): insert -> synchronous modeling -> offset region.
From the home tab: Synchronous modeling group -> offset region.

How to create an offset region.
1. On the synchronous modeling toolbar, click offset region.
2. Select faces to offset region in the graphics window.
3. Type offset value in the distance box.
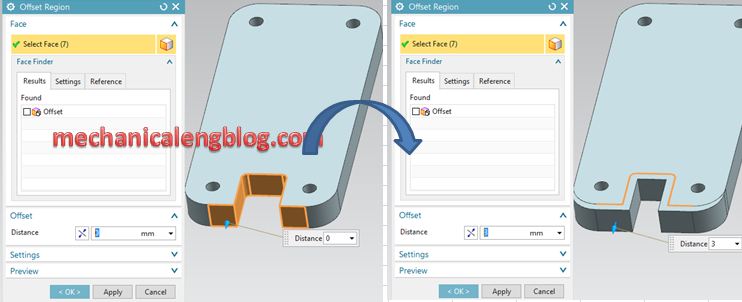
4. Click OK or apply to complete.

Leave a Reply