In this tutorial, I will share to you4 ways to rotate image in Word. When inserting images into word, sometimes the image does not look like what you want, so you will have to proceed to edit. Before, I have shown you how to edit the size when inserting pictures into word, or add artistic effects, … But today I will guide you how to rotate the image, rotate horizontally, rotate vertically, or rotate 180 degrees…
There are many ways to choose from, choose the one that suits you best. Now let us begin.
I. Rotate directly image in word.
Step 1: After inserting the image, click onto it. You will see a small spinning arrow above the photo right immediately.

Step 2: Press and hold the cursor on the round arrow and at the same time move the cursor to the left or to the right to rotate the image in the corresponding direction.
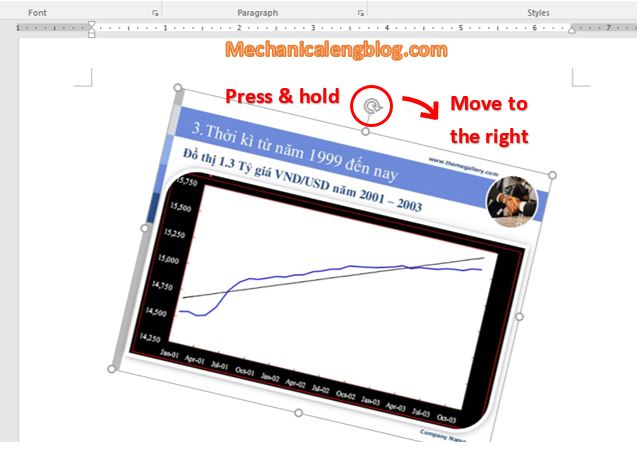
However, this rotation is probably rarely used because the image will be off-center, and a document that contains a skewed image, doesn’t look very good. And in some cases when you want the image to be rotated at a certain degrees angle, using this approach will not be accurate.
II. Rotate vertically, horizontally, flip photos.
This is a more commonly used way of rotating the image than what had been shown above, because it can rotate more accurately. You can reverse the top, bottom, left, right of the image, making the image accurate and beautiful.
Step 1: Double-click at the image needs to be rotated, the ribbon will move to the Format tab. Here in Arrange section, choose Rotate (icon button has 2 triangles)
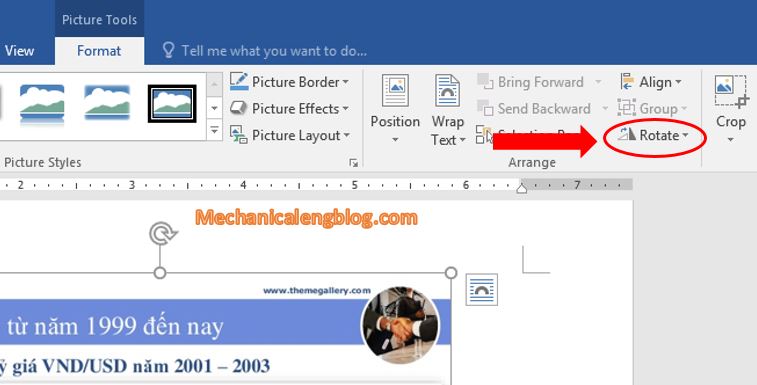
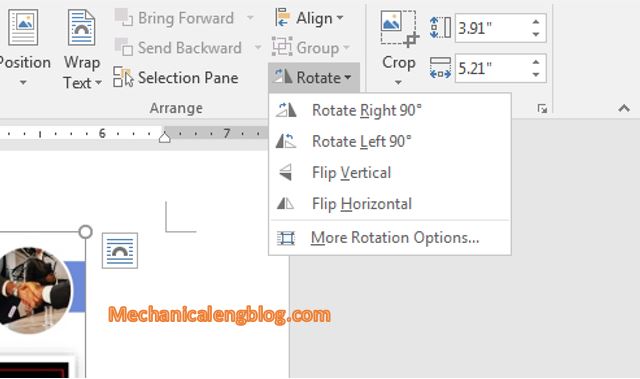
Step 2: Click onto it, there will be 5 options shown for you include:
Rotate Right 90: Rotate image from left angle to right angle 90 degrees.
Rotate Left 90: Rotate the image from right angle to left angle 90 degrees.
Flip Vertical: Flip the photo vertically.
Flip Horizontal: Flip the image horizontally, means the right of the image will turn to the left.
More Rotation Options…
Step 3: Choose the rotate method you want, for example you want to rotate the image 90 degrees from left angle to right angle, choose Rotate right 90 degrees, it will look like this.
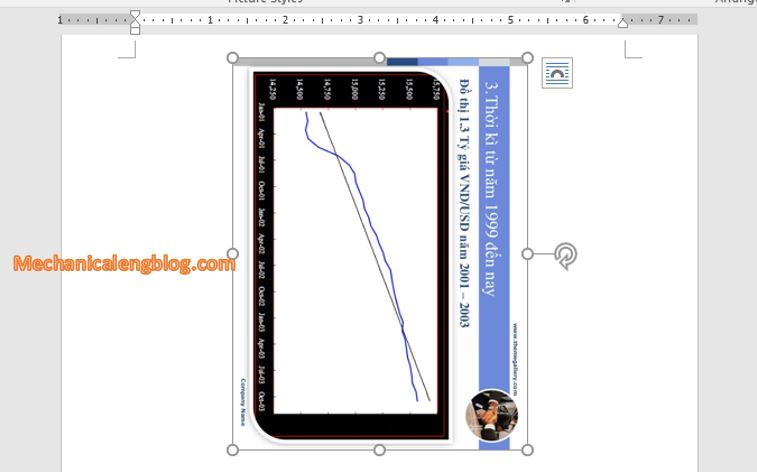
Looks funny isn’t it? But since it’s an example, you can rotate to your preference.
III. Rotate image in word in setting degree.
Using this method is the most accurate because you can choose to rotate 90 degrees, 80 degrees, or even 35 degrees, 45 degrees.
Step 1: Right-click onto the image, then choose Size and Position.

Step 2: In the Layout box, move to the Rotate section, adjust in the box the degree you want to rotate, then press OK.
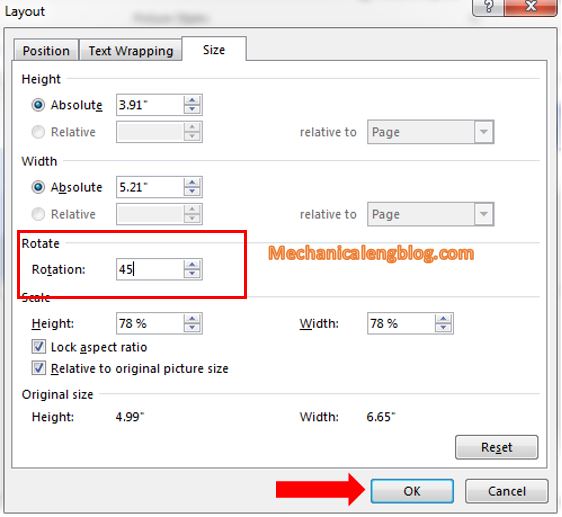
The image has been rotated exactly 45 degree. Don’t worry, it can not be wrong.
IV. Adjustment.
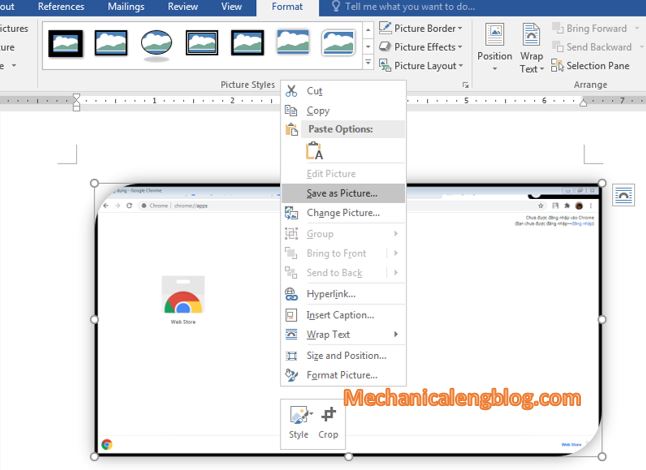
After rotating, the image may seem a little bit odd, or it looks not so good. You can add in some adjustment like borders, effects, styles.
To do that, click at the image then go to tab Format, or just double-click at the image, you will see the toolbar displaying different sections, which include commands for editing images. You can adjust the image style, insert border in Picture styles, color and effects in Arrange, crop or adjust the size in Size…

CONCLUSION
You have known how to insert pictures into Word, resize, add effects, and now you know how to rotate pictures depending on your preferences. To rotate image is actually quite similar to other photo editing operations that I have instructed before, and they share one common thing that the steps are very simple. Now you have more knowledge of photo editing.
Thank you very much for reading my article. Hope you will continue to follow the knowledge I share. And finally wish you a good luck in your job.
—————————————–
Author-hhchi


Leave a Reply