When you enter data in cells in Excel, you will see line around those cells. They are designed to make it easier for users to work. If you do not have a border, you will not see the lines when print your page, you just only see data you have entered. This brings unprofessional for your work.
You want to create a properly designed data or you do not know how your data have a Table style like in Word. I will show you 2 ways to create border in excel. It is very simple but very powerful ways.
1. Create border in excel by border tool.
After importing data content in Excel, if you want to quickly outline the data areas, you can do following steps:
Step 1: Scan / highlight the entire data area that you want to border.
Note: Because I want to frame all data here, I scan and select all data. If you want to frame rows, columns, cells, you can select correspondingly.

Step 2: Then you go to the Home Tab, at this point you will notice the Font tool group => click on the Border tool.
There are many options here, if you want to draw the entire border to the data, choose All Borders.

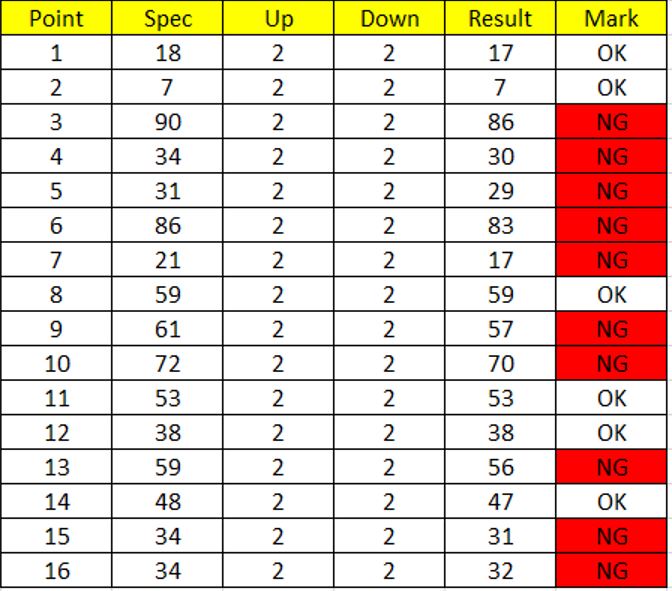
Step 3: Check the results, now you can observe that the data has a border around it.
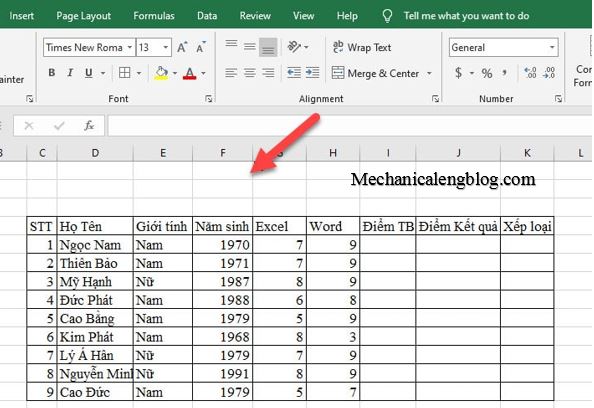
However, if you do this way, the strokes that surround the content will be single, and you have only one option.
In case you want to draw the table of data contents in Excel with different strokes like double stroke, bold line or dashed line…. How will you do it? Let’s move to 2nd way.
2. Draw borders in Excel with optional strokes.
For example, I want to outline borders for an Excel data table with the following requirements: The outer strokes are double strokes, while the inner strokes are dashed strokes, I will:
Step 1: Also scan / highlight the data area that I want to draw borders => Then go to the Home Tab => next go to the Borders tool and select the More Borders …

Step 2: At this time, you will see a dialog box Format Cell => choose to go to Tab Border. In Section Style => you choose to double stroke.
If you want to choose the color for the stroke, choose Color => then tick the Outline to draw the outline borders.
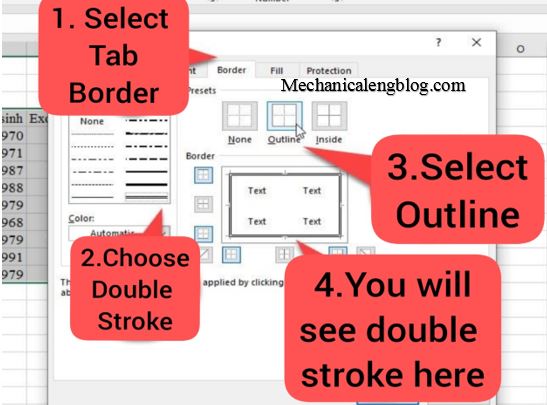
Step 3: Next, you select the dash line in section Style => then tick Inside to draw a border inside the contents of the data sheet.
After you have seen that the outer contours are double strokes, and inside are dash lines => click OK to confirm.

Result: You can observe that the outer outlines appear as double strokes, while the inside is dashed.

If you want to draw the data sheet with other strokes, the way to do it is the same as I instructed above!
3. Delete a border in Excel.
If you do not want to create a border, you can delete it with the following way:
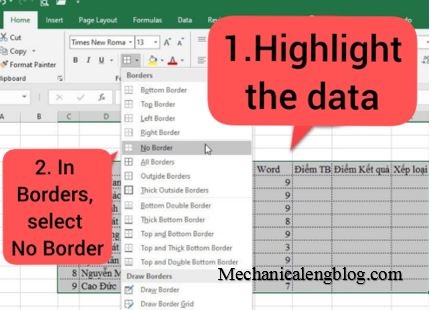
+ Option 1: Scan / highlight on the data sheet => then go to Tab Home => go to Borders and select No Border.
+ Option 2: Scan / highlight the data sheet => then right-click and select Format Cell. Or press CTRL + SHIFT + F to open the Format Cell.

Next, go to Tab Border => and select None. Or if you just want to remove a few lines, click on the appropriate option.

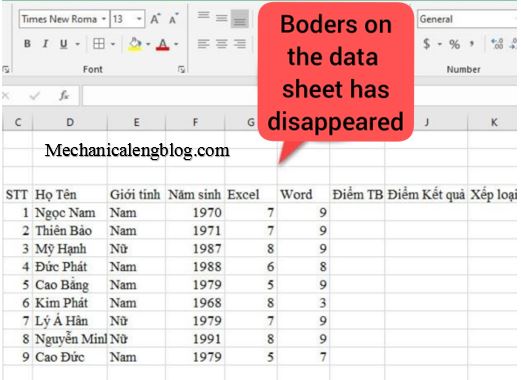
Return to the Excel screen, you will find that the entire border on the data sheet has disappeared.
CONCLUSION
So, I have show you 2 ways of how to make a border in Excel. This is a very simple and basic knowledge, but it is extremely important in the process of using Excel. Choose the most suitable way for you. Hopefully this article will be useful to you, wish you success and do not forget to visit the Blog everyday to learn more interesting things!


Leave a Reply