In this tutorial, I will guide to you how to turn off Compatibility mode in Word? You can turn off by compatibility mode, word options setting, delete Normal.dotm, edit in Registry,…
When open a document in Word, sometimes you may see the text: Compatibility Mode in the Title bar next to the document name. This means, the document right now is last created or saved in an earlier version of Word than the one you are using.
In general, Compatibility Mode allows you to view files with old formats on new software versions, but the working environment is the old environment. To find out more about it please checkout the content below.
I. Compatibility mode.
For example when you open a .doc file with Word version 2010 or more, you will encounter the text Compatibility Mode which means this mode has been enabled.

You can still edit with this document but some features will be limited. This is to ensure that after editing, it can still be opened with Word 2003. That is the working principle of this Compatibility Mode feature.
However, in reality, for some subjective or objective reason, the mode will not work according to its principle, may appears every time you open Word or generally displayed in a bluff.
Well, to help you solve the problem above, I will guide you on how to turn off the Compatibility Mode also to convert text from Compatibility Mode to normal mode.
II. Turn off Compatibility Mode.
1. Word options setting.
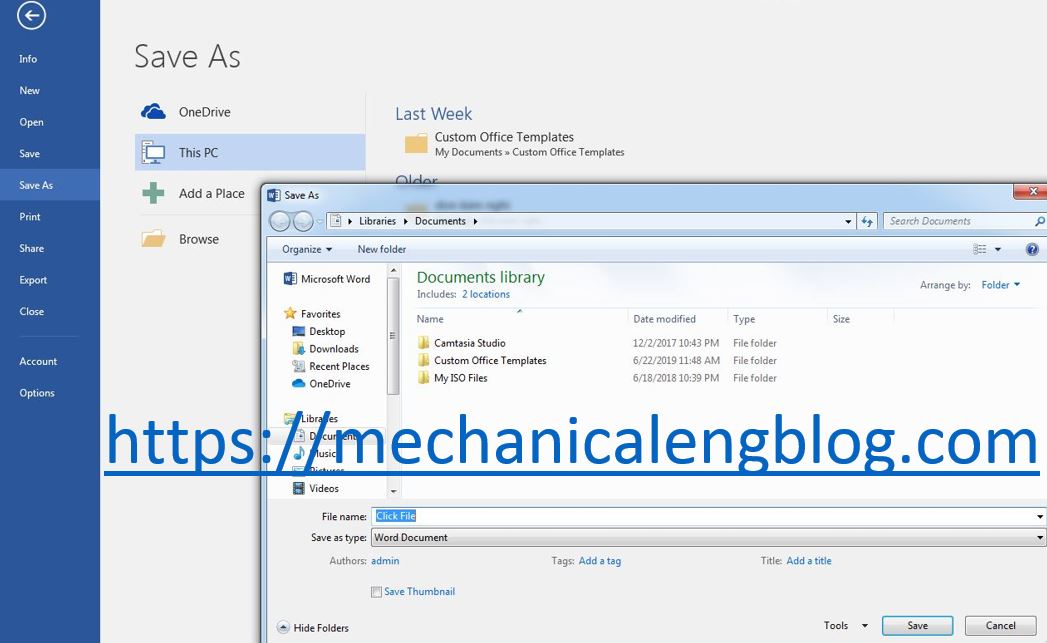
Step 1: Open Word, in File choose Options.
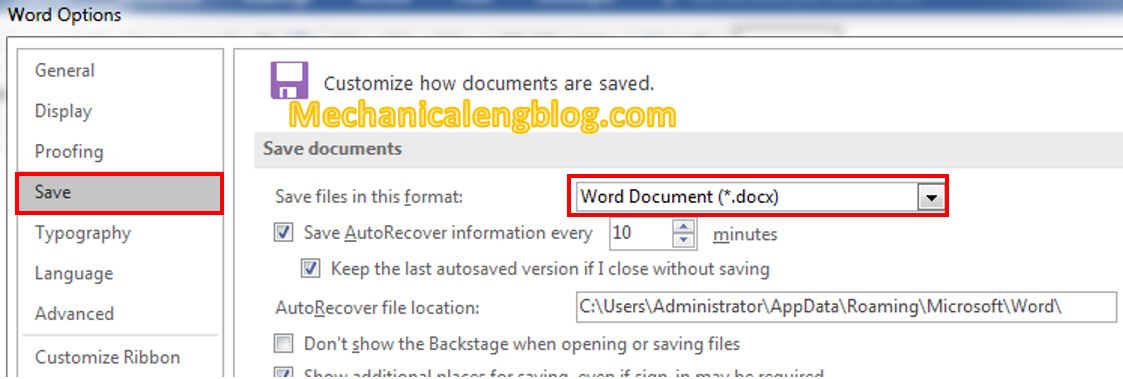
Step 2: Appears the Word Options box. Go to Save. In the Save files in this format section, select Word Document (*.docx). Then OK to save.

2. Delete Normal.dotm
This method works well in case you have multiple versions of Word installed on your computer.
Step 1: Press Window + R to open Run dialog box. Then you enter the command below:
%appdata%\Microsoft\Templates

Step 2: Then delete the Normal file, Word will automatically create a new file and the problem will be solved.

3. Edit in Registry.
If neither of the above methods work then you should try this one, but remember to back up the Registry before doing so.
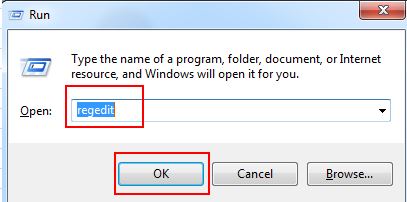
Step 1: Open Run by pressing Window + R. Enter “regedit” then Enter.

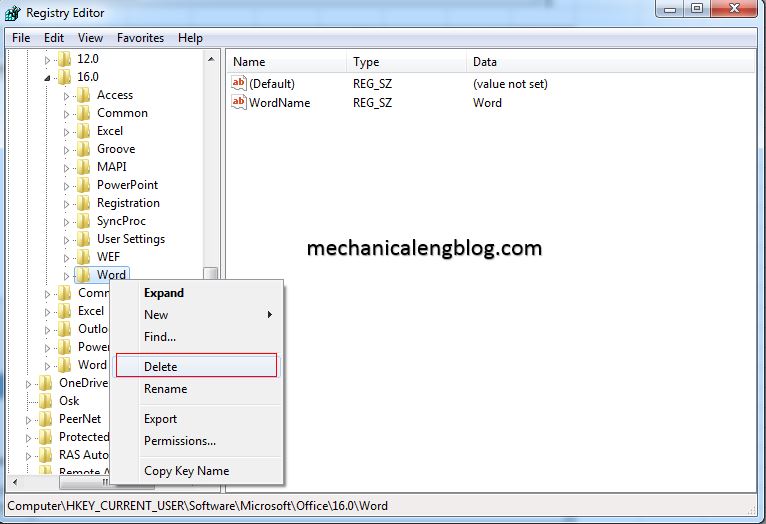
Step 2: Depending on the version of Word you are using, select the appropriate key. The key has the following form:
Word 2007: HKEY_CURRENT_USER\Software\Microsoft\Office\12.0\Word\Options
Word 2010: HKEY_CURRENT_USER\Software\Microsoft\Office\14.0\Word\Options
Word 2013: HKEY_CURRENT_USER\Software\Microsoft\Office\15.0\Word\Options
Word 2016 and Word 2019: HKEY_CURRENT_USER\Software\Microsoft\Office\16.0\Word\Options
Step 3: In the right column:
Find and delete the DWORD named CompatMode
If not found, create a DWORD with the same name and set its value to 0

Step 4: After that reset your computer and the problem has been solved.
III. Switch Compatibility Mode to Normal mode.
Step 1: In File, choose Info, then Convert.

Step 2: A Microsoft Word box appears, just click OK.

You can check at the option Do not ask me again about converting documents if you don’t want the box to appear again in the future.
CONCLUSION
Okay, so I have finished showing you how to handle the problem when Word automatically switches to Compatibility Mode, and in addition, also how to switch Compatibility mode to normal mode as well.
The new version of Word can easily open files created by the old version of Word, but the reverse is not always the case. Then you will have to convert the file extension, which I have made an article to talk about, so check it out if you need it sometimes.
Hope this article will be useful to you. Goodbye and see you in the next posts!
-hhchi


Leave a Reply