In this tutorial, I will guide to you how to set margins in Word 2016. You will know how to edit the default of ms word and set the best align margin in Word.
In administrative documents, alignment takes an extremely important role. It helps to correct the standard of administrative documents, as well as shows the professionalism.
Another benefit is to print nicely and more consistent. However, for those who are new to Word, or those who do not have much experience, this is quite limited, usually they will use the default margin. That is why today I will guide you in detail how to best align margin with Word 2016. If you do not know or are still vague about this part, please take a look to find out.
I. Set margins in Word 2016 _ Some notes before starting.
Alignment in a document is how you specify the distance from the top, bottom, left and right margins of the paper size to the main content. Before we start make sure your unit of measurement is set to be cm.
The left margin is always wider to make a binder when printing. Provisions on page margins of documents (for A4 size paper) according to the Circular are:
Top margin: 20-25 mm (2cm – 2.5 cm) from the top edge of the paper.
Bottom margin: 20-25 mm (2cm – 2.5 cm) from the bottom edge of the paper.
Left margin: 30 – 35 mm (3cm – 3.5 cm) from the left edge of the paper.
Right margin: 15 – 20 mm (1.5cm – 2cm) from the right edge of the paper.
II. Set margins in Word 2016.
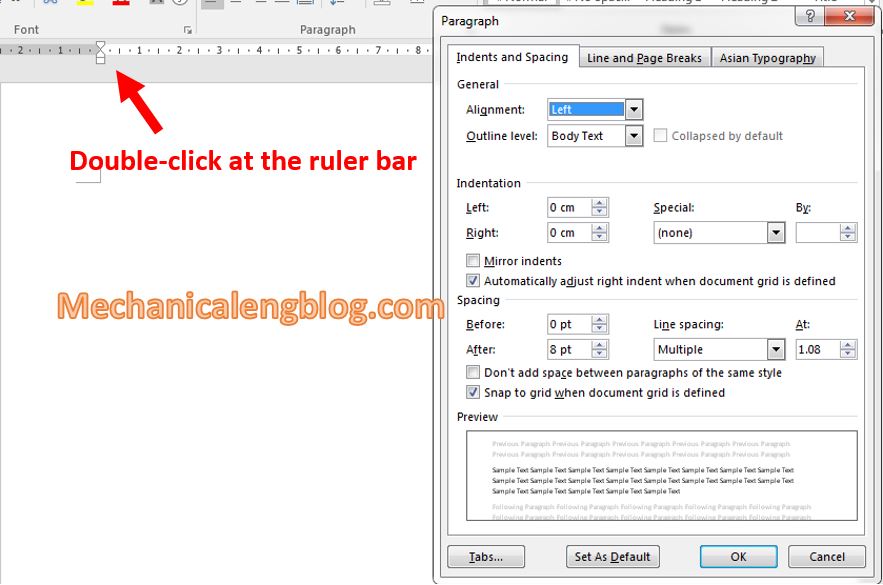
Step 1: Open the Page setup box. The fastest way is to drag the cursor to the left or right ruler then double-click.
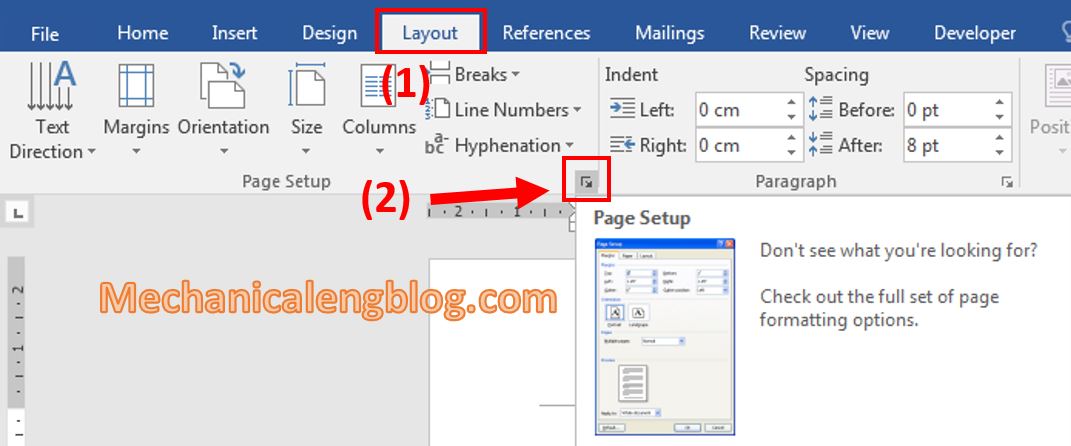
Another way to open it, In Layout, drag the cursor to Page Setup and click the arrow pointing down, the Page setup box will appear.
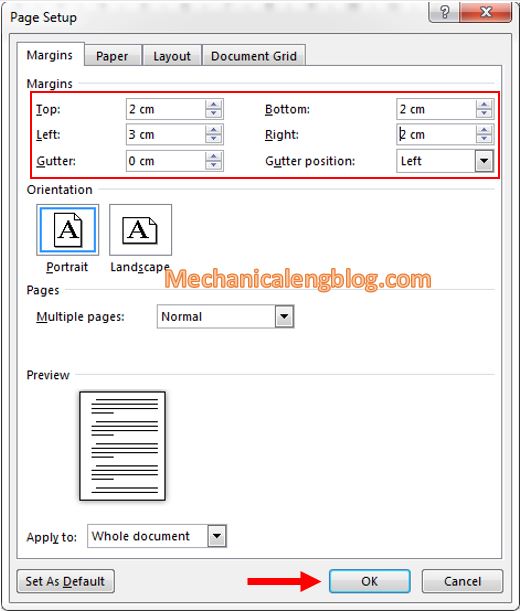
Step 3: The Page Setup dialog box appears, enter the following parameters:
Top: 2 cm.
Bottom: 2 cm.
Left: 3 cm.
Right: 2 cm.
In my opinion, Top, Bottom, and Right are set with 2 cm is fine. About Left, it depends on the content that we enter the space.
You should enter 3 – 3.5 cm if you need more space for the binder when printing. Otherwise, from 2.5 – 3cm is okay. Larger than 3cm is not recommended because it will likely be skewed.
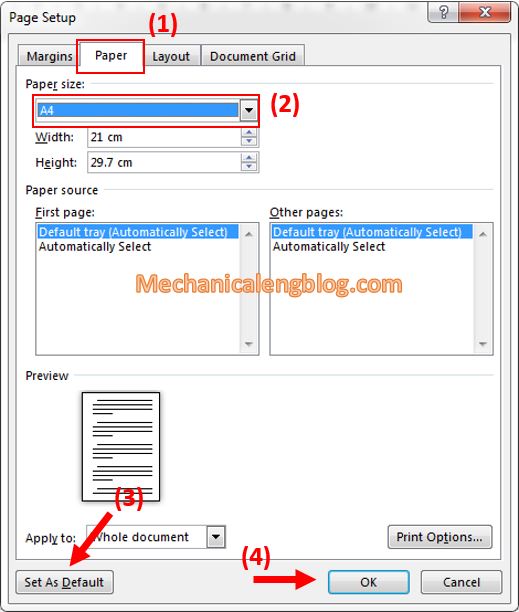
Step 4: Move to Tab Paper to select the paper size you want to print. The most common paper size is A4, so I will choose A4.
If you want to save all the parameters just entered, click Set As defaut and select Yes. Then click OK to save.
III. Margin preview before printing.
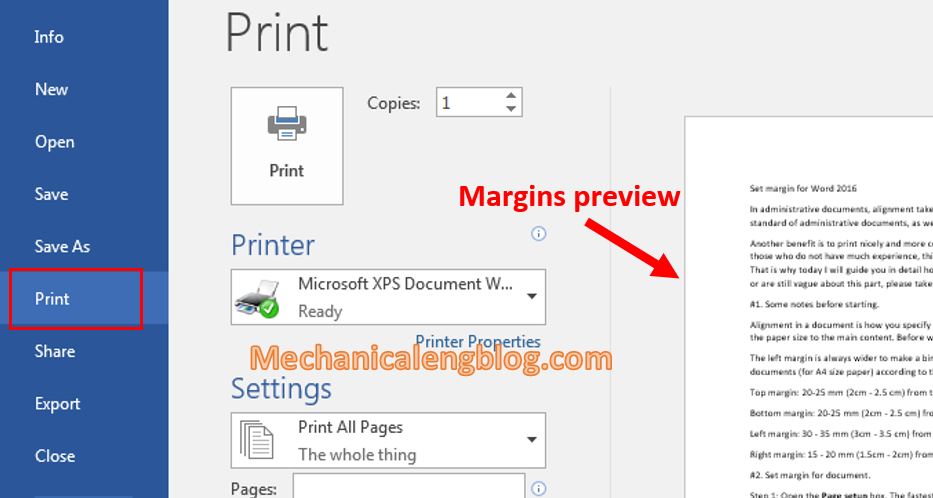
To check if the margin looks fine or not. Go to File and choose Print.
The document will be displayed as a preview so you can check if the margins are okay now. If not you can go back to Page Setup box to align.
CONCLUSION
Above is the detailed instructions that I gave to show you how to set margin in the most standardized way in Word.
These are the first steps of using Word that can help you. Hopefully, with the alignment instructions, you can proceed to work with it and presenting it more effectively. Thank you and see you In other tutorials.
-hhchi

Leave a Reply