The Gantt chart is one of the most popular methods of making a list of tasks to be done in the order of execution of the plan. You will most often come across Gantt diagrams in construction projects, for example. At first, this chart seems easy to draw on paper, but if you do it on a computer, are you confident enough? If yes, then congratulations, if not, follow this article of mine because I will show you how to make Gantt chart in PowerPoint.
I’m giving tutorial on Office 365 versions. Every version later than 2013 can refer to the same method.
How to make Gantt chart in PowerPoint
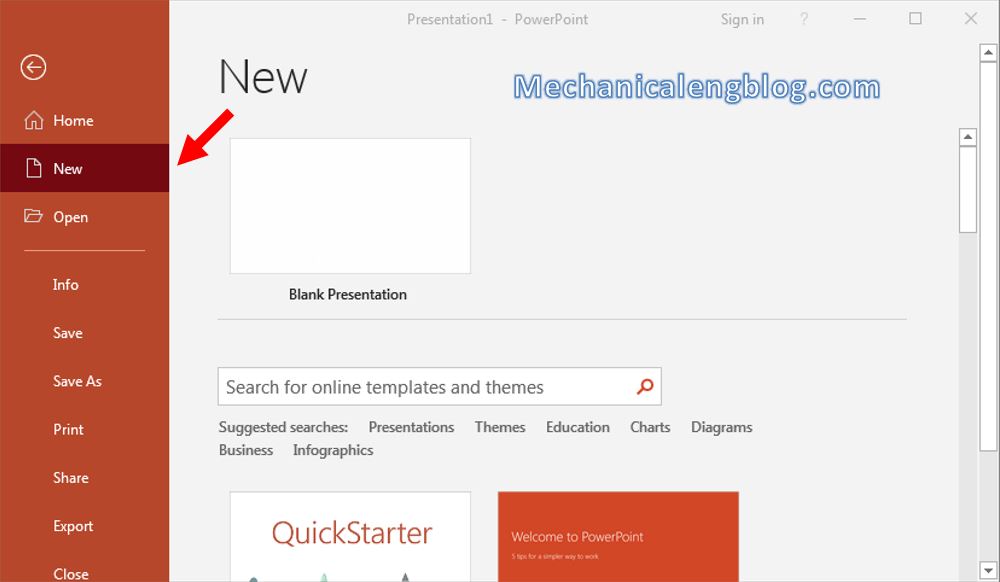
Step 1: First, open PowerPoint and go to File. Select New.
Step 2: In the Search box, type in the word “Gantt”. Wait for a little bit and PowerPoint will give you the templates for Gantt charts below.
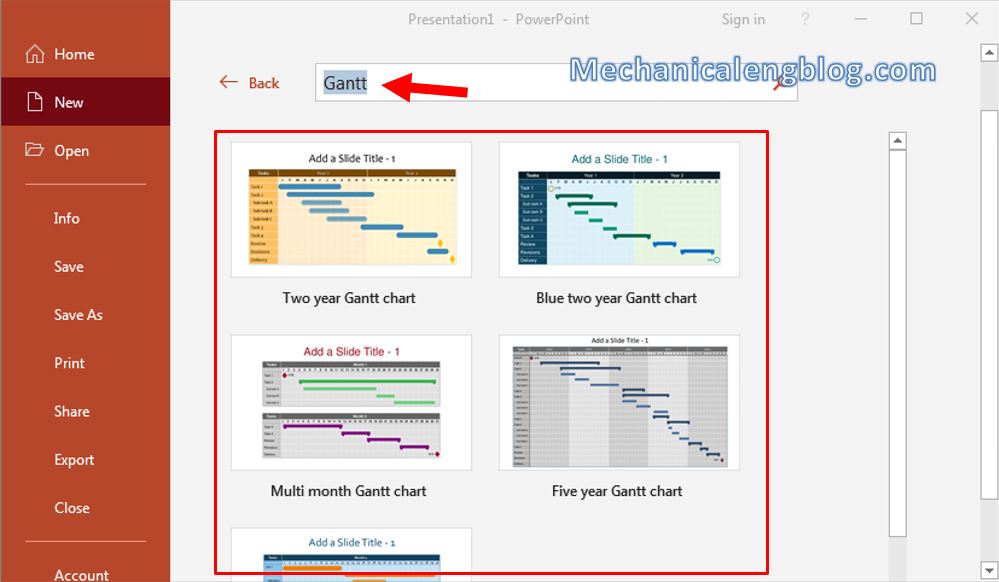
Step 3: Select one template, then click on Create.

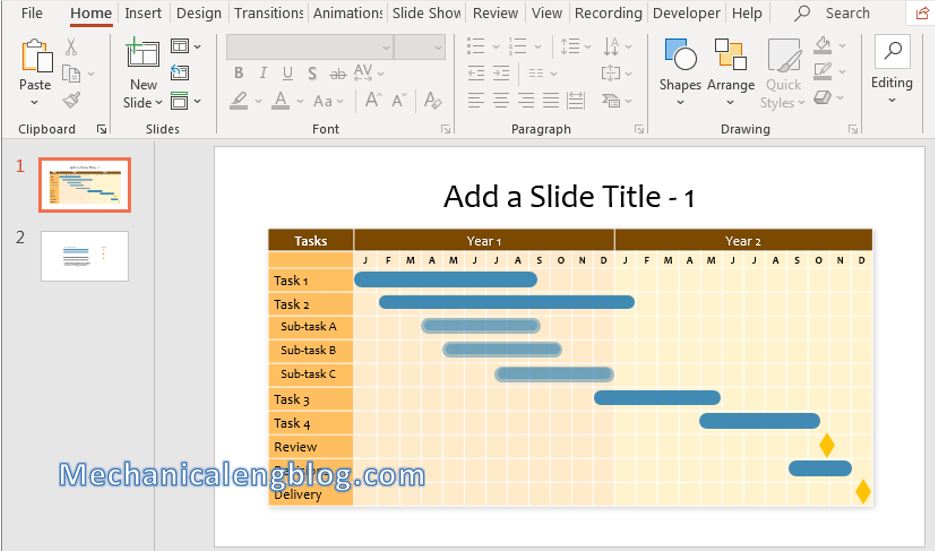
Then you will then be taken back to the PowerPoint screen and the Gantt chart has been automatically inserted into the currently displayed slide.
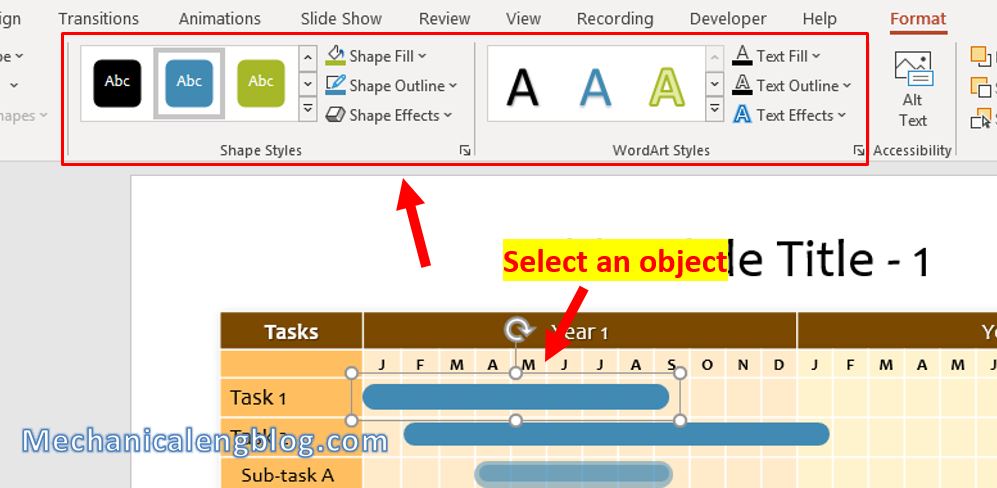
Step 4: To change the color of each object of the chart, click on them, select the Format tab and make changes to the style, color, border, and effects in the Shape Styles section.
Step 5: Select the chart and go to Design tab. Here you can proceed to change the chart style, borders, effects. Also, you can apply WordArt for text in the chart.
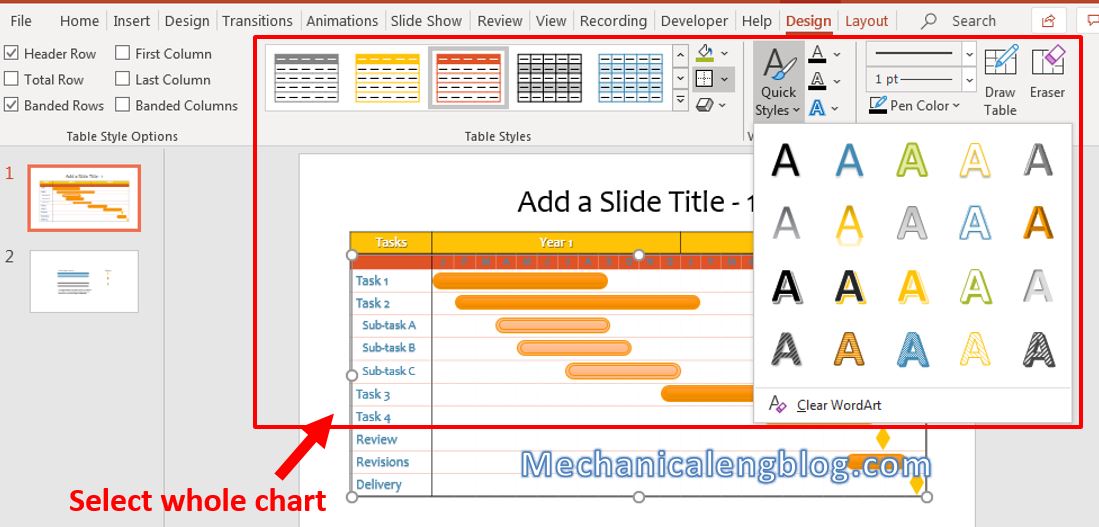
In addition, in the Layout tab, there are options such as adding rows, adding columns, aligning the position of the text, etc.

That’s it. Templates really help a lot, right?
CONCLUSION
Simple as that, this method of creating a Gantt chart doesn’t even take time by taking out paper and drawing one manually. Using the available templates is not only accurate, but also fast, beautiful and professional if you want to create Gantt charts in particular and other models and charts in general. So, know how to apply them to optimize your work efficiency.
See you in other posts, thank you and see you soon.
-hhchi



Leave a Reply