In this tutorial, I will guide t you how to create a timeline with PowerPoint using the SmartArt feature? It will make your presentations become to better.
For PowerPoint presentations with complex and lengthy content, creating timelines will be very useful because they will help viewers follow the order of presenting content more intuitively. Moreover, this is also a way of presentation that can make your slideshow more beautiful and professional. I will guide you to create a form for a basic timeline chart, depending on what the timeline is about, feel free to create your own.
How to create timeline chart in PowerPoint?
Step 1: In PowerPoint surface, go to Insert, then SmartArt.

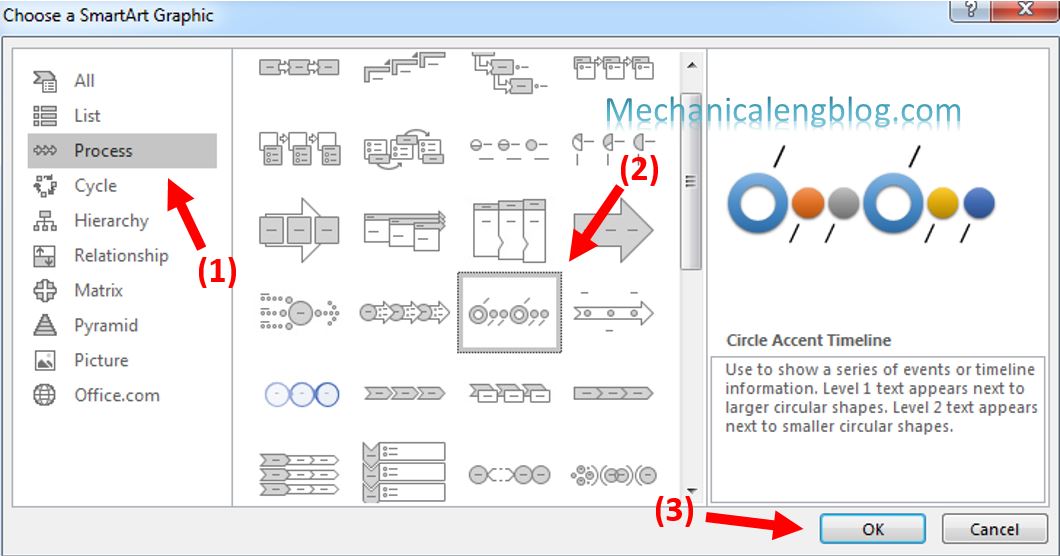
Step 2: In SmartArt window, select Process. A list of chart types will appear next to it, select a suitable one for your own timeline then click OK.

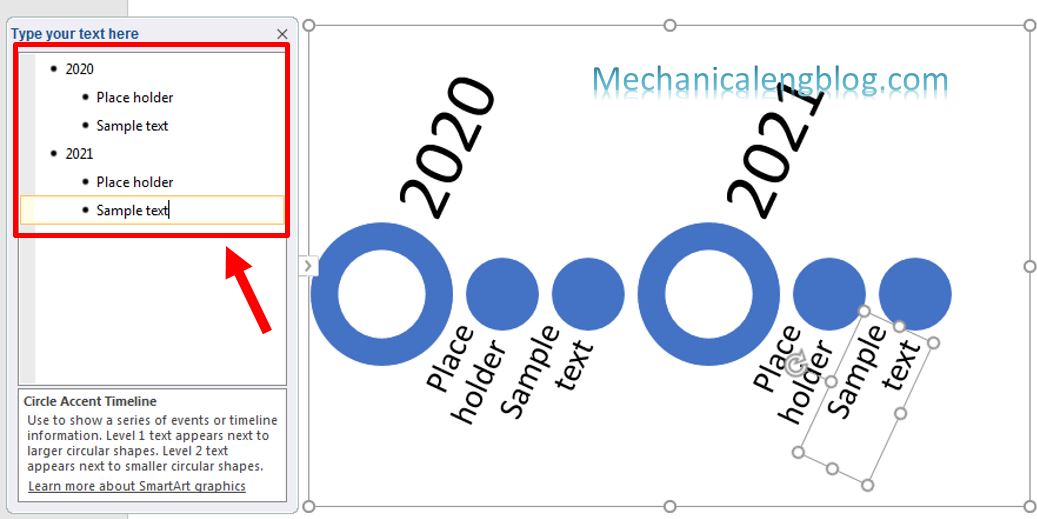
Step 3: The chart will be inserted into the slide immediately and a Type your text here window will open. Now your job is to enter the contents corresponding to the landmarks marked in the chart into the Text boxes.
Here I just enter a few words for example.

After you have done entering the text, close the type window.
In case you need to add more milestones, select the last line in the Type your text here window and press Enter, a new landmark will appear.
To delete a landmark, select it and delete the text until the landmark is removed from the Text pane window.
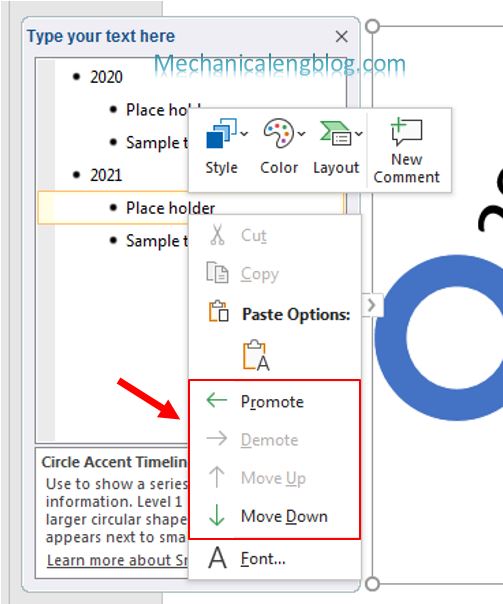
When you right click on a landmark, there will be options like move up and down, promote or demote.

Format timeline chart
After creating the timeline, you should edit it to make it look better.
Step 4: Select the timeline, then go to the Design tab to add, remove and edit landmarks in the Create Graphic section. The Layouts section is to switch to other similar chart types. In addition, you can change the color, change the style of the chart or reset the SmartArt to the original format.

Step 5: On the Format tab, you can format, edit styles and effects for shapes included in the diagram or for text. You can learn more by yourself, it’s very simple.

Also, if you want to edit the position of the landmarks, just click on the shape and drag it to where you want.

CONCLUSION
And that’s how you can create a timeline with PowerPoint using the SmartArt feature. As you can see this feature has a great benefit that it provides you with a lot of templates available, all you need to do is select, fill in text and format it to your liking. Try using these features combine with your imagination to create the most amazing charts.
Thank you for reading, hope to see you in another post.
-hhchi


Leave a Reply