In this tutorial, I will guide to you how to create mind map in powerpoint? We can create it by Imindmap software or directly by smart art.
We already know how to insert charts into PowerPoint, but have you heard of mind maps? You’ve probably seen them a lot in real life, they’re usually those diagrams with lots of zigzag and complicated lines and branches. So, can the technology make it easier for us to create those difficult diagrams?
The answer is, absolutely yes. Not only create, but also create in the most efficient way. Today I will introduce to you two things, one is the software that specializes in creating mind maps: iMindmap, the other is a way to insert the newly created mind map into PowerPoint. Let’s start.
I. Create a mind map with iMindmap.
To insert a mind map, of course you must first have a mind map. The application I’m about to show you now is a professional tool in creating mind maps. You can find the download links online. Let’s learn how to use iMindmap.
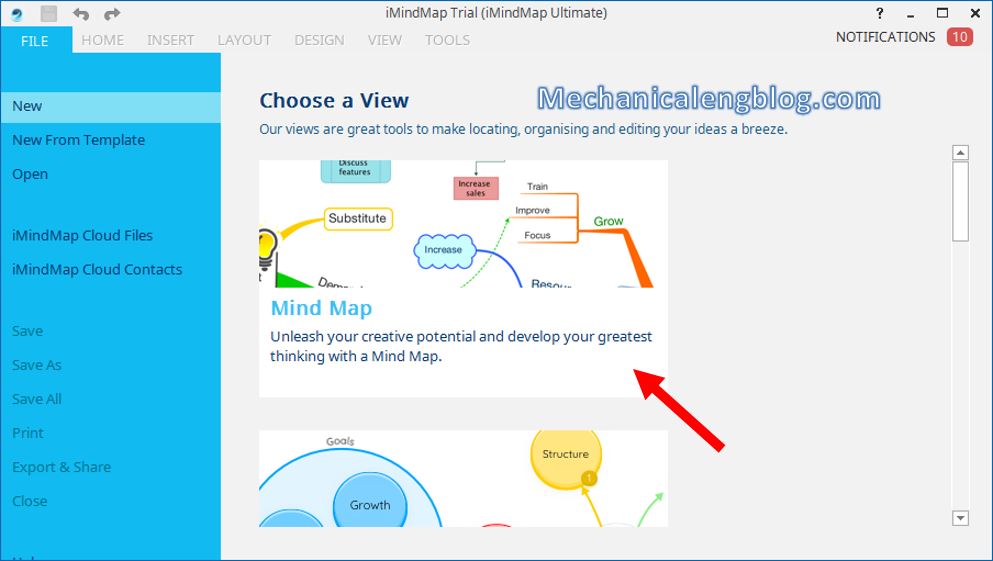
Step 1: When the installation is done, start iMindmap and you will see the main interface like this below.
Select Mind map, we’re going to create one right now.
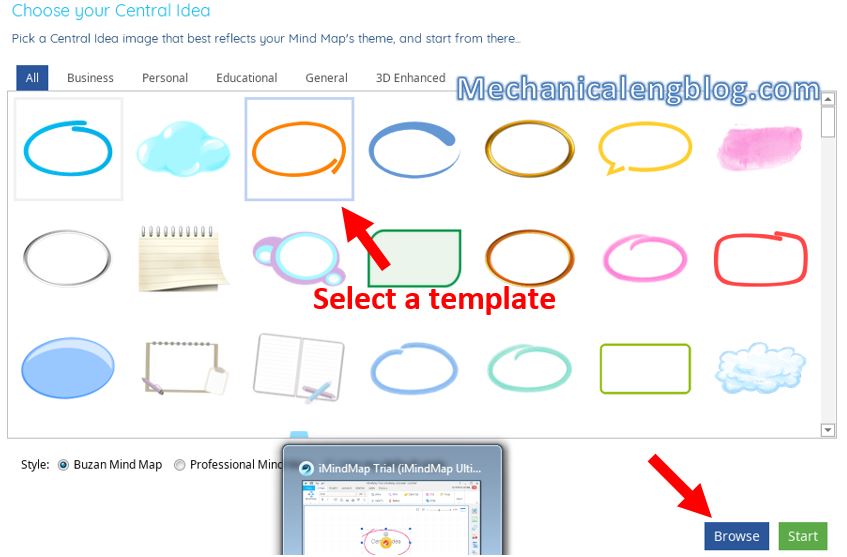
Step 2: Now you choose a template of mind map to create, then click Start. You can Browse it from your computer, but I recommend choosing from the available templates.
Step 3: You will be given a form. The options you can made are:
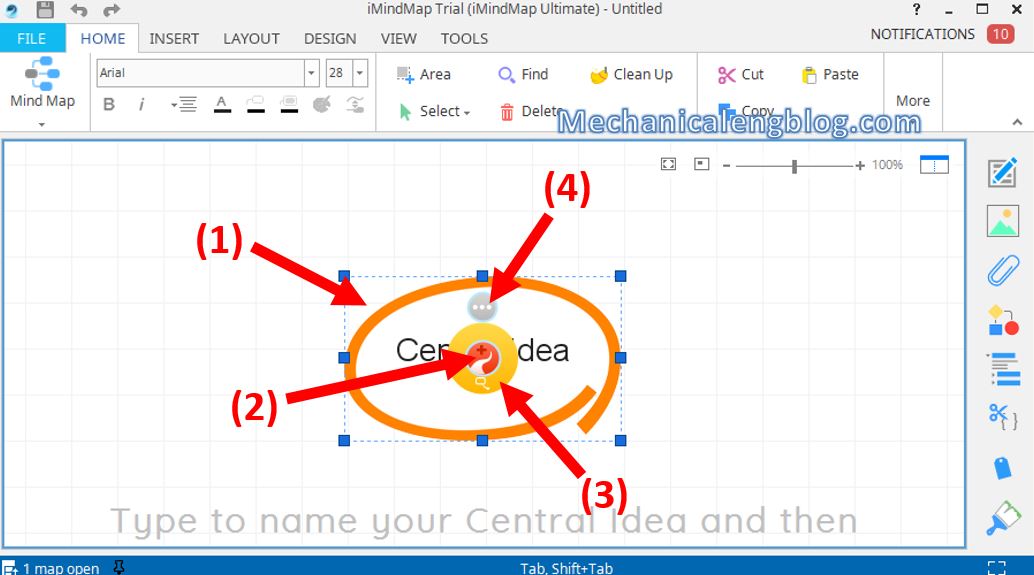
Click at (1) to enter the main content in the biggest circle of the mind map, or to move the main idea circle.
(2) to create branches or lines.
(3) to create the box which the branches connect to.
(4) is where you can optionally decorate the mind map, branches and boxes.
NOTE: For line break, press Shift + Enter.
Step 4: This is the complete mind map I have just created using all the basic options and decorations from (4). You can create a simple one for yourself too.

II. Insert Mind map into PowerPoint.
Step 1: In the interface of iMindmap and the mind map you have just created, go to File, then Export & Share.
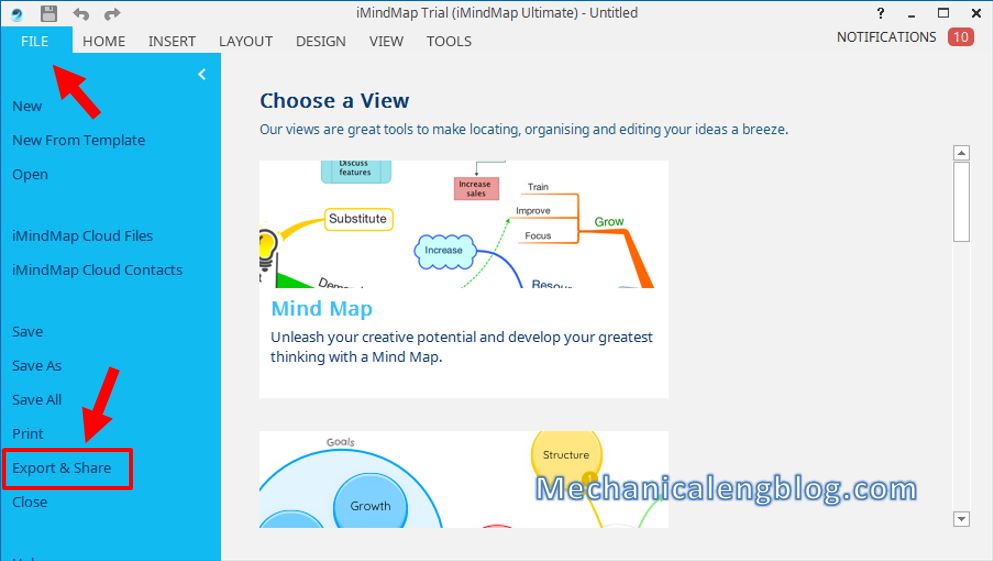
Then select Presentation. You can also refer to other functions such as Share, Image, Document, Audio… so you can use it someday.

Step 2: Switch to tab Single Animated Slide. Then in Export Type select PowerPoint Presentation. You can reorganize the ordering in Branch Odering. Select Automatic means which branch comes first appears first.
When complete, click OK and Export.

Step 3: Name the file, choose the location to save. Mind map file will be saved as .ppt or .pptx format. Finally click Export.

Step 4: Okay finally to the main point, after all the works we have done, to insert the mind map to PowerPoint, open the mind map file just saved and copy the slide with the mind map.
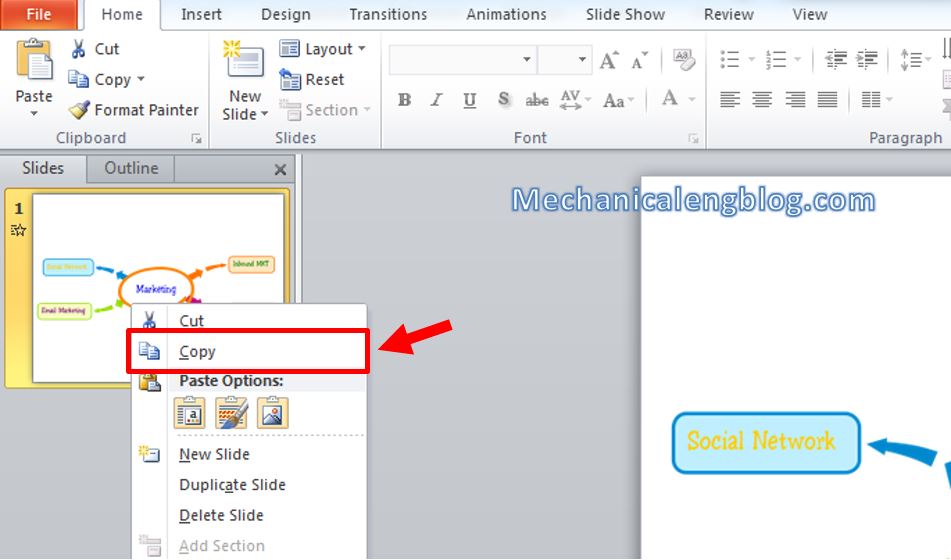
Step 5: Click on where you want to insert the mind map slide at in the second PowerPoint file. Then Paste (Ctrl + V).
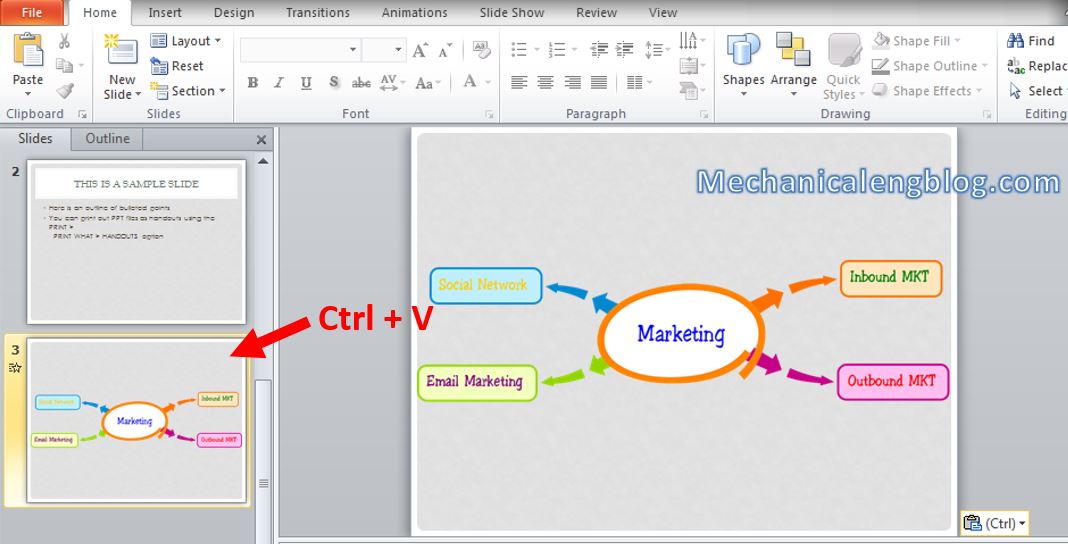
Easy as a piece of cake!
III. Use SmartArt to create mind map in powerpoint.
PowerPoint also has this SmartArt feature that helps you with creating mind maps. Although it is not as effective as specialized software for mind maps, but if you don’t need something complicated, you can give it a try.
Step 1: Go to Insert and select SmartArt.

Step 2: Select the SmartArt type, style. If you remember, this is similar with creating a chart.

Step 3: Fill in the contents of the cells and make edits in the Design and Format tabs. You will have a simple mind map like this.
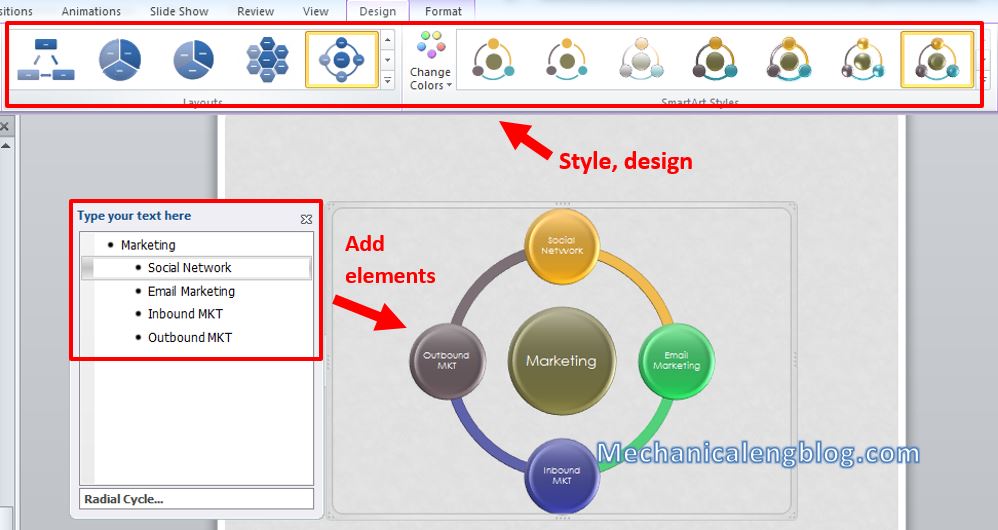
However, if there are too many branches, you will have to resort to another tool.
CONCLUSION
The two ways to create a mind map that I have just introduced to you, are the two simplest, most used ways. Depending on the purpose, you can choose the way you like. The reason I recommend a specialized software to create mind maps like iMindmap is because SmartArt cannot create complex mind maps with dozens of branches.
So when you have something to be done that is mind map related, you don’t have to be confused or take so much time anymore, because I believe after this article, you have somewhat mastered how to create and manage mind maps already.
See you in other posts!
-hhchi


Leave a Reply