Form is a form in text. You can create a form in Word so that people can fill in information according to your requirements. The best use cases for forms are registration form, registration form, survey, opinion form, basic personal information collection form, … In general, things that need someone else fill in can be used.
In addition, the options in the Form you can insert are Content Controls such as: Rich Text, Plain Text, Picture, Building Block Gallery, Check Box, Combo Box, Repeating Section, Drop-Down List, Date Picker.
So how to use Form as well as what is Content Controls? The answer is right below for you!
How to create a form in Word?
I. Enable Developer in Word.
Step 1: Open Word and go to File, choose Options.
Step 2: In the Word Options box, select Customize Ribbon, check at Developer then select OK.

II. Insert, set properties and add a description for Content Control.
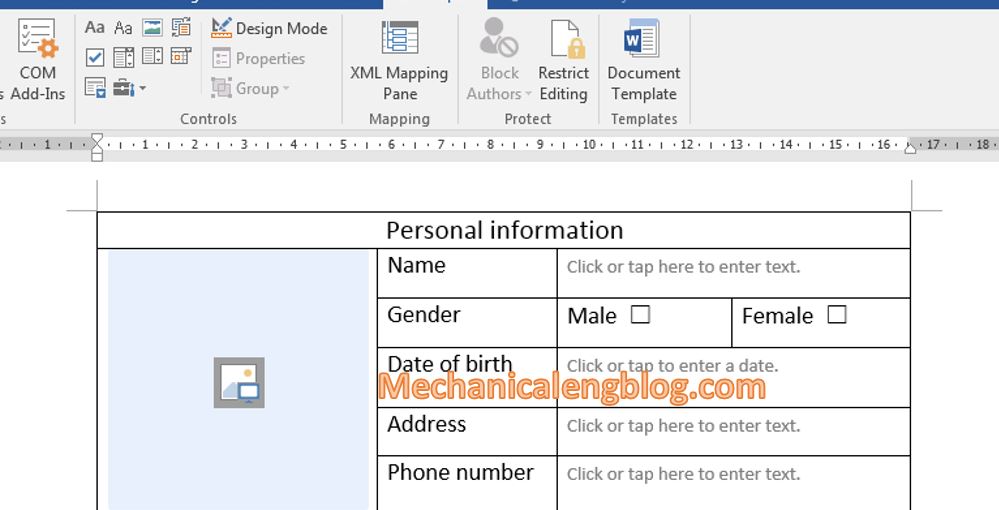
Step 1: Start Microsoft Word and open a blank document, then create and format as required. The form below is an example.

Step 2: Start inserting Content Controls.
Click at the place to insert, select Developer. In the Control group, you can choose one of the provided content controls.

Here are the names and uses of the content controls, depending on the form we will choose the suitable content, such as:
Rich Text: Inserts a text box
Plain Text: Inserts plain text boxes
Picture: Insert the image control
Building Block Gallery: Inserts a library of built-in blocks such as AutoText, Equations, Quick Parts, Tables
Check Box: Inserts checkboxes
Combo Box: Inserts a list box
Repeating Section
Drop-Down List: Inserts drop down list box
Date Picker: Inserts the date …
Step 3: Set properties for Content Controls
3.1: Choose the content control to set properties.
3.2: Click Properties in the Controls group of the Developer tab.
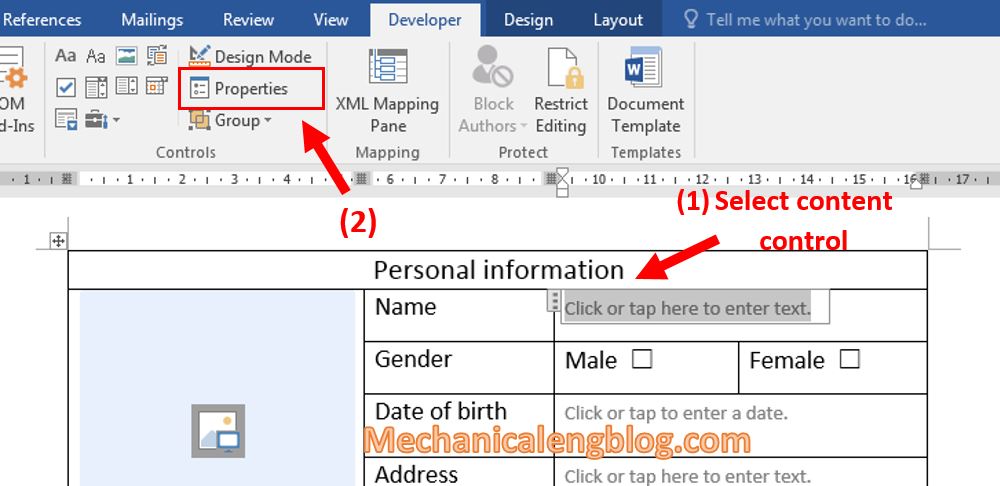
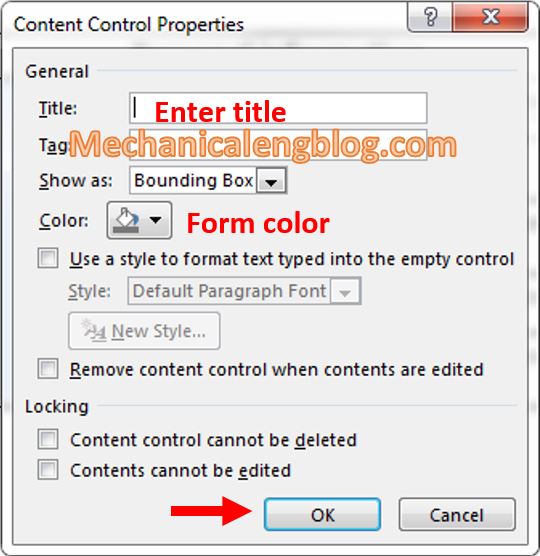
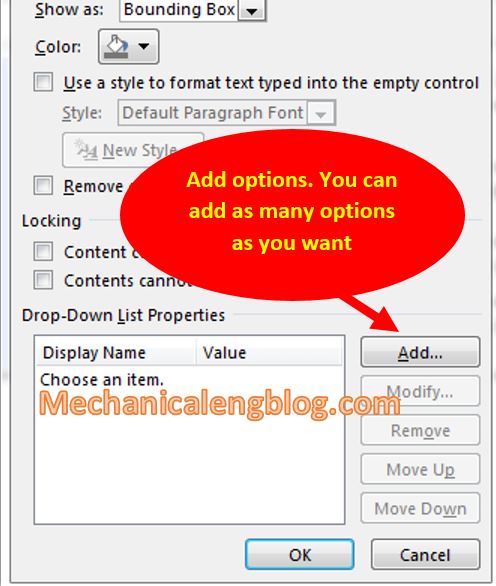
Each content control will have different properties, so the settings will be different. Therefore I will divide them into 5 groups.
a. Rich Text, Plain Text and Picture.
b. Building Block Gallery

c. Check box
Click Change… to change the check mark or unchecked mark. When clicking the Changed button of Checked Symbol, the Symbol dialog box will appear, just select the appropriate symbol and choose OK.

d. Combo box, Drop-down list.
e. Date Picker
In Locale choose your nationality to display and format according to it. For example I choose Vietnamese, the date will be displayed as Date / Month / Year.

Step 4: Add a description for Content Control
Adding description helps users know and declare exactly for each control object in the form.
4.1. Select Design Mode in the Controls group on the Developer tab.

4.2. Select the content and add caption one by one.
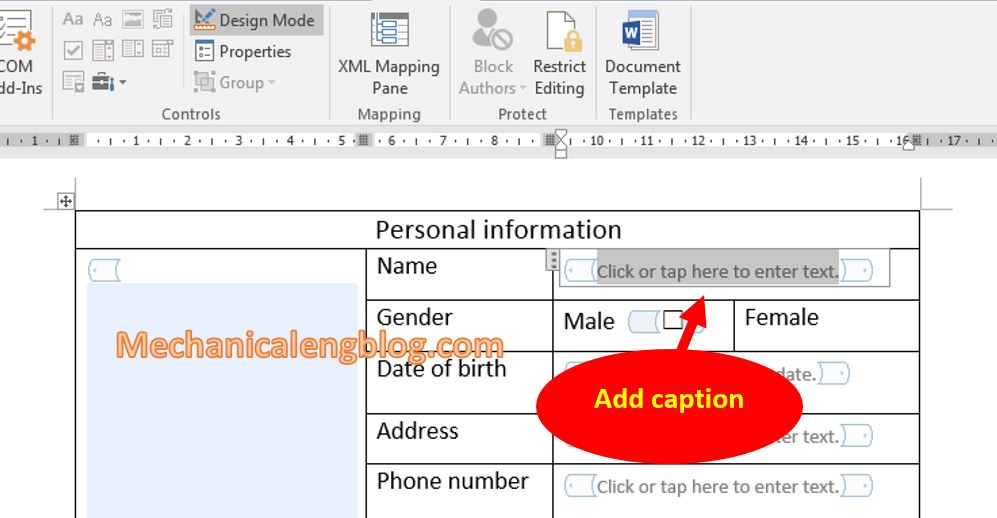
4.3. Repeat Step 4.1
Step 5: Save this form as a template.
Select File, then Save. The Save As box appears, you proceed to save as usual, but remember to choose Save as type as Word Template.

The form has been completed to use. The easiest way is to send it to people who need to get information from. When received, just open the * .dotx file, and it will be automatically generated. Proceeding to fill out the required form is considered done …
CONCLUSION
So I have finished showing you how to create a Form in Word, with many different types of Form and the use of Content Controls to helps design your form, in details. Hope you will find it useful to apply it to your work.
Also you can use Content Controls in many types of document such as surveys, multi-choices quiz,…So I can say this is a versatile tool and quite essential in designing all kinds of documents.
See you again in the next posts, thank you and goodbye!
-hhchi



Leave a Reply