In this tutorial, I will guide to you how to insert 3d model in word. The insertion and editing operations are the same as when you edit photos, very easy and can be memorized after a few times.
One of the special and unique features from the Office 2016 version onwards is that it allows us to insert clips, 3D models into Word, Powerpoint and make our presentations more vivid, vibrant and more interesting.
Which means in today’s article, I will show you how to insert 3D models into Word 2016. Please follow along.
How to insert 3d model in Word?
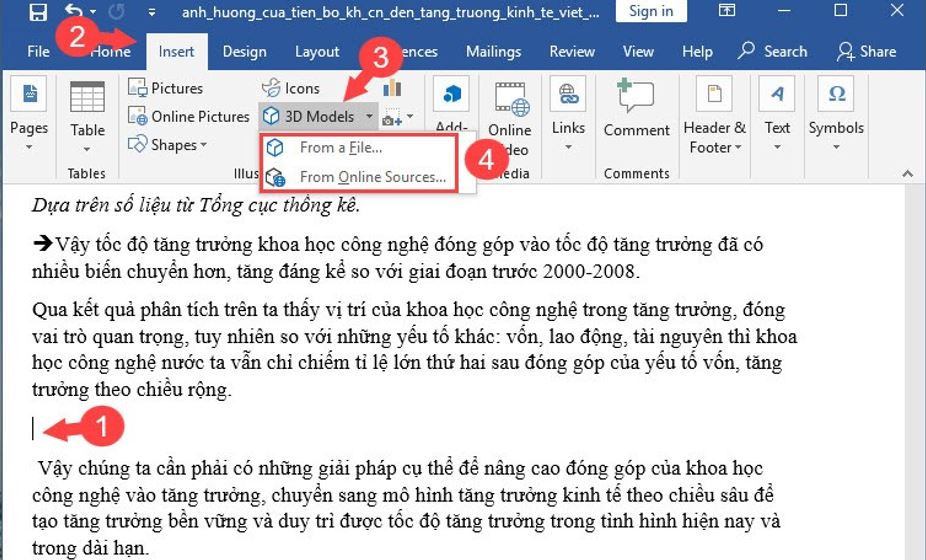
Step 1: Place the cursor at the place where you want to insert the model.
Go to Insert, choose 3D model. Then select From A File to insert model if you already have it in your computer. Choose From Online Sources to browse for the model online.
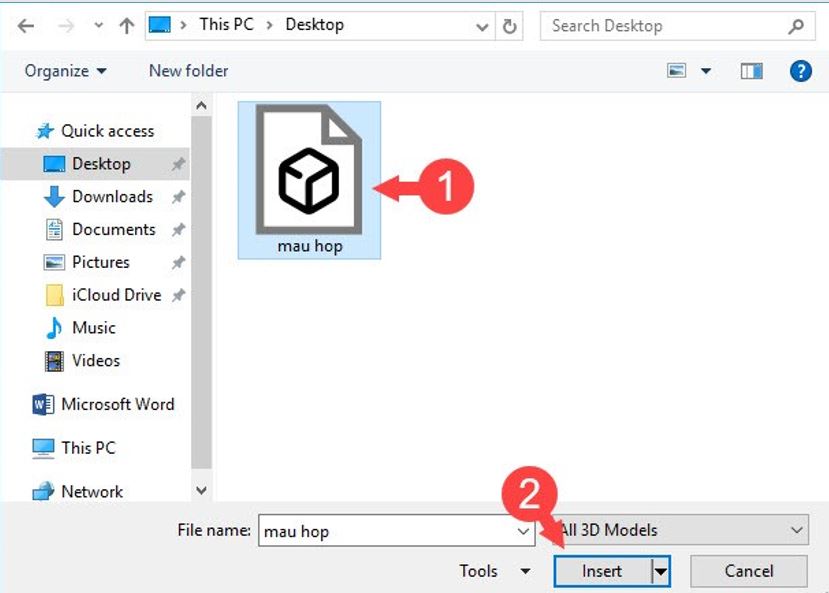
Step 2: If you choose From a File… select the 3D file to open and click Insert. The 3D file formats supported in Word are fbx, obj, 3mf, ply, stl, glb.
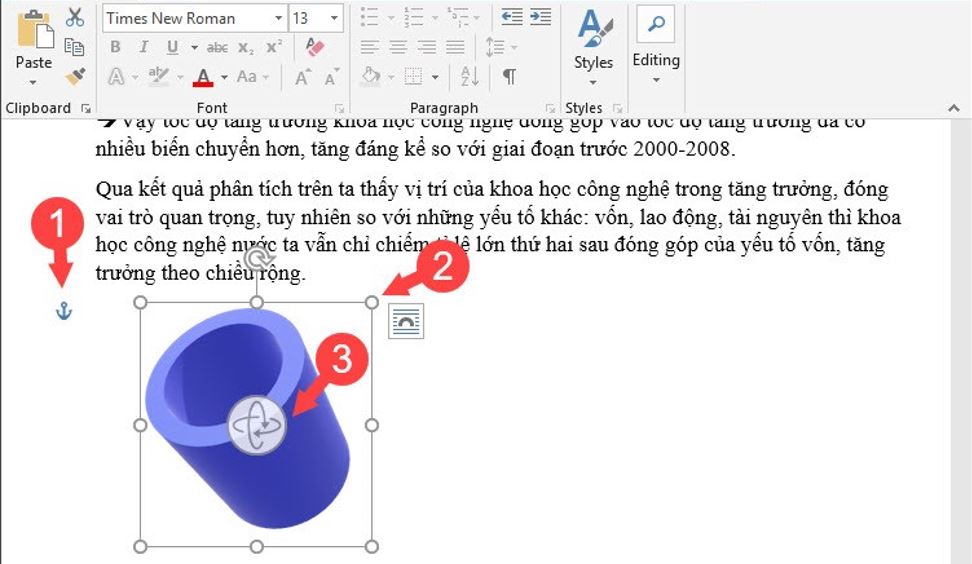
Step 3: After inserting the 3D model, we can click on the anchor icon (1) to move.
To zoom in and out, click on the 6 corners (2) of the image and drag in or out.
To rotate the 3D model, we click on the rotate icon (3) in the middle of the 3D model.
In addition to adjusting the model yourself, you can choose from the default settings shown in Format tab to reformat the 3D model.

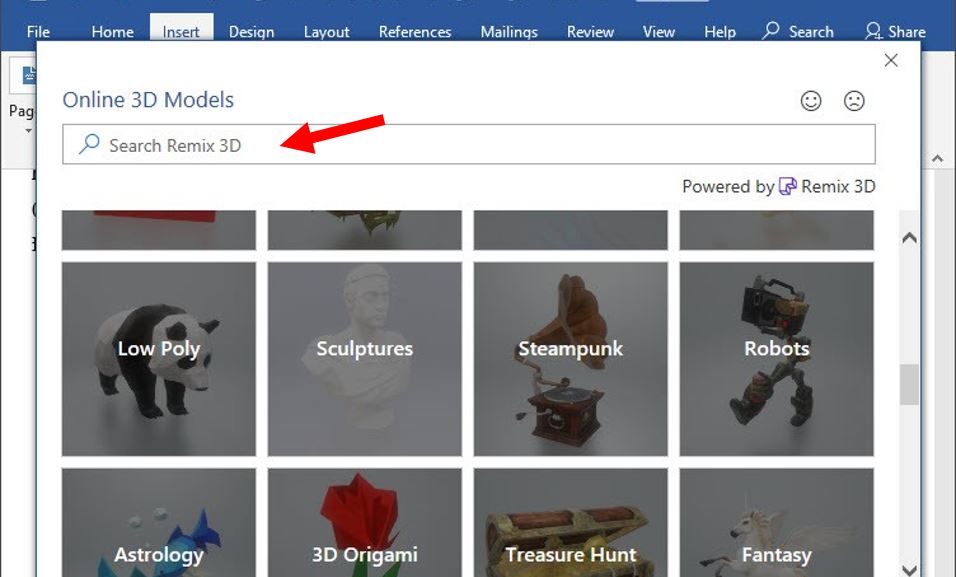
If you don’t have 3D models available in your device, you search for it online in From Online Sources… There are hundreds of 3D models with different topics.
CONCLUSION
Above is how to insert a 3D model into Word. The insertion and editing operations are the same as when you edit photos, very easy and can be memorized after a few times. In addition, if you use both Powerpoint, you can insert 3D models into Powerpoint using the steps above.
Next time will continue to be other useful knowledge. Thank you and good luck.
-hhchi



Leave a Reply