In in tutorial, I will guide to you remove the background of a picture in word, also you can crop seize it. It is easy and simple
If you want to rotate image, you can read it at: 4 ways to rotate image in Word
Since Office version 2013 and onward, Microsoft has integrated the feature to crop pictures and split the background directly on familiar applications such as Word, Excel, or a presentation application like PowerPoint you still see everyday.
That’s why you can now easily separate the backgrounds of your photo into a transparent form, and keep only the object that you need to keep in the image. And the cool thing here is that you completely do it in Word, not Photoshop or any other applications are needed at all. Let’s see how.
I. How to remove the background of a picture in word?
1: First, open Word application that has the image needs to remove background or you can insert a new image into it.
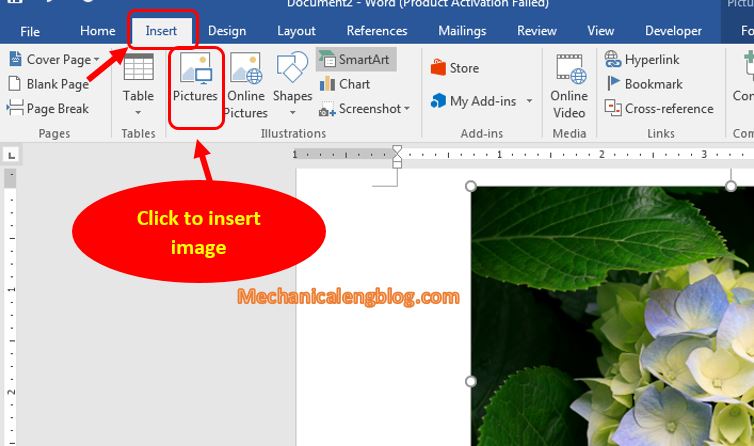
2: Next, select the image if you haven’t to enable tab Format, click on it then select Remove Background.
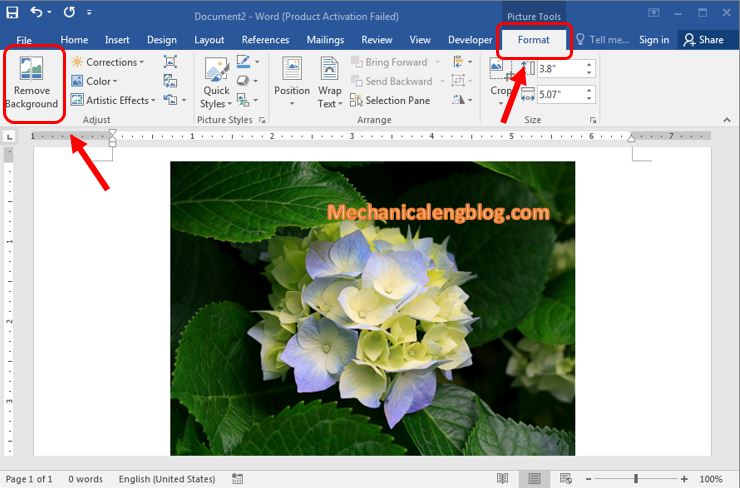
3: Word will automatically calculate the area to be removed of the background. Use your cursor to customize the area of the image you want to get back if necessary.
There are some tools for you to use like: Mark Area to Keep, Mark Area to Remove, Delete Mark, Keep Changes. Feel free to customize.
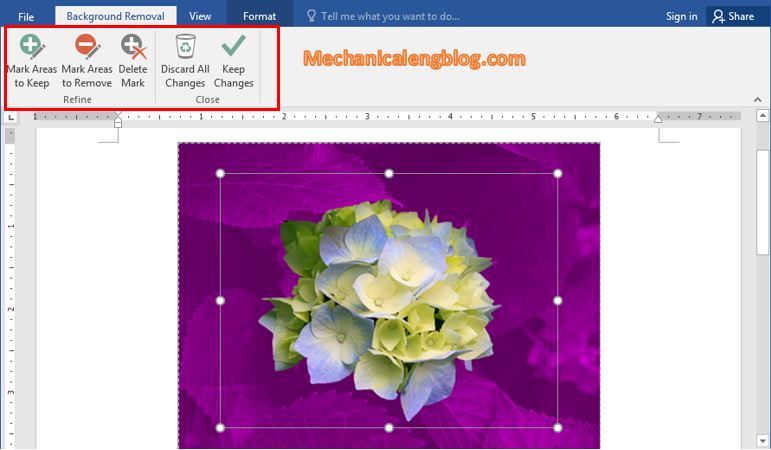
Once you have done all the changes, to save the progress and to the result, click on Keep Changes. The background will be perfectly removed.
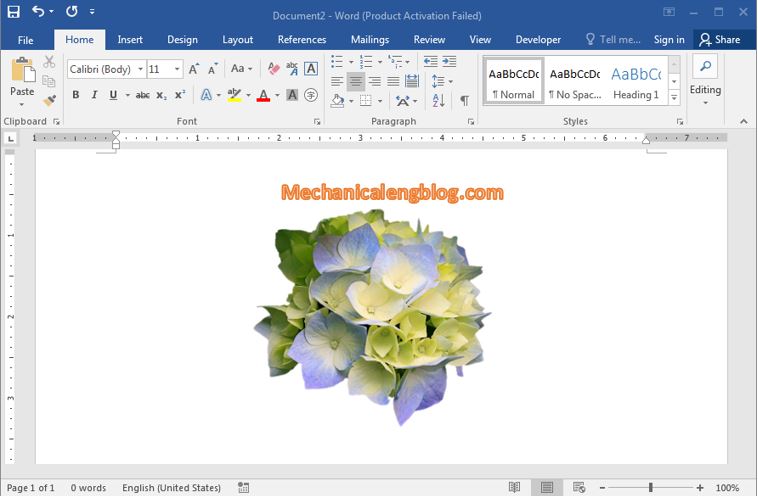
II. To crop and resize image in Word.
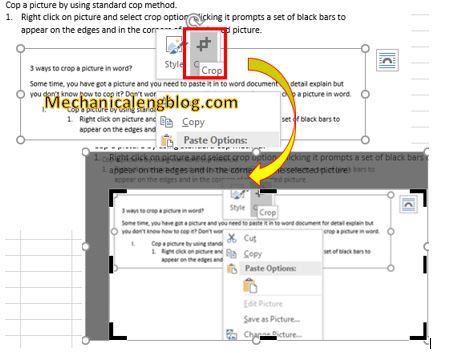
1: After successfully separating the background, right-click on the image and choose Crop as shown.

2: Here use your cursor to hold the corners of the image, drag and drop to crop.

3: After cropping is mace, then right-click and select Size and Position…
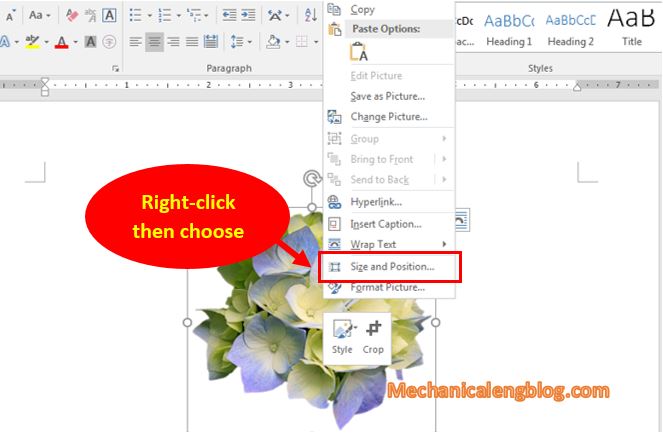
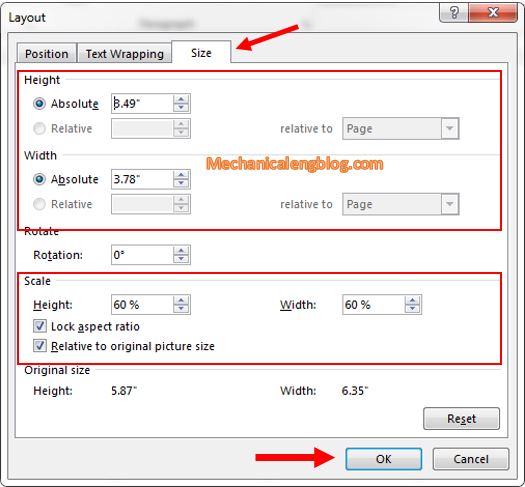
4: In the Layout dialog box, choose Size.
And change the Width, and Height. You can also change the Size percentage of these two components in Scale. Click OK to apply.
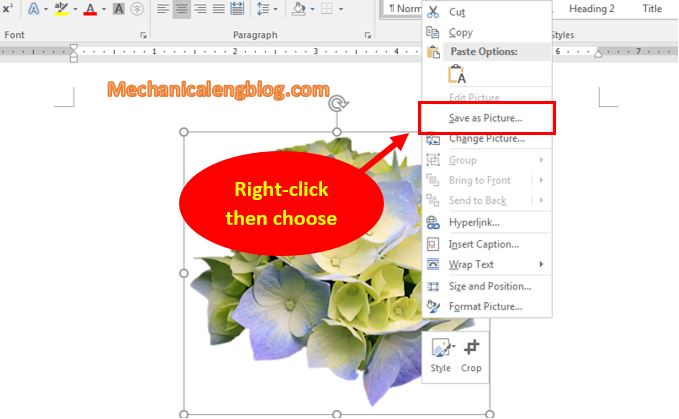
After that right-click on the image, choose Save As Picture… to save to your computer.
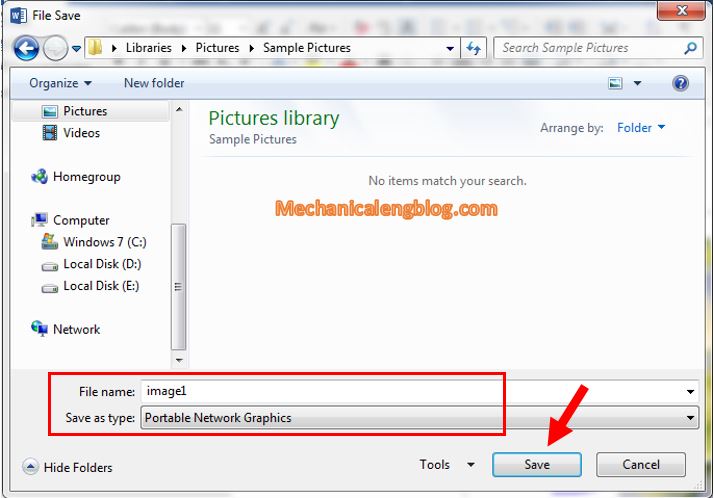
Step 5: In the File Save dialog box, name the image file, before saving choose the save format as Portable Network Graphics to save the file as PNG.
(It is okay to choose JPEG File Interchange Format.)
CONCLUSION
Okay that’s it. Very simple and easy to separate the background, and Resize photos by directly in Word, right? I still often see some of you having problems with background separation. In fact, websites that support online background separation, not all of them work effectively.
With these extremely useful features, you will not waste time processing images with external tools before inserting them into Word. Instead, you can insert images directly into Word file, then use the tools available to process images according to your needs.
Hope this tip can help you well. Good luck !
Author-hhchi


Leave a Reply