In this tutorial, I will guide to you 2 ways to create a calendar in word by Word manually and templates. I think anyone can do by themselves.
Maybe I don’t need to introduce too much about Microsoft Word anymore. Any computer user knows Word is one of the top word editing tools, and I’m sure there are loads of interesting Word features that many of you don’t know yet. But have you ever thought you could use Word to create a calendar?
And so that, in this article, I will share with you some ways to create a calendar directly in Word. There will be manual way and quicker way. I will give a detail tutorial so follow the steps and you can manage to do it very soon. Now let’s start.
I. Create a calendar in Word manually.
Of course manual means you will take more time and effort, but if you want to carefully create your calendar, you can use this method.
Step 1: Create a table first. Go to Insert and choose Table.
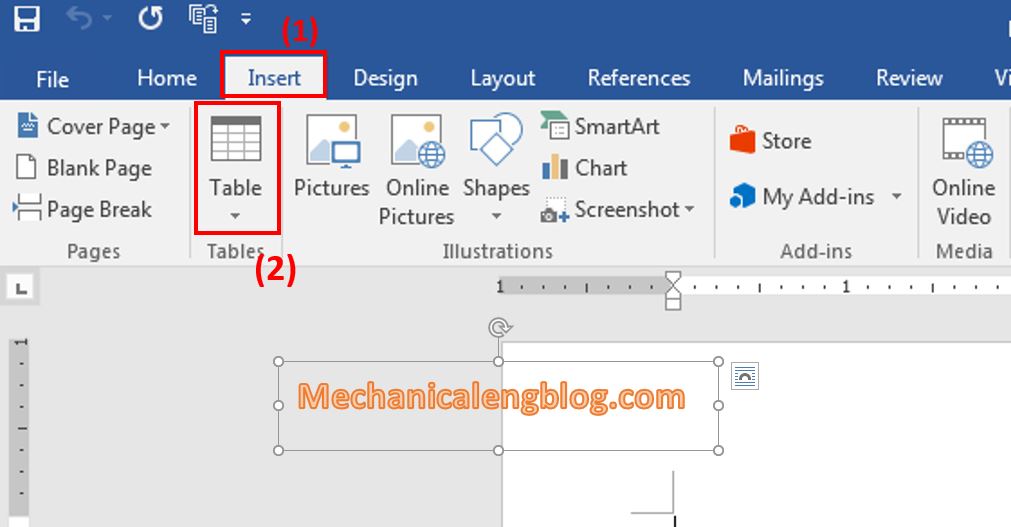
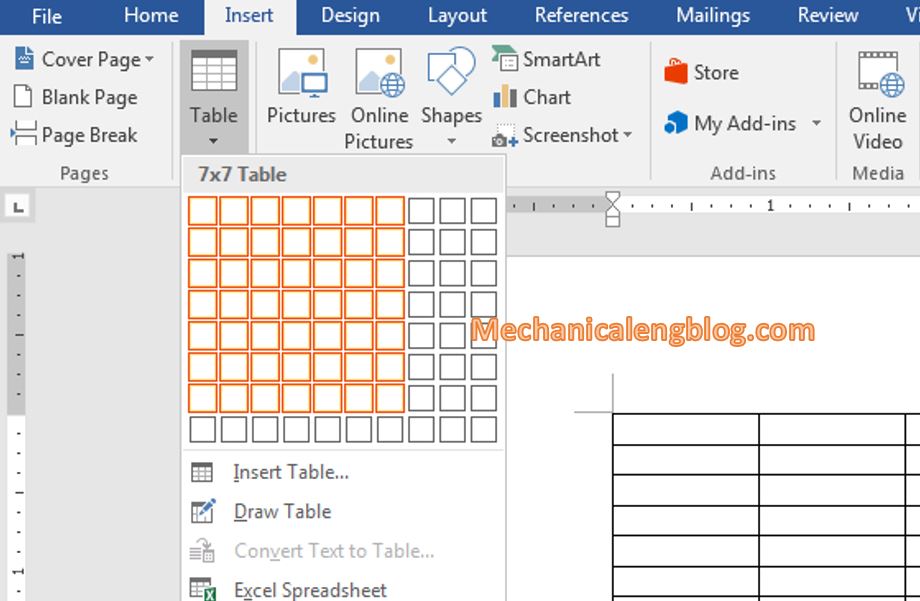
Click the drop-down arrow, then a menu will appear. Here you move the cursor to select the number of rows and columns in the table. For calendars, choose a size of 7 × 7 (7 rows and 7 columns).
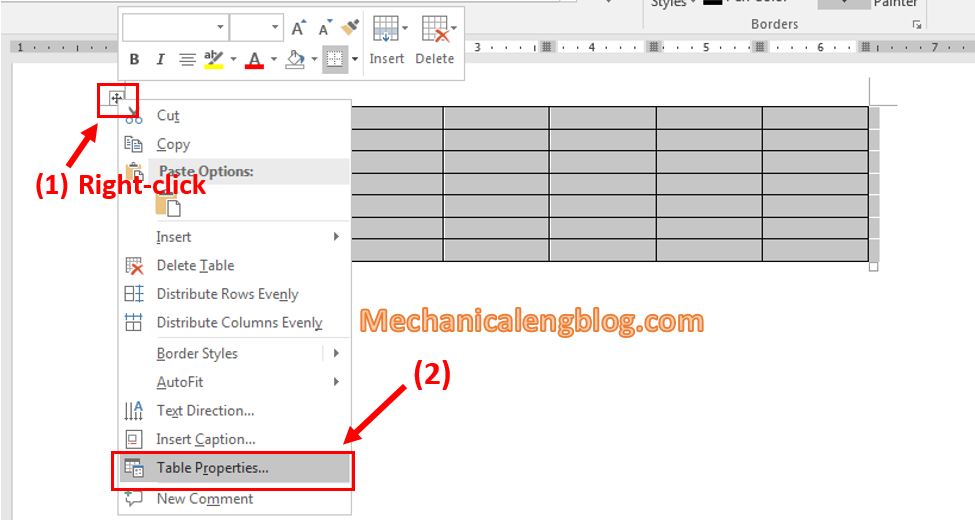
Step 2: Adjust the height of the cells in the table, by right-clicking at the icon in the top left corner. Then, choose Table Properties.
Step 3: The Table Properties window will appear, click on Row and choose Specify Height, enter the height you want. I suggest choosing about 2.5 cm, but you can adjust to suit your needs.
Note: Set the unit to cm instead of inches first.
Finally click OK when done.

Step 4: Next, we will make adjustments to the top two rows. First select them then right-click and choose Table Properties.
Adjust the height of the table the same as above, but change it to 1.5cm.

Step 5: Next, we will enter the Month for the table. Select the first row, then right-click and select Merge Cells.
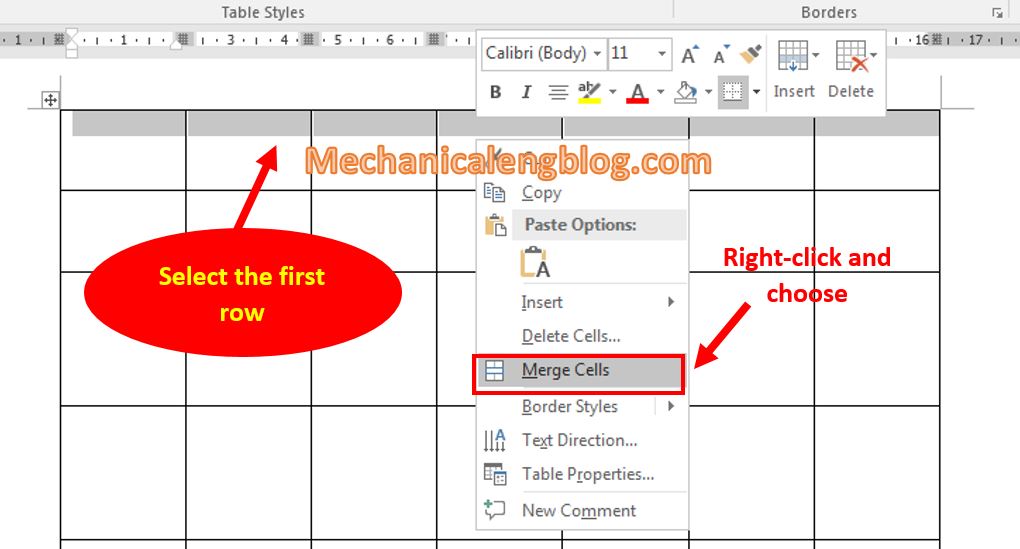
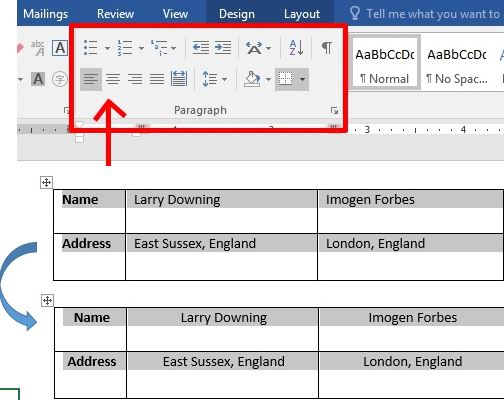
Now enter the Month and Year in the first row. In the second row is the Days of a week. Don’t forget to do some alignments for the table to looks nice.
Finally we enter the dates from the beginning of the month to the end, into the remaining cells, as in the image shown below.

II. Create a calendar using available templates.
Step 1: Open Word, click on File then select New. You can now see the search bar, enter Calendar.

Step 2: Choose the calendar template you like.
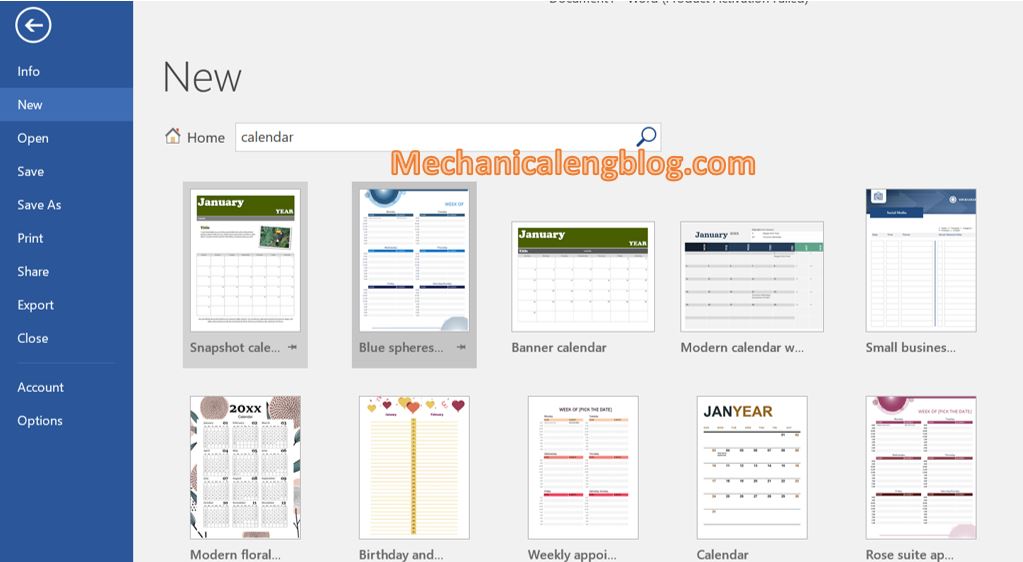
Click on the template you want to use then choose Create right next to it.
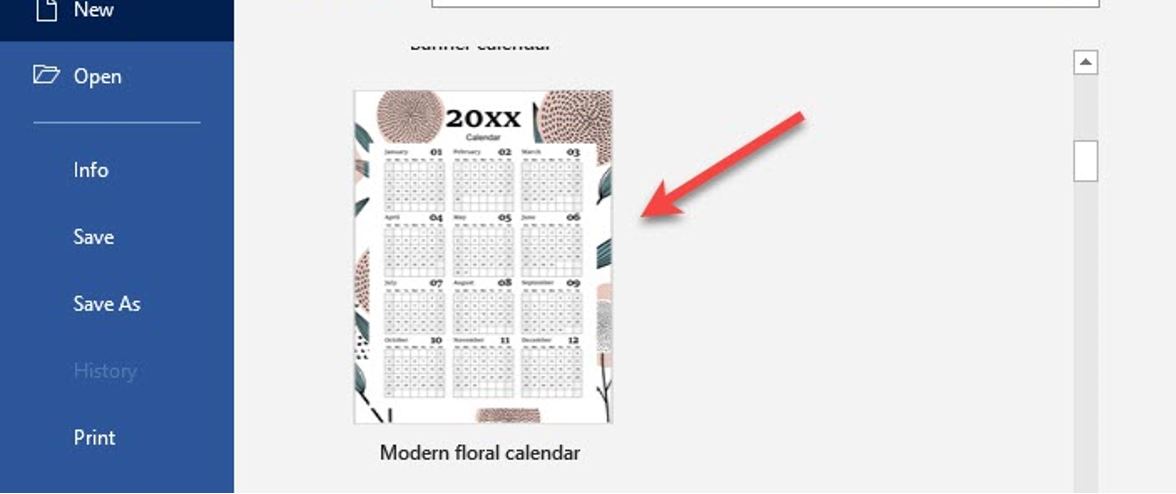
Step 4: When finished creating, you can customize the font, font size, font color or change the background image for the calendar … depending on your preference.
CONCLUSION
Well, above are two extremely simple ways to create a calendar in Word that I think anyone can do by themselves. In addition, Microsoft Word also helps you design much more, from blueprints to brochures with Microsoft’s design toolset. If you need a simple design and don’t have the time to invest in learning complex design software like Photoshop, you can do it in Word.
Hopefully this little knowledge will be useful for you. Thank you and wish you the best wishes.
-hhchi
ndar in word

Leave a Reply